Category: Beauty

  • Customizing Your Beard Balm
  • How to Make Beard Balm: The Process + Beginner Recipe
  • 3 Nourishing DIY Beard Balm Recipes
  • Application and Usage
  • Storing Beard Balm
  • Advanced Tips and Variations
  • Frequently Asked Questions
  • This hands-on skincare approach ensures your facial hair receives the best possible nourishment and conditioning without relying on commercial products that may contain unwanted chemicals.

    Beard balm serves as a versatile ally in the grooming arsenal of any bearded man. It not only moisturizes and conditions but also provides a light hold that aids in styling. Crafting it at home allows you to choose your favorite scents and the level of hold you prefer, all while making sure that the health of your beard is placed front and center.

    The process of making beard balm involves a blend of butters and oils that have been carefully selected for their beneficial properties for beard hair. Essential elements like beeswax usually form the base for the balm, giving it the necessary consistency to tame and shape your beard.

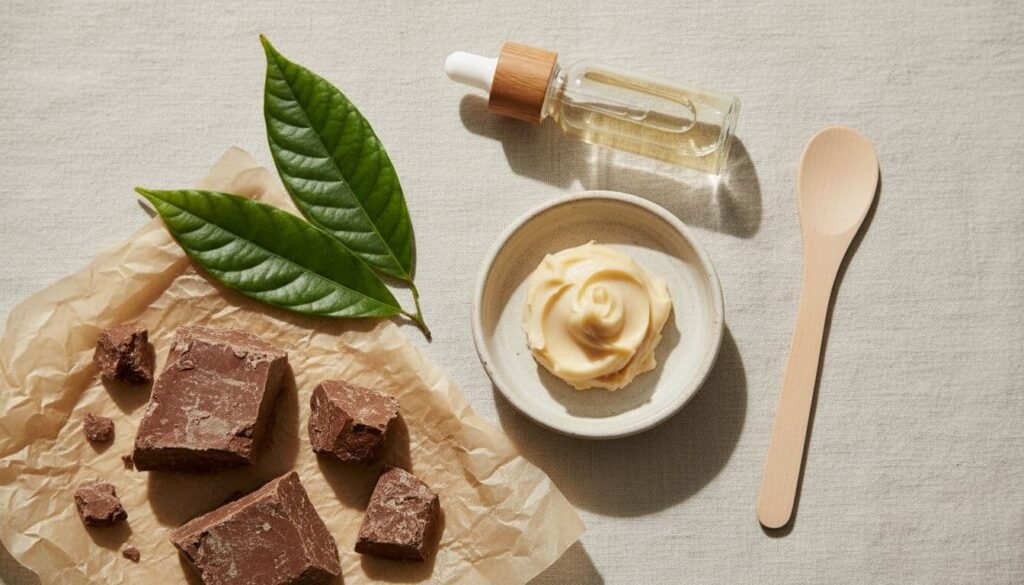
    Butters such as shea and cocoa butter are known for their deep moisturizing abilities, contributing to a soft, manageable beard. By including carrier oils such as jojoba or argan oil, you ensure your facial hair is moisturized, as well as the skin underneath.

    All About Natural Beard Balm

    Creating an effective beard balm is essential for maintaining a well-groomed and healthy beard. This section provides insights into what natural beard balm is and how it differs from other products, ensuring that your beard care routine promotes the best possible results.

    Purpose and Benefits

    Natural beard balm is a key product for facial hair maintenance. Crafted with a blend of oils and butters, these balms are designed to condition, moisturize, and provide a light hold to your beard. They also help to alleviate itchiness, dry skin, and flakiness.

    Beard Balm vs. Beard Oil

    While both products aim to moisturize and support beard health, their applications and effects do vary.

    Here is a simple comparison:

    ProductConsistencyMoisturizingStyling Control
    Beard OilLiquidHighLow
    Beard BalmSolidModerateModerate
    Beard WaxSolidLowHigh

    The choice between balm and oil often depends on your specific beard needs and preferences.

    Key Differences from Other Beard Care Products

    Beard balm differs from other beard care products in several ways:

    Balm’s unique combination of ingredients makes it a multifunctional product, essential for a comprehensive beard care routine.

    Essential Ingredients

    Crafting your beard balm begins with understanding and selecting the correct essential ingredients. Your choices in carrier oils, butters, essential oils, and waxes determine the balm’s nourishing properties, texture, and hold.

    Carrier Oils and Their Benefits

    Carrier oils form the base of your beard balm, providing essential moisture and nutrients to your facial hair and skin. Here’s a concise list of popular carrier oils and their benefits:

    Each of these oils offers a unique combination of beneficial properties for keeping your beard well-conditioned.

    Butters for Moisture and Control

    Butters are included in beard balm recipes for their moisturizing and softening capabilities. They contribute to a smoother texture and provide light styling control. Here are the butters you might use:

    Wax: The Holding Agent

    Finally, wax is the key ingredient that maintains the desired shape of your beard by giving your balm its hold. These natural waxes are commonly used:

    The wax you choose will largely influence the hold of your beard balm, so select based on your desired level of styling control.

    Customizing Your Beard Balm

    Creating the perfect beard balm is about understanding how individual ingredients can be adjusted to suit your personal preferences and specific skin and hair types. For any men reading this, let’s explore how to craft a beard balm tailored just for you. For you wives out there, pay attention; natural homemade beard balm is a perfect gift for your husband.

    The Role of Natural Ingredients in Beard Care

    Natural ingredients form the cornerstone of an effective beard balm. Carrier oils such as jojoba or argan oil provide moisture and a natural base for your balm, while beeswax offers hold without clogging pores. For those with dry skin, shea butter is a key ingredient for its hydrating properties.

    Adjust these base ingredients according to your skin’s needs: less beeswax if you desire less hold or more butter for additional moisture.

    Selecting Essential Oils for Scent

    Essential oils not only imbue your beard balm with a pleasant scent but can also have skin and hair benefits. Consider tea tree oil for its antiseptic qualities, ideal for sensitive skin, or cedarwood for its soothing properties. Lastly, lemongrass essential oil is an exceptional ingredient for helping relieve dandruff.

    Keep in mind the main difference in essential oils lies in their scent profile and potential skin effects.

    Essential OilScent ProfileBenefits
    SandalwoodWarm, woodsySoothing
    LavenderFloral, calmingRelaxing
    LemongrassFresh, EarthyRelives Dandruff
    PeppermintRefreshing, mintyInvigorating

    There are endless essential oils that could be used in any beard balm recipe, and we only listed a few. But the ones above are a great start.

    Adding Nutrients with Vitamin E and Other Oils

    Incorporating vitamin E oil into your beard balm adds nurturing antioxidants that can help soothe the skin. Suitable for all skin types, it works in tandem with carrier oils to deeply nourish both your beard and the skin beneath. Plus, it’s a natural preservative that can extend the shelf life of your DIY balm.

    Add a few drops to the mix based on your personal need for skin repair and protection.

    Adjusting for Hair and Skin Types

    Understanding and accommodating different hair and skin types ensures a tailored balm that works for you.

    How to Make Beard Balm: The Process + Beginner Recipe

    By following precise preparation, melting, and setting steps, you can tailor the balm to your hair growth needs and ensure a good shelf life.

    Basic Beard Balm Recipe for Beginners

    To start off, you’ll need a straightforward homemade beard balm recipe.

    For a standard batch, you’ll need a few simple ingredients like the ones below:

    This simple combination provides the foundation for effective beard conditioning.

    Preparing the Ingredients

    Before you begin, gather a few items like a double boiler, a glass jar or small heat-resistant bowl, and a small container or oz tins for the finished balm.

    Measure out your ingredients accurately, ensuring the beeswax is finely chopped or in pellet form to melt evenly.

    Melting and Mixing Technique

    Now, it’s time to melt and mix a few ingredients.

    1. Using the double boiler method, slowly and gently melt the beeswax.
    2. Once liquefied, add in your butter of choice (cocoa, shea, a combination of butters, etc.) until the mixture is uniform.
    3. Carefully incorporate the carrier oil or oils if you’re using a blend.
    4. This heat-induced blending will fuse the benefits of each ingredient, enhancing the balm’s nourishing properties. Constant stirring ensures an even consistency. Do not overheat; only heat just enough for the mixture to melt.
    5. Remove from heat and add in the essential oils.

    Note: We add essential oils as the final step since heating them can break down their composition and fragrance. Ideally, you’ll add them once your mixture begins to cool to preserve their qualities even better.

    Cooling and Setting

    Immediately pour the completed mixture into your small containers.

    Allow the balm to cool at room temperature, away from direct sunlight. As it cools, it will solidify into a usable balm.

    Once set, ensure the lids are closed tightly to maintain the balm’s shelf life. Your balm will be ready to use once it’s completely cooled and set, typically within a few hours.

    3 Nourishing DIY Beard Balm Recipes

    Creating your own beard balm is a practical way to maintain a soft and healthy beard. Below are three nourishing DIY recipes to keep your beard in top condition. Simply follow the same melting and mixing pattern as described with the beginner’s beard balm recipe above for each of the below recipes.

    1.) Classic Moisturizing Beard Balm

    Ingredients:

    Instructions:

    1. Melt the beeswax and shea butter in a double boiler.
    2. Once melted, mix in the carrier oil.
    3. Remove from heat and add essential oil drops.
    4. Pour the mixture into a tin and let it solidify.

    2.) Soothing Rosemary Pine Balm

    Ingredients:

    Instructions:

    1. Melt beeswax and coconut butter together.
    2. Stir in sweet almond oil.
    3. Add rosemary and pine essential oils after removing from heat.
    4. Decant into a container and allow to cool.

    3.) Conditioning Spice Beard Balm

    Ingredients:

    Instructions:

    1. Combine beeswax and cocoa butter and melt them.
    2. Blend in hemp seed oil smoothly.
    3. Infuse with cinnamon and vanilla essential oils once removed from the heat.
    4. Pour into a balm tin to set.

    Each recipe above combines natural waxes and oils that condition and moisturize the beard, making your DIY beard care routine rewarding and personalized. Remember, you can customize any beard balm recipe to be more waxy and thick, more smooth, or more fragrant; it’s entirely up to you. Perhaps you want to add a citrus note to your vanilla-cinnamon balm; go ahead.

    Be sure to experiment with many different essential oils for a more varied collection of beard balms. You could even make four fragrance blends, one for each season.

    Application and Usage

    When applying beard balm, using the correct technique and amount ensures your beard reaps the full benefits of this grooming essential. It functions akin to a leave-in conditioner, providing extra moisture and a touch of style.

    Applying Beard Balm Correctly

    To apply beard balm properly, begin by scooping out a small amount with your fingertip. Rub the balm between your hands until it softens, which turns it from a solid balm into a liquid oil, making it easier to spread evenly. Work the balm through your beard from roots to tips, ensuring full coverage. Don’t forget to massage it into the skin beneath to nourish the hair at the follicles.

    If you’re not accustomed to using beard balm, remember: when in doubt, less is more.

    Amount and Frequency of Use

    Remember, a small amount of beard balm goes a long way in making your beard feel soft and well-maintained, and it’s also a great gift for your husband, especially around Christmas (just a hint, ladies).

    Storing Beard Balm

    Proper storage of your beard balm is crucial for maintaining its effectiveness and shelf life. By choosing the right container and understanding the ideal storage conditions, the balm will remain fresh and well-preserved.

    Choosing the Right Container

    Materials to Consider:

    Features to Look For:

    Shelf Life and Ideal Storage Recommendations

    Advanced Tips and Variations

    Crafting a quality beard balm tailored specifically to your preferences can elevate your grooming routine. As we mentioned earlier, by adjusting the firmness, scent, and ingredients, you can create a balm that caters to the length and style of your beard.

    Creating a Firmer or Softer Balm

    To manipulate the texture of your beard balm, consider the core ingredients: beeswax and butter. For a firmer hold, increase the beeswax proportion; for a softer balm, increase the quantity of butter like shea or cocoa.

    Here’s a simple guide:

    Experiment with these ratios to achieve your desired consistency.

    Homemade Balm as a Gift

    Homemade beard balm makes for a super personalized gift.

    Customize the balm based on the recipient’s preferences, and consider pairing it with a beard butter recipe for added variety. Use natural ingredients and package your balm in a small tin with a homemade label for a personal touch.

    Frequently Asked Questions

    Creating beard balm at home can be a straightforward process if you understand the basics. Here, you’ll find answers to common questions about making your own beard balm, with a focus on the materials and methods that will deliver the best results for you.

    How do you make a beard balm at home?

    To make beard balm at home, melt beeswax, butter such as shea or cocoa, and carrier oils together, then add essential oils for fragrance before pouring the mixture into a container to solidify.

    What are the key ingredients for a DIY beard balm?

    The key ingredients for a DIY beard balm typically include beeswax for hold, butter like shea or cocoa for conditioning, carrier oils such as jojoba or argan for moisture, and essential oils for scent.

    Which essential oils are best for homemade beard balms?

    Essential oils like cedarwood, sandalwood, and lavender are popular for homemade beard balms due to their pleasant scents and potential skin benefits. Lemongrass essential oil is amazing if anti-dandruff properties are needed. A drop or two of citrus oil can introduce a wonderful fragrance note, especially to spicy blends.

    What can I use as a base for my beard balm?

    Beeswax and shea butter serve as excellent bases for beard balm, providing a good balance of hold and conditioning. Experiment with other butters, too, such as coconut butter.

    How do I create a beard balm without using beeswax?

    You can create a beard balm without beeswax by using alternative waxes like candelilla or carnauba, which are plant-based options that still provide a similar hold.

    What is the proper ratio of ingredients for crafting a beard balm?

    A common ratio for beard balm ingredients is one part beeswax, one part butter, and one to two parts carrier oil, which can be adjusted slightly depending on the desired consistency and hold. Also, this can vary depending on the ingredients used.

    How long does beard balm last?

    A 1 oz tin of beard balm should last for 3 to 4 weeks if you’re using it regularly, though this can vary based on the frequency and the amount you’re using each time.

    Does beard balm irritate skin?

    Beard balm should not irritate the skin if it is made with natural ingredients that are suitable for your skin type. Always perform a patch test to check for any allergic reactions. Nothing will irritate your skin unless one or more of the underlying ingredients are irritants for you, personally. So again, it’s all about the ingredients.

    If you have sensitive skin, start basic first. Just use wax, plant butter, and carrier oil. If the ingredients you used for that basic recipe didn’t irritate your skin after a week or so, you’re now safe to make your next batch with one or more essential oils of your choosing.

    Can I use beard balm for sensitive skin?

    Yes, you can use beard balm for sensitive skin, but again, start basic, then introduce more ingredients from there. See the above answer for more details.

    Should I use beard balm every day?

    Using beard balm every day is appropriate if it suits your grooming routine and does not cause skin or hair issues. It can help keep your beard soft and well-styled. Let’s ask it a different way: Should you moisturize your skin and beard every day? Exactly. Plus, depending on your recipe, it smells amazing and is akin to wearing cologne. Though, it smells better than cologne if made right.

    Do I need beard balm if I use beard oil?

    Beard balm and beard oil serve different purposes; balm provides hold and styling, while oil primarily conditions. Depending on your beard needs, you may use either or both. If you’ve used neither in the past, we recommend making and using beard balm. It’s the best of both worlds and can easily be customized to be more waxy for better hold or more oily for more absorption.

  • Nail Dehydrator DIY: Simple Steps to Make Your Own at Home

    Nail Dehydrator DIY: Simple Steps to Make Your Own at Home

    Nail Dehydrator DIY: Simple Steps to Make Your Own at Home

    Achieving long-lasting nail polish application at home often starts with proper nail preparation, including those of you who use acrylic nails. A crucial step in this preparation is dehydrating the nail plate, which ensures that any moisture and oils that could potentially cause lifting are removed ahead of time.

    While commercial nail dehydrators are readily available, there is a growing trend towards DIY nail dehydrator solutions that can be made and used right at home.

    It’s not hard to dehydrate your nails at home, and many people interested in creating their own nail dehydrator will typically rely on a combination of a few easily accessible ingredients, such as isopropyl alcohol and acetone (more on that later). We’re all about DIYs and taking a hands-on approach whenever we can, so keep reading if you are, too.

    Nail Dehydrators, Comparisons, and Nail Types

    For just a bit of context, you probably already know nail dehydrators are beauty-specialized products designed for prepping the nail plate before the application of artificial nails. This section delves into the specific types of dehydrators, their chemistry, and how they match up with different nail types.

    Purpose of Nail Dehydrators

    The primary function of nail dehydrators is to prepare the natural nail plate for better adhesion of nail enhancements. They work by removing oil residues and excess moisture that can cause lifting or peeling of the nail products.

    DIY vs. Professional Dehydrators

    Professional dehydrators are often from leading professional nail care brands and are formulated for salon use, which may cater to a higher level of skill level. On the other hand, DIY dehydrators might involve ingredients like acetone or rubbing alcohol, which are accessible but could be less nuanced in effect.

    Chemistry of Dehydrators

    Nail dehydrators can contain methacrylic acid, which is found in acid primers, or alternate compounds in non-acid primers. Acid-based primers are effective at dehydrating but can be harsh on sensitive skin.

    Effects on Nail Health

    Frequent use of dehydrators, especially those with harsh chemicals, can impact the health of the nail bed. It’s important for individuals to choose formulations that respect the integrity of their healthy nails while providing the desired result.

    Matching Dehydrators with Nail Types

    Different enhancements like gel nails, acrylic nails, dip powder, or gel-x nails might require different approaches to dehydration. That said, a tailor-made dehydrator ensures longevity in wear and safeguards the surface of your nails from potential damage, especially when using more complex application methods.

    Preparing the Nail Dehydrator Mixture

    Creating an effective DIY nail dehydrator solution can be done with two ingredients in equal ratios.

    Identifying Ingredients

    To begin formulating your own primer for an ideal surface on your nails, the essential ingredients include isopropyl alcohol and pure acetone. Combining these ingredients removes oils and moisture, preparing the nail’s surface for the best possible nail polish adhesion.

    • Isopropyl Alcohol: Acts as a degreaser and cleaner.
    • Pure Acetone: Utilized for its strong dehydrating properties.

    Another common ingredient is Ethyl Acetate, a solvent that aids in creating a uniform nail surface. This isn’t needed in a DIY mix; the fewer harsh chemicals, the better. We only mention it in case you’ve seen it listed as an ingredient (among many others) in products you may have used in the past.

    Creating the DIY Blend

    The easiest way to prepare the dehydrator is to mix a part of acetone with isopropyl alcohol in equal ratios. Using a funnel, carefully pour the substances into a small, clean bottle to create a thin layer when applied. Also, the purer the ingredients, the better. For example, use isopropyl alcohol with as little water as possible, like a 99% isopropyl solution.

    1. Mix Equally: Combine equal parts of isopropyl alcohol and acetone.
    2. Apply: Cover the entire nail with a thin layer of the mixture and allow it to evaporate and dry completely.

    Safety and Storage

    Once mixed, it should be capped tightly and stored at room temperature, away from any direct sunlight, and out of the reach of children. This eliminates potential degradation of the ingredients, as is true with most beauty supplies.

    Be sure to use a chemical-safe container so that the mixture won’t degrade. Glass or quality non-reactive plastic bottles work well.

    It’s imperative to avoid any contact with the skin or inhalation of the fumes. When applying anything to your nails, use it in a well-ventilated area.

    Nail Dehydrator Application Techniques

    Proper application techniques for DIY nail dehydrators are crucial for optimal adhesion and durability of nail enhancements used later. We’d recommend not rushing the process to ensure you have a good nail surface.

    Steps for Dehydration

    One of the most important steps in nail preparation is the dehydration of the natural nail surface, as we mentioned earlier. To start:

    1. Clean the surface of the nails with the 1:1 acetone and isopropyl alcohol mix. Avoid skin contact.
    2. All the coating to air dry.

    Alternatively, if you’re unable to mix the above two ingredients for any reason, feel free to simply use a cotton ball to coat your nails with a thin layer of acetone to remove moisture and oils. Then, apply a coat of isopropyl alcohol to remove any additional oils, dehydrate, and smooth the nail surface.

    By removing all oils and moisture, you’re providing a good foundation for other nail products and ensuring proper adhesion will be possible.

    Applying Base Products

    After dehydrating the nail:

    1. Use an acid-free primer if desired, applied in a thin, even layer.
    2. Allow it to air dry for a few seconds to create a sticky base, which contributes to better adhesion.

    A base coat should then be applied directly on top, which will bond the natural nail to the polish or enhancement product.

    Ensuring Proper Adhesion

    For gel polish or other enhancements to last, one must ensure that the nail is primed properly:

    1. base coat is crucial, as it provides a barrier and adhesive surface. Additionally, this will decrease the likelihood of chipping and peeling.
    2. Apply the base coat in thin, even strokes, and cure according to the gel system’s instructions.

    These simple steps, when done well without rushing, will maximize the longevity of the manicure and prevent lifting.

    Tips for Enhancing Nail Treatments

    When seeking to enhance at-home nail treatments, the focus should be on adequate preparation of the nail, protecting the cuticles, and using the right products for their intended applications.

    Primer Selection for Various Nails

    As mentioned a bit ago, the selection of a nail primer is pivotal for creating strong bonds between the natural nail and enhancements like a gel manicure.

    For those sensitive to chemicals, acid-free nail primers offer a gentler alternative, effectively prepping the nail without the aggressive components found in acid nail primers. Conversely, an acid nail primer might be required if you’re looking for a more robust adhesion. If you’ve had issues with lifting before, an acid primer may work well.

    • Acid-Free Primers: Suited for sensitive nails; gentler on the nail plate.
    • Acid Primers: Provide stronger adhesion; ideal for hard-to-bond nails.

    Aftercare and Maintenance

    Remember, the frequent use of dehydrators can lead to the nail becoming overly dry if not cared for properly. Proper aftercare ensures that natural oils are replenished and nails remain strong.

    Regular Nail Conditioning

    One should regularly apply cuticle oils to the natural nail surface, especially after using a nail dehydrator, which can have a drying effect. Opt for oils enriched with Vitamin E to condition the nails and keep them healthy. These oils can penetrate the nail plate to provide nourishment and prevent brittle nails.

    • Daily Routine: Apply cuticle oil at least once a day.
    • Oil Selection: Look for oils containing Vitamin E or jojoba oils, which closely mimic natural oils.

    Managing Long-Term Wear

    For individuals who have used nail dehydrators over a long period of time, a balance between drying is important to maintain healthy nails. Although a DIY nail dehydrator is convenient, taking breaks from any products that strip natural oils is vital.

    • Frequent Usage: Limit the use of dehydrators to avoid excessively dry nails.
    • Regular Breaks: Schedule periods of rest from polish and treatments to allow nails to recover.

    Choosing the Right Nail Care Products: We prefer Less Chemicals and Safer Ingredients

    If you’re going to use nail products for nailcare that include chemicals, the above tips will help to reduce the negative impacts of doing so by causing your nail enhancements to last longer, meaning fewer applications of harsh products.

    Alternatively, some great alternative options, such as water-based nail polish, are available and marketed as containing less chemicals. Not only do these choices potentially safeguard against harsh chemical exposure, but they also align with a holistic approach to nail health, especially for those with sensitive skin.

    Additionally, for enhancing natural nails or applying gel nails, acrylic nails, or dip powder, you can try acid-free nail primers that minimize potential damage and are preferable for maintaining healthy nails vs. products with harsher chemicals.

    Comparing Brands and Products

    The exploration of leading professional nail care brands reveals a spectrum of formulas.

    • Products range from professional primers that prepare the nail bed for adhesion to methacrylic acid-based solutions designed for durability.
    • Comparing these brands entails scrutinizing ingredient lists and their potential dangers. Then, understanding their long-term effects on nail health.

    Additionally, decisions have to be made in terms of whether exposure to chemicals is worth the styling benefit gained from their use. You have to decide if regular water-based nail polish will suit your needs as opposed to products with harsher or more toxic chemicals. In our opinion, a simple DIY dehydrating method and water-based nail polish are all we need.

    If our nails don’t look quite as styled from our DIY solutions and less harsh products, that’s totally okay! That said, even with more natural and gentle ingredients, you can still come away with quite an impressive-looking nail job.

    Moreover, we suggest weighing nail health over product efficacy.

    Natural DIY Methods to Clean and Dehydrate Nails

    Creating the perfect canvas for nail polish or acrylics starts with properly dehydrated nails, as we discussed regarding the acetone and alcohol methods described above.

    But can similar results be achieved with completely natural options? Indeed, there are natural ways to dehydrate your nails if you want to avoid acetone and alcohol.

    Vinegar Solution

    • Ingredients: Equal parts white vinegar and water
    • Method:
      • Mix the vinegar and water in a bowl.
      • Soak your nails for 5 to 10 minutes.
      • Pat nails dry thoroughly with a clean towel.

    The acidity in the vinegar helps remove oils and prepare the nail surface, making it an effective natural dehydrator. All nails must completely dry before applying additional products.

    Lemon Juice

    • Ingredients: Fresh lemon juice
    • Method:
      • Apply lemon juice to a cotton ball or swab.
      • Swipe each nail to cover the entire nail plate.
      • Allow it to air dry before applying nail treatments.

    Lemon juice not only dehydrates but also brightens nails, providing a clean slate for your manicure.

    Baking Soda Scrub

    • Ingredients: Baking soda and water
    • Method:
      • Create a paste with baking soda and a small amount of water.
      • Gently scrub the nail beds with the paste using a soft toothbrush.
      • Rinse with water and dry well.

    Baking soda is a mild abrasive that can help clean the nail surface and absorb oils.

    Feel free to combine any of the above methods for more comprehensive cleaning. For example, you could use the baking soda scrub and then apply a thin layer of vinegar to prep them well.

    Tips for Natural Nail Dehydration

    • Always ensure your nails are clean and free from polish or treatments before dehydrating.
    • Push back your cuticles gently to expose the entire nail plate for even dehydration.
    • Avoid soaking your nails in water post-dehydration, as this can reintroduce moisture.

    By using these natural methods, you can effectively prepare your nails for any manicure or treatment without the need for traditional dehydrators. Remember to follow up with your preferred base coat to protect your nails and enhance polish adhesion.

    DIY Nail Dehydrator FAQs

    What household items can be used to dehydrate nails?

    As discussed in the above post, isopropyl alcohol (we recommend a 99% solution) and acetone is quite effective. Natural alternatives are available as well.

    What are the best natural options for dehydrating nails?

    Natural options for nail dehydration include applying lemon juice or vinegar, as their acidic properties can temporarily remove oils from the nail surface. Additionally, baking soda can be used for cleaning and smoothing the nail’s surface.

    What are the most effective homemade nail dehydrator recipes?

    A highly effective homemade nail dehydrator recipe involves using a mix of isopropyl alcohol and acetone to eliminate oils and moisture and prepping nails for polish or acrylic application.

    How long does it take to dehydrate nails?

    Dehydrating nails usually takes a few minutes, depending on the product used. The nails should appear matte once dehydrated. Don’t rush the process; be thorough, and avoid any skin contact with harsh ingredients like acetone.

    Are DIY nail dehydrators safe?

    DIY nail dehydrators can be safe when made with recommended proportions of commonly used substances like isopropyl alcohol or acetone and applied according to instructions. If you’d prefer something far more mild, vinegar, baking soda, or lemon juice can also be used.

    Are hand sanitizers an appropriate option for dehydrating nails before a manicure?

    Hand sanitizers, while containing a high concentration of alcohol, are not the best option for nail dehydration due to additional ingredients that may leave a residue and hinder adhesion.

    Is acetone a suitable alternative for a professional nail dehydrator?

    Acetone, especially when used with alcohol (see above post), is an effective nail dehydrator.

    How can I prepare my nails for gel application without a commercial dehydrator?

    Preparing nails for gel application without a professional dehydrator involves completely cleaning the nail with a DIY 1:1 ratio solution of 99% isopropyl alcohol and acetone to remove any oils or residue.

  • Coconut Oil Bath Bomb Recipe: DIY Guide, 4 Extra Recipes

    Coconut Oil Bath Bomb Recipe: DIY Guide, 4 Extra Recipes

    Coconut Oil Bath Bomb Recipe: DIY Guide, 4 Extra Recipes

    Coconut oil has become a popular ingredient in many natural beauty products. Coconut oil bath bombs are easy to make and super fun to use, especially for children. They’re also a great way to pamper yourself and add a touch of luxury and aromatherapy to your bathtime routine.

    With just a few simple ingredients, you can create a luxurious bath experience that is both moisturizing and relaxing. Not only are these bath bombs easy to make, but they are also customizable to your preferences. You can add different scents, colors, and even dried flowers or herbs to make your bath bombs unique.

    In this article, you’l learn about the common ingredients you can customize your recipes with, learn how to make your own coconut oil bath bombs with a basic recipe, plus get some creative inspiration from three additional recipes.

    Bath Bombs with Coconut Oil: Why They’re Great

    A coconut oil bath bomb is a type of bath bomb that is made with coconut oil as one of its main ingredients. Bath bombs are small, hard-packed balls or shapes that are designed to dissolve in bathwater, releasing a variety of ingredients that can help moisturize, soothe, and relax the skin.

    Coconut oil (pure unrefined cold-pressed is best) is a natural oil extracted from mature coconuts. It is known for its moisturizing and skin-soothing properties and is often used in various skincare products. When used in a bath bomb, coconut oil can help to moisturize and soften the skin, leaving it feeling smooth and refreshed.

    We always suggest a gradual transition to natural skincare alternatives, and using all-natural bath bombs is yet another way to make the transition to natural skincare. Like most DIYs, they can also be scented with various essential oils, providing additional relaxation benefits.

    Additional Benefits of Coconut Oil in Bath Bombs

    Coconut oil is the perfect ingredient for bath bombs, and there are multiple reasons for that. It has numerous benefits for the skin. Let’s consider a few.

    • Moisturizing: Coconut oil is a natural moisturizer that can help hydrate and soften the skin. It contains fatty acids that can penetrate the skin and provide long-lasting moisture.
    • Skin-soothing: Coconut oil has anti-inflammatory properties that can help soothe irritated skin. It can also help reduce redness and swelling. Add a bit of colloidal oatmeal, and you have a powerful combination, especially for sensitive skin.
    • Antioxidant: Coconut oil contains antioxidants that can help protect the skin from damage caused by free radicals. Free radicals can cause premature aging and damage to the skin.
    • Non-toxic: Coconut oil is a non-toxic ingredient that is safe for most people to use. It is gentle on the skin and does not contain any harmful chemicals.

    Using coconut oil in bath bombs can be a great way to nourish and pamper the skin. It is a natural and effective ingredient that can benefit a wide variety of skin types.

    Essential Ingredients for Coconut Oil Bath Bombs

    To make a high-quality coconut oil bath bomb, several essential ingredients are required. These ingredients include coconut oil, baking soda, citric acid, Epsom salt, essential oils, water, and one of many other optional ingredients.

    Coconut oil is a key ingredient, primarily as a moisturizing agent. As discussed in the previous section, it will help balance the other ingredients and soothe your skin.

    Baking soda is another essential ingredient in bath bombs. It helps to soften the skin and neutralize any acidic elements in the bathwater. It also helps to balance the skin’s pH levels and chemically reacts with a dry acid, like citric acid (below), to cause fizzing in the water.

    Citric acid is a key ingredient in bath bombs as it helps to create the fizzing effect. It reacts with the baking soda to create carbon dioxide gas, which causes the bath bomb to fizz and dissolve in the water.

    Epsom salt is another important ingredient in bath bombs. It helps to relax muscle aches and can soothe dry, itchy patches of skin.

    Colloidal Oatmeal: Colloidal oatmeal has been used for decades for those with sensitive skin due to its emollient and anti-inflammatory properties. Get a few oats, grind them up in a blender until you have oat powder, and try adding this to your bath bomb recipes. You can make soap bars for sensitive skin with colloidal oatmeal as well.

    Manuka Honey: Any honey will do, but manuka honey is especially helpful in soothing the skin. It’s anti-inflammatory, too.

    Essential oils are used to add fragrance and therapeutic benefits to bath bombs. There are numerous skin benefits that vary wildly depending on the essential oil being used. Popular essential oils for bath bombs include lavender, peppermint, eucalyptus, and chamomile.

    Jasmine essential oil and other floral oils can also work quite well, especially when combined with a drop or two of citrus oil.

    Water is also an essential ingredient in bath bombs. It is used to activate the citric acid and baking soda, which creates the fizzing effect. It is important to use the right amount of water to ensure that the bath bomb has the right consistency and does not fall apart.

    Other optional ingredients that can be added to bath bombs include cornstarch, almond oil, cocoa butter, coconut milk powder, fractionated coconut oil, shea butter, carrier oils, and vegetable-based food coloring. These ingredients can help to add texture, color, and additional moisturizing properties to the bath bomb.

    High-quality, natural ingredients are essential in making a great coconut oil bath bomb. By following the right recipe and using the right ingredients, anyone can create a luxurious and relaxing bath experience.

    Choosing the Right Essential Oils

    When it comes to making coconut oil bath bombs, choosing the right essential oils is an important consideration, too. Essential oils are highly concentrated plant extracts that are used in aromatherapy to promote relaxation and improve mood.

    Here are some tips for selecting the right essential oils for your coconut oil bath bomb recipe.

    Consider the Benefits of Aromatherapy

    Different essential oils have different properties, benefits, and uses. For example, lavender essential oil is known for its calming properties, while citrus oils are energizing and uplifting. When selecting essential oils for your coconut oil bath bombs, consider the benefits of aromatherapy and choose oils that will help you achieve your desired mood.

    Experiment with Different Combinations

    Mixing different essential oils can create unique and complex scents. Experiment with different combinations of essential oils to find the perfect blend for your coconut oil bath bombs. Some popular combinations include lavender and peppermint, grapefruit and bergamot, and lemon and eucalyptus. Oh, and don’t forget sandalwood. It’s an incredible scent.

    Use Calming Bath Salts

    Adding calming bath salts to your coconut oil bath bombs can enhance the relaxation benefits of aromatherapy. Bath salts are made from minerals such as magnesium and potassium, which can help soothe sore muscles and ease tension. Look for bath salts that contain lavender or chamomile essential oils for an extra calming effect.

    4 Easy Bath Bomb Recipes and Step-by-Step Instructions

    Making your own bath bombs can be a fun and rewarding experience. With this simple recipe, you can create your own coconut oil bath bombs quickly. Here is a step-by-step guide to making your own coconut oil bath bombs.

    1.) Basic Coconut Oil Bath Bomb Recipe

    Ingredients:

    • 1 cup baking soda
    • ½ cup citric acid
    • ½ cup cornstarch
    • ½ cup Epsom salt
    • 2 tablespoons coconut oil
    • 1 teaspoon water
    • 10 drops of essential oil (optional)
    • Bath bomb mold

    Step-by-Step Instructions:

    1. Mix the baking soda, citric acid, cornstarch, and Epsom salt in a large bowl until well combined.
    2. In a separate bowl, melt the coconut oil in a double boiler or microwave for 30 seconds until it is completely melted.
    3. Add the melted coconut oil and essential oils (if you’re using them) to the dry mixture and stir until it is crumbly.
    4. Add a teaspoon of water to the mixture and stir until it is well combined. The mixture should hold together when you squeeze it in your hand. The amount of water you need may vary slightly but use just enough to hold it together without it being too wet.
    5. Fill each half of the bath bomb mold with the mixture, pressing down firmly. Make sure to overfill each half of the mold. No worries if you aren’t using molds; you could use small measuring spoons, muffin tins, cookie cutters, or even shape them with your hands.
    6. If using a mold, press the two halves of the mold together and hold for a few seconds to ensure they are tightly packed.
    7. Carefully remove the bath bomb from the mold and place it on a flat surface to dry for at least 24 hours.
    8. Once the bath bomb is dry, store it in a glass jar or airtight container until ready to use. Separate with wax paper as needed.

    Using a silicone mold can also work well for this recipe. With this easy-to-follow guide, you can create your own DIY coconut oil bath bombs quickly. Enjoy a relaxing and soothing bath with your homemade bath bombs.

    2.) Lavender Coconut Bath Bombs

    • 1 cup baking soda
    • 1/2 cup citric acid
    • 1/4 cup Epsom salts
    • 2 tbsp coconut oil, melted
    • 1 tbsp dried lavender buds
    • 10 drops lavender essential oil
    • Food coloring (optional)

    Combine dry ingredients in a bowl. Add coconut oil, lavender buds, and essential oil. Mix well. Add food coloring if desired, form it with your hands, or use molds, and let it dry for 24 hours.

    3.) Coconut Milk Bath Fizzies

    • 3/4 cup baking soda
    • 1/2 cup corn starch
    • 1/4 cup coconut milk powder
    • 2 tbsp coconut oil, melted
    • 1 tbsp honey (manuka preferably)
    • 1 tsp vanilla extract
    • Coconut fragrance oil

    Mix dry ingredients in a bowl. Add coconut oil, honey, vanilla, and fragrance. Mix well and scoop into molds or shape with your hands. Once shaped well, allow to dry for 24 hours.

    4.) Coconut Lime Bath Bombs

    • 1 cup citric acid
    • 2 cups baking soda
    • 1/4 cup Epsom salts
    • 3 tbsp coconut oil, melted
    • Zest of 2 limes
    • 10 drops lime essential oil
    • Green food coloring

    Combine the dry ingredients in a bowl. Add melted coconut oil, lime zest, and essential oil. Mix in a few drops of natural green food coloring if desired. Pack firmly into molds and allow to set 1 hour before removing; allow to dry for 24 hours.

    5.) Coconut Rose Bath Bombs

    • 1 cup baking soda
    • 1/2 cup citric acid
    • 1/4 cup cornstarch
    • 3 tbsp coconut oil, melted
    • 1 tbsp dried rose petals
    • 5 drops rose essential oil
    • Red food coloring (optional)

    Combine the baking soda, citric acid, and cornstarch in a bowl. Add the melted coconut oil, rose petals, and rose essential oil. Mix well. Add a few drops of red food coloring if desired. Firmly pack the mixture into molds and allow it to set for 1-2 hours before removing it from the molds. Allow to dry for 24 hours.

    Tips for Perfect Bath Bombs

    Creating the perfect bath bomb can be challenging, but with these tips, it can be a breeze. Here are some tips to help you create the perfect bath bomb:

    Use the Right Molds

    Silicone molds are the most popular choice because they are easy to use and clean. However, you can also use metal or plastic molds. Just make sure that whatever you’re using is sturdy. Again, you can use measuring spoons, small plastic containers, leftover plastic easter eggs, or your hands to get the desired shape.

    Use Witch Hazel

    Witch hazel is an excellent ingredient to add to your bath bomb recipe. It helps to bind the ingredients together and makes the mixture easier to mold. It also has astringent properties that help to tighten and tone the skin. Since many people don’t have witch hazel, we didn’t include it in our recipes. But it’s definitely worth trying.

    Add Coloring

    Adding coloring to your bath bomb mixture can create a beautiful effect, especially if you add it towards the end for a swirled appearance. Alternatively, natural colorants such as beetroot powder or spirulina powder can be used. Keep in mind that some natural colorings may stain your tub.

    Create Rainbow Bath Bombs, Variations

    To create a rainbow effect, divide the mixture into separate bowls and add different colors to each one. Then, layer the mixture in the mold, starting with the darkest color and ending with the lightest.

    With these tips, you can create the perfect bath bomb every time. Remember to experiment with different ingredients and molds to find the perfect combination for you.

    Special Considerations for Sensitive Skin

    For those with sensitive skin, using bath bombs can be a bit tricky, but it just depends on the ingredients you’re using. Coconut oil is generally considered safe for most skin types, but it’s always a good idea to test a small area first to ensure you don’t have a reaction.

    If you have sensitive skin, add some extra oil to your recipe and alternate ingredients until you find the best combination for your skin. Avoid scents at first.

    Once you’ve settled on your basic ingredients, add a scent or two with essential oils, but just a few drops. Another option is to use a moisturizing bath truffle instead of a bath bomb. These truffles are typically made with ingredients like cocoa butter and shea butter, which can be gentler on sensitive skin.

    To avoid irritation, it’s important to rinse off thoroughly after using a bath bomb. You can help remove these dead skin cells and prevent breakouts by rinsing thoroughly. Also, use a natural moisturizer to lock in your skin’s moisture.

    Frequently Asked Questions

    What is the best oil to use in bath bombs?

    It depends. The best oil to use in bath bombs is the one that’s the best suited for your skin type. Carrier oils, such as coconut oil, almond oil, olive oil, shea butter, cocoa butter, or jojoba oil, help moisturize the skin and provide a smooth texture to the bath bomb.

    To answer your question, make bath bomb variations that utilize a few of those oils and see which ones you like the best.

    Regarding essential oils, it depends on the fragrances and skin benefits you’d like in your final product. We like combining floral essential oils (like Jasmine or Rose) with citrus or sandalwood essential oils. We also like myrrh, Spikenard, and frankincense, which are great for a warm, spicy blend in winter.

    Many essential oils can help nourish the skin (see below).

    How do you make a moisturizing bath bomb?

    To make a moisturizing bath bomb, use a combination of carrier oils listed in the answer above. Don’t forget to use a few skin-nourishing essential oils as well, such as palmarosa, myrrh, lavender, etc.

    What are some natural bath bomb recipes?

    Some natural bath bomb recipes include using natural ingredients like baking soda, citric acid, Epsom salt, and essential oils.

    You can also add natural colorants like beetroot powder or turmeric powder to create colorful bath bombs. See the recipes earlier in this article for more information.

    Are there any bath bomb recipes for sensitive skin?

    Yes, there are bath bomb recipes that are specifically designed for sensitive skin. These recipes typically use gentle ingredients like colloidal oatmeal, chamomile, or calendula to soothe and moisturize the skin.

    Start with the most basic ingredients first, then add others individually. If you notice irritation from a new ingredient, stick to basic ingredients. Also, be sure to moisturize well after bathing to seal in your skin’s moisture.

  • DIY Shampoo Without Castile Soap: 5 Nourishing Recipes

    DIY Shampoo Without Castile Soap: 5 Nourishing Recipes

    DIY Shampoo Without Castile Soap: 5 Nourishing Recipes

    DIY shampoo is becoming increasingly popular as people seek natural and chemical-free alternatives to traditional hair care products. While castile soap is a common ingredient in many DIY shampoo recipes, some people may prefer to avoid it due to its high pH level and potential for stripping the hair of its natural oils.

    Fortunately, several alternative ingredients can be used to make DIY shampoo without castile soap. Castile soap is all-natural and an amazing ingredient overall, but if you have color-treated hair or are looking for a no-poo hair cleansing method, there are plenty of additional ways to nourish your hair and scalp while also removing dirt and excess oil.

    DIY Shampoo: Only Natural, All the Time

    DIY shampoo is a natural alternative to commercial shampoos, which are often filled with harsh chemicals. Making your own shampoo at home can be enjoyable, but it’s also so much better than exposing your scalp and hair to harsh synthetic ingredients. Additionally, you can customize your shampoo to your specific hair type and needs.

    Natural shampoos typically include ingredients such as baking soda, apple cider vinegar, coconut oil (or other natural oils), and essential oils. These ingredients can help to cleanse the scalp and hair without stripping away natural oils, leaving your hair feeling soft and healthy. DIY recipes could also include glycerin, castile soap, liquid soap base, or something similar when soap is used.

    When making DIY shampoos, it’s important to remember that not all ingredients are suitable for all hair types. For example, baking soda can be too harsh for some hair types, while coconut oil may be too heavy for others. Experimenting with different ingredients and ratios is important to find what works best for your hair. That’s the beauty of DIY: it’s entirely customizable.

    Why Some Avoid Castile Soap in Shampoo

    Castile soap is a popular ingredient in many DIY shampoo recipes due to its natural properties and ability to create a rich lather. However, some people may choose to avoid using castile soap in their shampoo for various reasons.

    One reason is that castile soap can dry the hair and scalp. This is because it has a high pH level, which can strip the hair of its natural oils and cause it to become dry and brittle. This is especially true if the castile, oil, and water ratio isn’t ideal in the DIY recipe you’re using.

    This can lead to breakage and split ends, making it difficult to maintain healthy hair. While that problem can easily be avoided when using a suitable homemade shampoo recipe that incorporates natural moisturizers and other ingredients, some still prefer to stay away from castile soap altogether.

    Another reason to avoid castile soap is that it may not suit all hair types. While it can work well for those with oily hair, it may not be as effective for those with dry or damaged hair. It may even exacerbate existing hair problems, such as dandruff or an itchy scalp.

    Lastly, liquid castile soap may contain other ingredients that some people with allergies want to avoid, such as certain essential oils or other natural fragrances.

    While castile soap can be a great natural ingredient alternative (one that we love) to commercial shampoos, it’s not the best choice for everyone. It is important to consider your hair type and any existing hair or scalp problems before using castile soap in your DIY shampoo recipe.

    Natural Ingredients for DIY Shampoo

    When it comes to making your own shampoo without castile soap, numerous natural ingredients can be used to cleanse and nourish your hair. Here are some common and key ingredients to consider when making a shampoo from scratch:

    Essential Oils

    Essential oils add a pleasant scent to your DIY shampoo and have many beneficial properties for your hair and scalp. Some popular essential oils for shampoo include:

    • Lavender: known for its calming properties and ability to promote hair growth
    • Peppermint: has a cooling effect and can help stimulate hair growth
    • Rosemary: studies demonstrate that it can be as effective as chemical hair-growth treatments
    • Cedarwood: has a woodsy scent and can help reduce dandruff and hair loss
    • Tea tree: has antifungal and antibacterial properties, making it great for treating scalp issues
    • Lemongrass: Incredibly, lemongrass essential oil can reduce dandruff significantly after 7-14 days, according to this study
    • Other floral essential oils: There are endless fragrance opportunities when you consider the many floral-scented essential oils available. Pair them with a drop or two of citrus essential oil, and you’ll have an amazing shower or bath experience.

    Natural Oils

    Natural oils are a great way to nourish and moisturize your hair without using harsh chemicals. Some popular natural oils for shampoo include:

    • Olive oil: can help strengthen hair and reduce frizz
    • Coconut oil: has moisturizing properties and can help prevent hair breakage
    • Jojoba oil: closely resembles the natural oils produced by the scalp and can help regulate oil production
    • Castor oil: can help promote hair growth and prevent hair loss
    • Almond oil: contains vitamin E and can help nourish and strengthen hair
    • Shea butter: a natural emollient that works to moisturize dry and fragile hair

    Other Key Ingredients

    In addition to essential oils and natural oils, there are a variety of other natural ingredients that can be used in DIY shampoo, including:

    • Apple cider vinegar: can help balance the pH of your scalp and remove buildup
    • Coconut milk: has moisturizing properties and can help prevent hair breakage
    • Rosemary: can help stimulate hair growth and prevent dandruff
    • Peppermint: has a cooling effect and can help stimulate hair growth
    • Honey: has moisturizing properties and can help prevent hair breakage
    • Baking soda: can help remove buildup and balance the pH of your scalp
    • Raw honey: has moisturizing properties and can help prevent hair breakage
    • Aloe vera gel: has moisturizing properties and can help soothe the scalp
    • Green tea: contains antioxidants and can help stimulate hair growth
    • Cornstarch: can help absorb excess oil from the scalp
    • Vegetable glycerin: can help add moisture to the hair and scalp.

    Now that you have an idea of the many available ingredients that can be used in DIY shampoo recipes, the real fun can begin. If you want a “no poo,” no soap shampoo, no problem. You can use some baking soda and water or even just vinegar. If you want to utilize the benefits of essential oils in addition to a nourishing oil like shea butter, that’s easy, too.

    It’s all about your personal preferences, hair type, scalp skin type, and the result you’re aiming for overall. One bit of advice: experiment with different ingredients and recipes until you’ve found the perfect combinations. Personally, we like using castile soap, essential oils, water, and other oils to make a balanced shampoo.

    Choosing Ingredients Based on Hair Type

    When making DIY shampoo without castile soap, it’s important to choose ingredients that are suitable for your hair type. Here are some suggestions based on different hair types:

    Oily Hair

    People with oily hair may want to avoid heavy oils (like shea butter, olive oil, etc.) in their DIY shampoo. Instead, they can use ingredients that help to regulate the production of sebum, such as:

    • Apple cider vinegar
    • Aloe vera gel
    • Lemon juice
    • Tea tree oil

    Dry Hair

    Dry hair needs extra moisture to prevent breakage and frizz. Some ingredients that can help to moisturize dry hair include:

    • Coconut milk
    • Honey (manuka honey is fantastic)
    • Jojoba oil
    • Shea butter

    Damaged Hair

    Hair that is damaged or breaking needs extra care to help repair and strengthen it. Here are some ingredients that can help:

    • Argan oil
    • Avocado oil
    • Egg yolks
    • Yogurt

    Color-Treated Hair

    If you have color-treated hair, it’s important to choose ingredients that won’t strip the color or cause fading. Some ingredients that are gentle on color-treated hair include:

    • Chamomile tea
    • Hibiscus powder
    • Rosemary essential oil
    • Silk amino acids

    By choosing ingredients tailored to your hair type, you can create a DIY shampoo that meets your specific needs and helps you achieve healthy, beautiful hair.

    Understanding pH Level in DIY Shampoo

    pH level is an important factor to consider when making your own shampoo. Did you know that pH stands for “potential of hydrogen”? It measures the acidity or alkalinity of a solution on a scale from 0 to 14. A pH of 7 is considered neutral, while anything below 7 is acidic, and anything above 7 is alkaline.

    • The ideal pH level for shampoo is between 4.0 and 6, which is slightly acidic. This is because the natural pH level of our scalp is also slightly acidic, and using a shampoo with a similar pH level can help maintain the health of our scalp and hair.
    • When making DIY shampoo, it’s important to measure the pH level of the final product using a pH testing strip or meter. This can help ensure that the shampoo is safe to use and won’t cause any damage to the scalp or hair.
    • Some ingredients commonly used in DIY shampoo, such as baking soda, can be highly alkaline and may disrupt the natural pH balance of the scalp if not used properly.
    • It’s important to use overly acidic or alkaline ingredients in moderation and dilute them properly with other ingredients to avoid any negative effects. We suggest this when using castile soap as well.

    Understanding the pH level in DIY shampoo is crucial for creating a safe and effective product that can help promote the health of your scalp and hair. And again, it only takes a few seconds to test your final batch with a pH test strip.

    How to Make DIY Shampoo (Liquid)

    Making your own shampoo without castile soap is easier than you might think, especially with all the ingredients we listed earlier. Here are a few simple recipes to get you started:

    Anti-Dandruff Shampoo with Lemongrass Oil:

    • 1/2 cup of coconut milk
    • 1/4 cup of aloe vera gel
    • 1 tbsp of apple cider vinegar
    • 15 drops of lemongrass essential oil
    • 10 drops of tea tree essential oil

    Mix the coconut milk and aloe vera gel. Then, add the apple cider vinegar and essential oils. Shake well before each use. Apply to the scalp and hair, massage gently, and rinse thoroughly.

    Shampoo for Curly Hair:

    • 1/4 cup of coconut milk
    • 1/4 cup of aloe vera juice
    • 1/4 cup of distilled water
    • 1 tbsp of vegetable glycerin
    • 1 tbsp of honey
    • 10 drops of lavender essential oil

    Combine all ingredients in a bottle and shake well. The glycerin and honey are humectants that help moisturize curls and reduce frizz.

    Shampoo for Straight Hair:

    • 1/2 cup of distilled water
    • 1/4 cup of liquid aloe vera
    • 1 tbsp of baking soda
    • 1 tbsp of honey
    • 10 drops of rosemary essential oil

    Dissolve the baking soda in water, and add the aloe vera, honey, and rosemary oil. This mixture can help add shine and keep straight hair sleek.

    Shampoo for Sensitive Scalp:

    • 1/2 cup of oat milk (homemade by blending and straining oats with water)
    • 1/4 cup of aloe vera juice
    • 1 tsp of avocado oil
    • 1/2 tsp of sweet almond oil
    • 10 drops of chamomile essential oil

    Mix all ingredients and shake well. Oat milk and chamomile are soothing for a sensitive scalp.

    Volumizing Shampoo for Fine Hair:

    • 1/2 cup of rose water
    • 1/4 cup of aloe vera gel
    • 1 tbsp of lemon juice
    • 1 tbsp of vodka (optional, helps to remove product buildup)
    • 10 drops of peppermint essential oil

    Combine the rose water, aloe vera gel, and lemon juice. Add vodka if using, which can help to de-grease and add volume by removing residue. Stir in the peppermint essential oil for a refreshing scent and to stimulate the scalp.

    For all recipes, shake well before each use, apply to your hair, and massage into the scalp. After washing, finish with a thorough rinse. After rinsing, apply a natural conditioner as needed.

    Making your own shampoo and conditioner is a great way to save money and reduce your exposure to harmful chemicals. These simple recipes allow you to enjoy nourished, beautiful hair without breaking the bank. Feel free to incorporate some of the other ingredients listed earlier in our post and test the pH of your customized homemade shampoo.

    Dry Shampoo Recipes for Light, Dark, and Red Hair

    For a quick hair refresh without without the water, DIY dry shampoo is a practical and simple alternative. It’s easy to make with ingredients you likely have in your pantry, and it’s perfect for those times when a traditional wash isn’t possible or desired.

    Below, find three simple recipes for homemade dry shampoo tailored for light, dark, and red hair, helping you keep your hair looking fresh and clean on non-wash days.

    Dry Shampoo for Light Hair:

    • 1/4 cup of arrowroot powder or cornstarch
    • 5 drops of lavender essential oil

    Simply mix the arrowroot powder or cornstarch with the lavender essential oil for a calming scent. Apply to the roots of your hair with an old makeup brush or applicator brush, wait a few minutes, and then brush out thoroughly.

    Dry Shampoo for Dark Hair:

    • 1/4 cup of cornstarch
    • 1/4 cup of baking soda
    • 1 tablespoon of cocoa powder (add more if needed for darker hair)
    • Optional: Add 2-3 drops of any essential oil of your choice for fragrance (rose, lavender, or sandalwood are great choices

    Combine the dry ingredients, adjusting the cocoa powder according to the darkness of your hair. Add the essential oil if desired. Apply to the roots and brush out.

    Dry Shampoo for Red Hair:

    • 1/4 cup of arrowroot powder or cornstarch
    • 1 tablespoon of cinnamon
    • 1 tablespoon of cocoa powder
    • Optional: 2-3 drops of an essential oil of your choice for fragrance

    Mix the arrowroot powder or cornstarch with the cinnamon and cocoa powder to achieve a color that matches red hair. Add the essential oil if desired for scent. Sprinkle on the roots, wait a few minutes, and then brush through the hair.

    Preservation and Shelf Life

    When making DIY shampoo without castile soap, it’s important to consider preservation and shelf life. Without the use of preservatives, homemade shampoo can quickly spoil. Therefore, it’s best to make your shampoo in typical batch sizes, just enough to last you for a few weeks.

    To extend the shelf life of homemade shampoo, use a natural preservative like grapefruit seed extract, vitamin E, or rosemary essential oil. These natural preservatives can be added to your shampoo recipe in small amounts to prevent the growth of bacteria and mold.

    It’s important to note that even with the use of natural preservatives, homemade shampoo may not have the same shelf life as store-bought shampoos, but for good reason: no chemicals.

    Lastly, exposure to heat, sunlight, and moisture can cause the shampoo to spoil more quickly. With that in mind, storing homemade shampoo in a cool, dry place will further help extend its shelf life.

    Closing Thoughts

    If you’re looking to mix up your hair care routine with a DIY approach, you might find that skipping castile soap in your homemade shampoo recipes can be a refreshing change. Castile soap is a fantastic natural cleanser for those who love it (like our family), but it’s not the only path to clean, healthy hair.

    For those of you who prefer not to include it in your homemade shampoo concoctions, you can easily see that’s more than possible with the plethora of other natural ingredients that can be used instead.

    Going the natural route with DIY shampoo means ditching the harsh chemicals and keeping it simple. It’s perfect if you’ve got a sensitive scalp or if you like knowing exactly what’s going into your hair care. Plus, you get to handpick every ingredient to ensure it’s just right for your hair. At the end of the day, you have a shampoo made by you and for you.

    Frequently Asked Questions

    How do you make 100% natural shampoo?

    To make 100% natural shampoo, you can use ingredients such as aloe vera gel, coconut milk, essential oils, apple cider vinegar, vegetable glycerin, castile soap, etc.

    As we wrote about in this blog post, natural DIY shampoos can also be made without castile soap. Natural ingredients are free from synthetic chemicals and can be combined in different ratios to create a shampoo that suits your hair type.

    How do you make natural shampoo from scratch?

    There are many ways to make a natural shampoo from scratch. Key steps would include selecting your base ingredients, mixing them together, and then testing the resulting pH level, which would best be between 4.0 and 6.0 on the pH scale.

    Base ingredients could be one or a combination of any of these: water, castile soap, vegetable glycerin, apple cider vinegar, oil (olive oil, coconut oil, shea butter, etc.), along with additional ingredients like essential oils, honey, baking soda, etc.

    How do you make homemade PH-balanced shampoo?

    To make homemade pH-balanced shampoo, you can use ingredients such as aloe vera gel, apple cider vinegar, and honey. These ingredients can help balance the pH of the scalp and hair, thus preventing damage.

    If you find your shampoo is either too acidic (less than 4.0 pH) or too alkaline (over 7.0 pH), you can use vinegar to lower it or water, baking soda, or other ingredients to increase it. The idea is to get an ending pH between the ideal 4.0 and 6.0 levels.

    What can I use instead of Castile soap for homemade shampoo?

    You can use ingredients such as baking soda, coconut milk, apple cider vinegar, or even water to clean the hair of impurities, as an alternative to Castile soap.

    Many recipes are available for different applications, including recipes for dry shampoos on no-wash days (see the above recipes earlier in the post).

    What’s a good beard wash recipe without Castile soap?

    To make a beard wash recipe without Castile soap, you can use many of the same ingredients mentioned earlier in this post. Here’s a simple and effective DIY beard wash recipe that doesn’t use castile soap:

    DIY Beard Wash Recipe Ingredients:

    • 1/4 cup distilled water
    • 1 tablespoon baking soda
    • 2 tablespoons raw honey
    • 2 tablespoons apple cider vinegar
    • 5-10 drops of essential oil (such as tea tree for its antibacterial properties or peppermint for a refreshing scent)

    Test the final pH with a pH strip since it can vary depending on whether you have soft or hard water.

  • DIY Oatmeal Face Mask: Easy Recipe and 17 Common Ingredients

    DIY Oatmeal Face Mask: Easy Recipe and 17 Common Ingredients

    DIY Oatmeal Face Mask: Easy Recipe and 17 Common Ingredients

    Oatmeal is not just a healthy breakfast option but has numerous benefits for the skin. It’s also known to soothe irritated skin, reduce inflammation, and moisturize dry skin. It is no wonder that oatmeal is a popular ingredient in many skincare products, including face masks.

    However, store-bought face masks can be expensive, and the ingredients list can be long and confusing.

    That’s where DIY oatmeal face masks come in.

    Making a DIY oatmeal face mask is easy and affordable. All you need is some oatmeal and a few other ingredients that you probably already have in your kitchen. They can be customized to suit different skin types and concerns. Whether you have dry, oily, or sensitive skin, any DIY oatmeal mask recipe can easily be tailored to your skin type.

    In this article, we will explore the benefits of oatmeal for the skin and provide some easy DIY oatmeal face mask recipes that you can try at home. With these recipes, you can give your skin the TLC it deserves without breaking the bank or exposing it to harsh chemicals.

    Understanding the Benefits of Oatmeal

    Oatmeal’s an amazing breakfast treat when cooked right, but it’s an incredible skincare ingredient, too. It’s been used for decades for eczema sufferers for the reasons mentioned a bit ago. There are also several soaps, including DIY soaps, that contain colloidal oatmeal as a key ingredient for that reason.

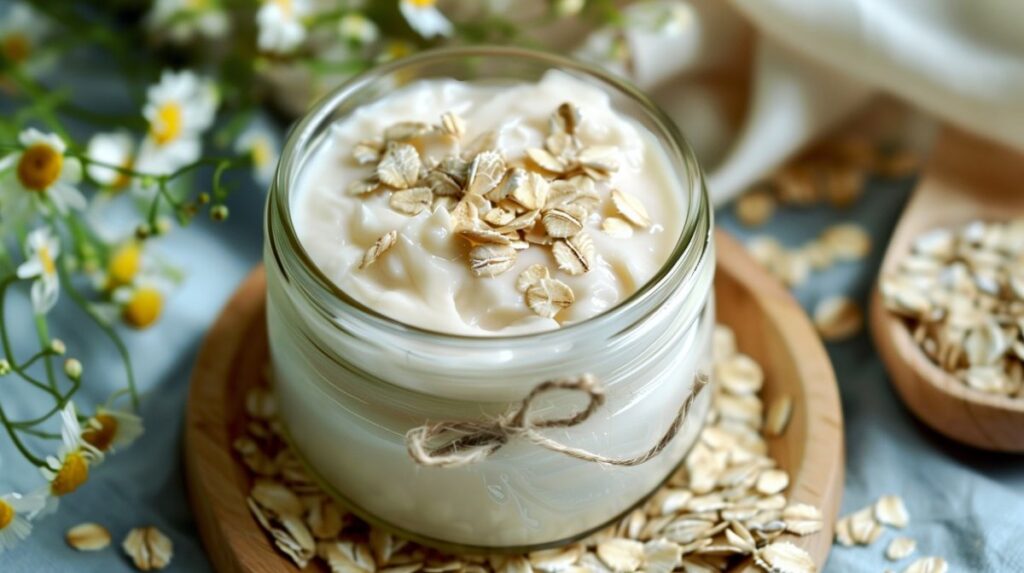
    • Colloidal oatmeal, a finely ground version of oatmeal, is particularly effective in skincare products due to its ability to form a protective barrier on the skin. This barrier helps to lock in moisture and prevent irritation and inflammation.
    • It’s rich in minerals such as magnesium, potassium, and phosphorus. These minerals help to nourish the skin and promote a healthy, glowing complexion.
    • Oatmeal contains avenanthramides, which are unique antioxidants that have been shown to soothe and calm irritated skin.
    • Avena sativa, the scientific name for oats, is also a natural source of saponins, gentle cleansing agents that help remove dirt and impurities from the skin.

    Clearly, oatmeal is a versatile and effective ingredient in skincare, making it a fantastic option for DIY face masks. Its anti-inflammatory, antioxidant, and nourishing properties make it an excellent choice for all skin types, particularly those with sensitive or irritated skin.

    Why DIY Face Masks

    DIY face masks have become increasingly popular in recent years, and for good reason. Not only are they cost-effective, but they also offer a range of benefits that store-bought masks may not provide. Here are a few reasons why you should consider making your own face mask, specifically an oatmeal face mask.

    Cost-Effective

    DIY face masks are a great way to save money, as they typically require only a few ingredients that you may already have in your pantry. Oatmeal, for example, is a common household item that can be used as a base for a face mask, making it an affordable option.

    Customizable

    As mentioned earlier, one of the biggest advantages of making your own face mask is that you can customize it to suit your specific skin type. Oatmeal, for instance, is great for those with sensitive skin, as it can help soothe irritation and reduce inflammation. You can create a face mask that targets your unique skin concerns by experimenting with different ingredients.

    Natural Ingredients

    Many store-bought face masks contain harsh chemicals that can irritate the skin. DIY face masks, on the other hand, often use natural ingredients that are gentle and nourishing. Oatmeal, for example, is a natural exfoliant that can help remove dead skin cells and reveal a brighter complexion.

    As discussed elsewhere, one goal at Enticingly Simple is to equip readers with the ability to reduce their regular exposure to synthetic chemicals. That includes transitioning to natural solutions, from the toothpaste you brush with daily to the cleaners you expose yourself to; natural solutions are effective in their own right.

    Easy to Make

    Making your own face mask is easier than you may think. With just a few simple ingredients and a little time, you can create a mask tailored to your skin’s needs. Plus, you can make a larger batch and store it for future use.

    DIY oatmeal face masks are a cost-effective, customizable, and natural alternative to store-bought masks. By making your own mask, you can take control of your skincare routine and achieve healthy, glowing skin.

    17 Amazing Ingredients for DIY Oatmeal Face Mask Recipes

    Making a DIY oatmeal face mask is a simple and cost-effective way to improve your skin’s health. The ingredients for this mask are easily available and can be found in most kitchens. Here are some of the ingredients you can use to make a DIY oatmeal face mask:

    • Oatmeal: Oatmeal is the main ingredient in this face mask. It is rich in antioxidants and has anti-inflammatory properties that can help soothe irritated skin. Oatmeal can also absorb excess oil and moisture from the skin, making it an excellent ingredient for people with oily skin. Grinding oatmeal into a fine powder to make colloidal oatmeal is recommended.
    • Honey: Honey is a natural humectant that can help moisturize the skin. It also has antibacterial properties that can help prevent acne and other skin infections. When it comes to skincare, any honey will do, but manuka honey is best.
    • Milk: Milk is rich in lactic acid, which can help exfoliate the skin and remove dead skin cells. It also contains vitamins and minerals that can nourish the skin.
    • Coconut oil: Coconut oil is a natural moisturizer that can help hydrate the skin and also has antimicrobial properties that can help with acne and similar skin issues.
    • Apple: Apples contain alpha-hydroxy acids (AHAs) that can help exfoliate the skin and improve its texture. They also contain vitamins and minerals that can nourish the skin.
    • Yogurt: Yogurt is rich in lactic acid, which can help exfoliate the skin and remove dead skin cells. It also contains probiotics that can help balance the skin’s microbiome.
    • Apple cider vinegar: Apple cider vinegar has astringent properties that can help tighten the skin and reduce the appearance of pores. It also has antibacterial properties that can help prevent acne and other skin infections.
    • Lemon: Lemon contains citric acid, which can help exfoliate the skin and improve its texture. It also has antibacterial properties that can help prevent acne and other skin infections.
    • Almond oil: Almond oil is a natural moisturizer that can help hydrate the skin. It also contains vitamins and minerals that can nourish the skin.
    • Banana: Bananas contain vitamins and minerals that can nourish the skin. They also contain antioxidants that can help protect the skin from damage.
    • Sage: Sage has anti-inflammatory properties that can help soothe skin, plus antimicrobial properties that can help prevent acne and other skin infections.
    • Rose water: Rose water has astringent properties that can help tighten the skin and reduce the appearance of pores. It also has anti-inflammatory properties and helps to soothe the skin, including irritated skin.
    • Cinnamon: Cinnamon has antimicrobial properties that can help prevent acne and other skin infections. It also has anti-inflammatory properties that can help soothe skin.
    • Aloe: Aloe has anti-inflammatory properties that can help soothe the skin. It also has moisturizing properties that can help hydrate the skin.
    • Green tea: Green tea contains antioxidants that can help protect the skin from damage. It also has anti-inflammatory properties that can help soothe irritated skin.
    • Cucumber: Cucumber has astringent properties that can help tighten the skin and reduce the appearance of pores. It also has anti-inflammatory properties and can reduce inflammation.
    • Jojoba oil: Jojoba oil is a natural moisturizer that can help hydrate the skin. It also has anti-inflammatory properties that can help soothe irritated skin.

    Recipes could include a combination of any of the above ingredients to make a DIY oatmeal face mask, even egg whites, which we didn’t include above. Each ingredient has its own unique benefits for the skin. When making a DIY face mask, it’s important to choose ingredients that are suitable for your skin type and avoid any ingredients that may cause irritation or allergic reactions.

    Lastly, essential oils can be combined with a basic face mask recipe to glean from their many skincare benefits. That opens up endless options for tailoring your face mask recipe to your skin type, as well as the overall skincare benefit profile you’d like to achieve.

    Preparation and Application

    Preparing and applying an oatmeal face mask is a simple process that can be done at home with just a few ingredients.

    To make the mask, one can use a food processor or blender to grind rolled oats into a fine powder. Alternatively, one can use pre-ground oat flour. A recipe for a basic oatmeal face mask is as follows:

    • 1/2 cup of rolled oats or oat flour
    • 1/4 cup of warm water
    • 1 tablespoon of honey
    • Essential oils (optional, according to preference)

    To prepare the mask, mix the oats and warm water in a bowl until it forms a paste. Then, add the honey and mix well.

    Before applying the mask, it is important to have a clean face. One can cleanse their face with a gentle cleanser and warm water or use a facial steamer to open up pores.

    It is also recommended to do a patch test on a small area of skin before applying the mask to the entire face. This can help ensure the mask does not cause any adverse reactions or irritation.

    Once the mask is prepared and the face is clean, apply the mask in a thin, even layer to the face. Avoid the eye area and any open wounds or cuts. Leave the mask on for 10-15 minutes or until it has completely dried.

    To remove the mask, gently rinse the face with warm water and pat dry with a towel. Follow up with a moisturizer to hydrate the skin.

    Preparing and applying an oatmeal face mask is an easy and affordable way to relax comfortably at home with a spa-like treatment. Turn on a diffuser and some relaxing music, close your eyes, and pamper yourself.

    Specific Skin Conditions and Oatmeal Masks

    Oatmeal masks are a popular choice for those looking for a DIY face mask option that can help with specific skin conditions. Here are some common skin issues and how oatmeal masks can help:

    Dry Skin

    Oatmeal is a natural humectant, which means it can help to lock in moisture and keep skin hydrated. Oatmeal masks can be especially beneficial for those with dry skin, as they can help to soothe and moisturize the skin.

    Sensitive Skin

    Oatmeal is also known for its soothing properties, which can make it a great option for those with sensitive skin. Oatmeal masks can help to calm and soothe irritated skin, reducing redness and inflammation.

    Acne-Prone Skin

    Oatmeal masks can be a great option for those with acne-prone skin, as they can help to exfoliate and remove dead skin cells. This can help to unclog pores and reduce the occurrence of breakouts. Additionally, oatmeal contains anti-inflammatory properties, which can help to reduce inflammation associated with acne.

    After you apply the mask, wash with a natural and gentle cleanser, then apply a light moisturizer that’s suitable for acne.

    Aging Skin

    Oatmeal contains antioxidants, which can help to protect the skin from damage caused by free radicals. This can help reduce fine lines and wrinkles, making oatmeal masks a great option for those with mature skin.

    Eczema and Psoriasis

    Oatmeal has been shown to have anti-inflammatory properties, which can make it a great option for those with eczema or psoriasis. Oatmeal masks can help to soothe inflamed skin, reducing itching and irritation.

    Oatmeal masks can be a great option for those looking for a natural, DIY face mask that can help with various skin issues. For those with sensitive skin especially, it’s not always easy to find something that’s gentle enough.

    Oatmeal is about as gentle as it gets! Of course, it’s never a bad idea to patch-test first.

    7 Additional Skincare Reminders for Healthy Skin

    In addition to using an oatmeal face mask, there are other skincare tips that can help improve the appearance and health of your skin.

    1.) Hydrate: Drinking plenty of water is essential for maintaining hydrated, healthy skin. Aim for at least eight glasses of water per day.

    2.) Cleanse: Use a gentle cleanser to remove dirt, oil, and makeup from your skin. Avoid harsh, abrasive cleansers that can strip your skin of its natural oils.

    3.) Moisturize: After cleansing, apply a moisturizer to your face to keep your skin hydrated and soft. Look for moisturizers that contain ingredients like lactic acid, niacin, and zinc, which can help improve the texture and appearance of your skin.

    4.) Protect from UV radiation: Protect your skin from the harmful effects of UV radiation by wearing a sunscreen SPF rating suitable for your sun exposure on any given day. You can also wear a hat or seek shade during peak sun hours, which is what we typically do to avoid exposure to the chemicals in traditional sunscreens.

    5.) Use skin care products with essential oils: Essential oils like patchouli and palmarosa can help nourish and moisturize the skin. Look for skincare products that contain essential oils and other natural ingredients to help keep your skin healthy and radiant.

    6.) Use an astringent: An astringent can help remove excess oil from your skin and tighten your pores. Many natural ingredients have astringent properties, like tea tree essential oil.

    7.) Incorporate vitamin E: Vitamin E is a powerful antioxidant that can help protect your skin from damage caused by free radicals. Look for skincare products that contain vitamin E to help keep your skin looking young and healthy.

    Following these additional skincare tips can help keep your skin looking its best. And, perhaps most importantly, you’ll take yet another step to reduce your regular exposure to chemicals from traditional skincare products.

    Homemade Oatmeal Face Mask DIYs

    What are the benefits of using an oatmeal face mask?

    Oatmeal face masks are known for their ability to soothe and hydrate the skin. They can also help to reduce inflammation and redness, making them a great choice for people with sensitive skin. Oatmeal contains saponins, which are natural cleansers that can help to remove dirt and impurities from the skin.

    How do you make an oatmeal face mask for eczema?

    Mix 1/2 cup of ground oats with 1/4 cup of warm water to make an oatmeal face mask for eczema. Let the mixture sit for a few minutes until the oatmeal has absorbed the water and become soft. Add 1 tablespoon of honey and 1 tablespoon of coconut oil to the mixture and stir well. Apply the mask to your face and leave it on for 15-20 minutes before rinsing off with warm water.

    Can an oatmeal face mask help with rosacea?

    Oatmeal face masks can be helpful for people with rosacea because they can help reduce inflammation and redness. To make an oatmeal face mask for rosacea, mix 1/2 cup of oatmeal with 1/4 cup of plain yogurt and 1 tablespoon of honey. Apply the mixture to your face and leave it on for 15-20 minutes before rinsing off with warm water.

    What are the benefits of using milk and oatmeal in a face mask?

    Milk and oatmeal are both great ingredients for hydrating and soothing the skin. Milk contains lactic acid, which can help to exfoliate and brighten the skin. To make a milk and oatmeal face mask, mix 1/2 cup of oatmeal with 1/4 cup of milk and 1 tablespoon of honey. Apply the mixture to your face and leave it on for 15-20 minutes before rinsing off with warm water.

    Keep in mind that if you have allergies to dairy, you should avoid using milk on your skin. Instead, you could just use water for your mask.

    Is an oatmeal face mask suitable for dry skin?

    Yes, oatmeal face masks are great for people with dry skin because they can help to hydrate and soothe the skin. To make an oatmeal face mask for dry skin, mix 1/2 cup of oatmeal with 1/4 cup of warm water and 1 tablespoon of honey. Apply the mixture to your face and leave it on for 15-20 minutes before rinsing off with warm water.

    Can an oatmeal face mask help with blackheads?

    Oatmeal face masks can help remove dead skin cells and unclog pores, which can help reduce the appearance of blackheads. Mix 1/2 cup of ground or colloidal oatmeal with 1/4 cup of warm water and 3-5 drops of tea tree, lavender, or myrtle essential oil to make an oatmeal face mask for blackheads. Apply the mixture to your face and leave it on for 15-20 minutes before rinsing off with warm water.

  • Homemade Peppermint Shampoo: Simple Recipe for Healthy Hair

    Homemade Peppermint Shampoo: Simple Recipe for Healthy Hair

    Homemade Peppermint Shampoo: Simple Recipe for Healthy Hair

    Peppermint is a popular ingredient in many hair care products, thanks to its refreshing scent and many benefits for the hair and scalp. Homemade peppermint shampoo is a great way to harness these benefits while avoiding the harsh chemicals found in many commercial shampoos.

    Whether you’d like to create a DIY shampoo that awakens your senses or soothes an itchy scalp, peppermint essential oil is a fantastic ingredient for hair care. With a little effort and a few simple, inexpensive ingredients, you can create a natural, effective shampoo tailored to your hair type.

    Understanding Homemade Shampoo

    Homemade shampoo has become increasingly popular in recent years, with many people looking for natural and organic alternatives to traditional store-bought shampoos. DIY shampoo recipes can be made with various natural ingredients, including peppermint, which has a refreshing and invigorating scent.

    When making homemade shampoo, it’s important to remember that natural ingredients may not lather as much as traditional shampoos.

    • Commercial shampoos often contain artificial foaming agents that create lots of bubbles and suds.
    • This does not mean that natural shampoos are not effective at cleaning your hair. In fact, many people find that homemade shampoos leave their hair feeling even more clean and refreshed without stripping away natural oils.

    Comparing Homemade and Commercial Shampoos: Continued

    While commercial shampoos are convenient and widely available, they may contain harmful chemicals that can damage hair and skin. On the other hand, homemade shampoos can be made with natural ingredients and are often gentler on hair and skin.

    Commercial Shampoos

    Commercial shampoos are widely available and come in various formulas for different hair types.

    • Many commercial shampoos contain toxic chemicals such as sulfates, parabens, and synthetic fragrances that can strip hair of its natural oils and cause irritation or allergic reactions.
    • In addition, some commercial shampoos may even contain microplastics that can harm the environment.

    Homemade Shampoos

    Homemade shampoos can be made using natural ingredients such as essential oils, apple cider vinegar, and baking soda. These ingredients can help to cleanse and nourish hair without the use of harsh chemicals.

    • Homemade shampoos can be customized to suit individual hair types and preferences.
    • While homemade shampoos may not lather as much as commercial shampoos, they can still effectively clean hair and leave it feeling soft and healthy.
    • Homemade shampoos are often more environmentally friendly than commercial shampoos, as they do not contain harmful chemicals or microplastics.
    • One of the main benefits of homemade shampoo is controlling the ingredients that go into your hair care products. By making your own shampoo, you can choose precisely the natural and organic ingredients that are gentle and nourishing for your hair.

    By using natural ingredients and avoiding harsh chemicals, you can create a gentle and effective shampoo that is better for both your hair and the environment.

    Ingredients for Homemade Peppermint Shampoo

    Making your own peppermint shampoo is a great way to ensure that you are using natural, safe ingredients in your hair, as already mentioned. Additionally, by creating your own DIY shampoo, you’re able to tailor fragrances and other many other properties to your exact preferences.

    Your creation tailored precisely according to your preferences.

    Here are some of the key ingredients you will need to make your own homemade peppermint shampoo:

    Essential Oils

    • Peppermint essential oil is the star of this shampoo, providing a refreshing and invigorating scent. The menthol contained in it works to soothe the scalp and reduce dandruff. Peppermint oil is also known to promote hair growth and improve hair texture.
    • Other essential oils that can be added to the shampoo include rosemary essential oil, chamomile essential oil, lavender essential oil, jasmine essential oil, palmarosa essential oil, and tea tree essential oil. Each of these oils has its unique benefits for hair and scalp health.

    Base Ingredients

    The base ingredients of this shampoo include castile soap, olive oil, and coconut milk. Castile soap is a gentle and natural soap that is perfect for use on hair. Olive oil helps to moisturize and nourish hair, while coconut milk provides a creamy and luxurious texture.

    Additional Ingredients

    Other ingredients that can be added to the shampoo include aloe vera, glycerin, and jojoba oil. Aloe vera is a natural conditioner that can help soothe and nourish hair, while glycerin helps lock in moisture. Jojoba oil is a lightweight oil that is easily absorbed by hair and can help to strengthen and protect it.

    Optional Ingredients

    Depending on your hair type and needs, many other optional ingredients can be added to the shampoo. These ingredients include apple cider vinegar, honey (manuka is best), green tea, baking soda, almond oil, and more. Experiment with different combinations to find the perfect recipe for your hair.

    Making your homemade peppermint shampoo is a great way to ensure you use safe and natural ingredients in your hair routine. With a few simple ingredients, you can create a shampoo tailored to your specific hair type and needs.

    Peppermint Essential Oil Moisturizing Shampoo: DIY Recipe

    Making homemade peppermint shampoo is a simple and cost-effective way to get a refreshing and invigorating hair wash. Check out the easy DIY recipe below. This shampoo uses peppermint essential oil paired with moisturizing and lathering ingredients to leave your scalp moisturized and your hair feeling refreshed, clean, and soft.

    Ingredients

    • 1/2 cup castile soap
    • 1/4 cup coconut oil or olive oil
    • 1/4 cup aloe vera gel
    • 1/4 cup distilled water
    • 2 tbsp vegetable glycerin
    • 20 drops peppermint essential oil

    Instructions

    1. Melt the coconut or olive oil if solid.
    2. Gently mix the castile soap, oils, aloe vera gel, glycerin, and water with a whisk until smooth and creamy.
    3. Add the peppermint essential oil and mix until well combined.
    4. Transfer to a bottle and seal. Foaming bottles or flip-cap bottles work well.
    5. Apply to wet hair, massage, and lather.
    6. Rinse thoroughly.
    7. Apply a natural hair conditioner.

    Additional Tips and Recommendations

    • The coconut/olive oil, aloe vera, and vegetable glycerin add moisture while still allowing for a nice lather.
    • You can adjust the oils and other ingredients to suit your hair and scent preferences.
    • We always prefer adding a few drops of jasmine or lavender essential oil for a floral note, which smells terrific with the peppermint EO.
    • If you want a spicier fragrance note, add a few drops of rosemary EO, which has also been demonstrated to promote hair growth in recent studies.

    Again, this is a fantastic shampoo alternative to store-bought shampoos and can be customized to suit your hair’s needs.

    Benefits of Homemade Peppermint Shampoo: Summarized

    Here’s a quick summary of many of the benefits of this wonderful homemade shampoo.

    BenefitDetails
    Scalp HealthPeppermint oil promotes a healthy scalp by reducing itching and irritation with its cooling, soothing menthol. It also has antiseptic properties.
    Hair HealthPeppermint oil stimulates hair growth by increasing blood flow to the scalp. It nourishes and strengthens hair to prevent breakage and hair loss.
    HydrationHomemade shampoo allows you to use simple, natural ingredients like castile soap, oils, aloe vera, and essential oils without harsh chemicals.
    Fresh ScentThe minty scent of peppermint oil leaves hair smelling clean and refreshed.
    Natural IngredientsMaking your own shampoo is cheaper than buying products from the store while still providing high-quality hair care.
    CustomizableYou can adjust the ingredients and amount of essential oils based on your hair and scent preferences.
    Cost-EffectiveMaking your own shampoo is cheaper than buying products from the store while still providing high-quality hair care.

    Safety Measures and Considerations

    When making homemade peppermint shampoo, it is important to take certain safety measures and considerations to ensure that the final product is safe to use. Here are some things to keep in mind:

    Patch Test

    Before using the shampoo or any natural beauty product, it is recommended to perform a patch test to ensure that you are not allergic to any of the ingredients.

    Vegan

    If you are vegan, you may want to use vegan-friendly ingredients when making the shampoo. This means avoiding ingredients such as honey, milk, egg, and opting for plant-based alternatives instead.

    Essential Oils

    Peppermint essential oil is a key ingredient in this shampoo, but it should be used with caution, as with any essential oil. Essential oils are highly concentrated and can cause skin irritation if not diluted properly. Be sure to follow the recipe and use the recommended amount of peppermint oil. Never apply any essential oil directly onto the skin without properly diluting it first.

    Storage

    Store the shampoo in a cool, dry place away from direct sunlight. This will help preserve the ingredients’ quality and prevent the shampoo from spoiling. Again, foaming soap bottles or flip-up bottles work great for storage and easy usage.

    By following these safety measures and considerations, you can create a safe and effective homemade peppermint shampoo that is suitable for your hair type.

    Alternatives to Liquid Shampoo

    For those who want to avoid liquid shampoos, a few alternatives are available.

    Soap Bars: One popular option is shampoo bars, solid bars of soap specifically formulated for hair. These bars are often made with natural ingredients and can be a great option for sensitive skin users.

    Dry Shampoo: Another alternative is dry shampoo, a powder that can be sprinkled onto the hair and brushed out. This can be a great option for those who want to extend the time between washes or who don’t have access to water.

    Baking Soda and Apple Cider Vinegar: Some people also use baking soda or apple cider vinegar as a natural alternative to liquid shampoo. Baking soda can be mixed with water to create a paste, which is then applied to the hair and rinsed. Apple cider vinegar can be diluted with water and used as a rinse after washing the hair.

    It’s important to note that not all alternatives will work for everyone, and it may take some trial and error to find the right option. It’s also important to research and choose safe and effective solutions for hair care.

    Homemade Peppermint Shampoo FAQs

    How can I make my own herbal shampoo at home?

    There are many different recipes for making herbal shampoo at home, but most involve steeping herbs in hot water to create an infused liquid. This liquid can then be mixed with a gentle shampoo base to create a custom shampoo that is tailored to your specific hair type and needs. In the above post, we’ve implemented essential oils instead.

    What are the benefits of using essential oils in shampoo?

    Essential oils can provide various benefits when used in shampoo, including adding fragrance, promoting hair growth, and soothing an itchy scalp. However, it is important to use essential oils in moderation and to dilute them properly to avoid irritation.

    Is it possible to make hypoallergenic shampoo at home?

    Yes, it is possible to make hypoallergenic shampoo at home by using gentle, non-irritating ingredients and avoiding common allergens such as fragrances and harsh detergents. Some popular hypoallergenic ingredients include aloe vera, chamomile, and oatmeal.

    What are some recipes for homemade coconut milk shampoo?

    Popular recipes for homemade coconut milk shampoo may oftentimes include mixing coconut milk with liquid castile soap, honey (optional), and essential oils. Other recipes may involve mixing coconut milk with aloe vera gel and essential oils for a soothing, moisturizing shampoo. Below, see the two simple recipes for more info.

    Basic Coconut Milk Shampoo

    • 1/2 cup coconut milk
    • 1/2 cup liquid castile soap
    • 10 drops essential oil (optional)

    Hydrating Coconut Shampoo

    • 1/3 cup coconut milk
    • 1/3 cup aloe vera gel
    • 1/3 cup liquid castile soap

    Yes, peppermint oil can be added to shampoo for a refreshing scent and to provide a cooling sensation on the scalp. However, it is important to use peppermint oil in moderation and to avoid getting it in your eyes.

    How much peppermint oil should I use when making homemade shampoo?

    Using no more than 1-2% peppermint oil in homemade shampoo is recommended to avoid irritation. This means using approximately 4-8 drops of peppermint oil per ounce of shampoo base.

  • 14 Best Essential Oils to Mix with Shea Butter

    14 Best Essential Oils to Mix with Shea Butter

    14 Best Essential Oils to Mix with Shea Butter

    Shea butter is a beloved moisturizer for its ability to soften dry skin. It takes on new aromatic layers and sensory experiences when paired with the right essential oils.

    With so many essential oils available, it can be challenging to determine which one to mix with shea butter.

    This guide explores 14 oils that beautifully complement shea butter. They were selected based on attributes like their fragrance profiles and unique skin-nourishing effects. So, whether you’re looking to combine essential oils with shea butter for a relaxing body butter or to enhance the skin benefits of a DIY skin moisturizer containing shea butter, we’ll discuss the top EOs to use in a bit.

    Most agree that 6-12 drops of essential oil per 1-2 ounces of shea butter is ideal. Of course, you may choose to modify that general rule depending on the oils you’re using and personal preferences.

    Reminder: Always test a small amount of any new DIY skin solution first and avoid direct sunlight after applying photosensitive blends.

    Now, Let’s take a look at the top essential oils to use with shea butter.

    14 Best Essential Oils That Mix Well with Shea Butter

    Shea butter is a popular ingredient in many skincare products due to its moisturizing and nourishing properties. When combined with essential oils, the combination can create a versatile skin moisturizer with a wide variety of benefits that can be tailored to skin type and application needs.

    To keep things simple, we only included a single essential oil in each of the below recipes. However, we purposefully kept the essential oil concentrations somewhat low, rather than the recommended 6-12 drops per ounce of the other ingredients mentioned earlier.

    We did that for two reasons:

    1. You can simply either add more of the single essential oil in the recipe (6 drops per ounce) or blend others with your mixture in accordance with personal fragrance preferences or other skin benefit outcomes. Ideally, you’ll try some other scents to compliment the main EO in each recipe for a total of 6 drops of EOs per ounce of mixture.
      • Example: 8 ounces of ingredients * 6 drops of EOs equals 48 drops of EOs.
      • Consider blending sweet and spicy scents as well as floral and citrus scents for stunning fragrance contrasts.
    2. When making DIY skin recipes for the first time, it’s best to follow the “less is more” rule. Essential oils are highly concentrated, so experiment with less at first; perhaps add a few other scents, then increase the concentration as desired.

    1.) Lavender and Shea Body Butter

    Recipe:

    • 1/2 cup (4 oz) shea butter
    • 1/4 cup coconut oil
    • 1/4 cup jojoba oil
    • 24 drops lavender essential oil

    Lavender creates a deeply relaxing moisturizer. Its calming scent soothes both skin and mind, helping to reduce stress and promote restful sleep. Lavender oil contains powerful anti-inflammatory and antioxidant compounds that reduce acne, irritation, and signs of aging when blended into rich shea butter. A few drops are all that’s needed to relax and rejuvenate tired, stressed skin.

    2.) Frankincense and Shea Body Butter

    Recipe:

    • 1/2 cup (4 oz) shea butter
    • 1/4 cup mango butter
    • 1/4 cup almond oil
    • 24 drops frankincense oil

    Frankincense supports overall skin health and anti-aging with its high concentration of anti-inflammatory boswellic acids. When mixed into moisturizing shea butter, these compounds help reduce redness, scaling, and signs of inflammation. Regular use assists with firming skin tone over time, reducing the appearance of scars and age spots. An indulgent yet reparative moisturizer for mature, dry complexions.

    3.) Tea Tree and Shea Body Butter

    Recipe:

    • 1/2 cup (4 oz) shea butter
    • 1/4 cup cocoa butter
    • 1/4 cup grapeseed oil
    • 24 drops tea tree oil

    Tea tree oil’s powerful antibacterial properties make it an effective treatment for blemish-prone skin when added to shea butter. Its fresh, spa-like scent purifies pores and prevents breakouts without over-drying the skin. A few drops blended into moisturizer provide a simple solution for acne-prone complexions needing a rich moisturizer that won’t encourage bacterial growth.

    4.) Chamomile and Shea Body Butter

    Recipe:

    • 1/2 cup (4 oz) shea butter
    • 1/4 cup coconut oil
    • 1/4 cup olive oil
    • 24 drops chamomile essential oil

    Chamomile contains anti-inflammatory compounds that effectively calm irritated or sensitive skin when added to a moisturizer. Its subtle essence enhances shea butter’s ability to soothe redness, flare-ups, and signs of inflammation. Together, they create a rich yet gentle moisturizer ideal for those with easily aggravated skin types in need of calming relief.

    5.) Sandalwood and Shea Body Butter

    Recipe:

    • 1 cup (8 oz) shea butter
    • 1/4 cup mango butter
    • 1/4 cup jojoba oil
    • 48 drops sandalwood oil

    Sandalwood supports natural cell turnover and reduction of signs of aging due to its antioxidant and anti-inflammatory properties. When blended into rich shea butter, it creates an exotic yet rejuvenating moisturizer that nourishes maturing skin without clogging pores or causing breakouts. Regular use helps reduce fine lines and dullness and supports a smooth, youthful complexion.

    6.) Rose and Shea Body Butter

    Recipe:

    • 1/2 cup (4 oz) shea butter
    • 1/4 cup cocoa butter
    • 1/4 cup almond oil
    • 24 drops rose oil

    Rose oil nourishes the skin with antioxidants that brighten the complexion and reduce signs of aging over time. When combined with hydrating shea butter, its sweet floral aroma lifts mood while its stress-relieving properties enhance skin’s radiance, firmness, and resilience. It is a true luxury blend indeed that will leave you feeling extra pampered.

    7.) Peppermint and Shea Body Butter

    Recipe:

    • 1/2 cup (4 oz) shea butter
    • 1/4 cup coconut oil
    • 1/4 cup grapeseed oil
    • 24 drops peppermint oil

    Peppermint’s refreshing properties make it an invigorating addition to moisturizers. Its cooling menthol soothes irritation, reduces puffiness, and provides relief to tired skin when blended into shea butter. The resulting moisturizer awakens the complexion for an energized boost.

    8.) Ylang Ylang and Shea Body Butter

    Recipe:

    • 1 cup (8 oz) shea butter
    • 1/4 cup mango butter
    • 1/4 cup jojoba oil
    • 48 drops ylang ylang oil

    Ylang-ylang has a profoundly relaxing and mood-enhancing effect. When blended into rich shea butter, it creates an indulgent moisturizer that melts tension from both skin and mind. This is a great essential oil for massage oil applications as well.

    9.) Jasmine and Shea Body Butter

    Recipe:

    • 3/4 cup (6 oz) shea butter
    • 1/4 cup cocoa butter
    • 1/4 cup olive oil
    • 36 drops jasmine oil

    Jasmine’s intoxicating floral scent enhances shea butter’s ability to nourish and pamper. Together, they create an ultra-hydrating moisturizer that indulges the senses as it softens skin. The blend of aromatherapy and natural oils melts away daily stresses for a moment of pure relaxation.

    10.) Geranium and Shea Body Butter

    Recipe:

    • 1 cup (8 oz) shea butter
    • 1/4 cup coconut oil
    • 1/4 cup almond oil
    • 48 drops geranium oil

    Due to its astringent and antibacterial properties, geranium supports oil control and blemish reduction. When included in a shea butter moisturizer, it helps to purify pores and clarify complexion without causing over-drying or breakouts. Regular use leaves skin clean and balanced.

    11.) Bergamot and Shea Body Butter

    Recipe:

    • 1/2 cup (4 oz) shea butter
    • 1/4 cup cocoa butter
    • 1/4 cup grapeseed oil
    • 24 drops bergamot oil

    Bergamot oil’s refreshing citrus scent energizes and uplifts mood, while its antiseptic compounds deeply cleanse the skin. Combined with nourishing shea butter, it creates an uplifting citrus-scented moisturizer. Add a few drops of vanilla essential oil for the perfect citrus and sweet scent combination.

    12.) Grapefruit and Shea Body Butter

    Recipe:

    • 3/4 cup (6 oz) shea butter
    • 1/4 cup mango butter
    • 1/4 cup jojoba oil
    • 36 drops grapefruit oil

    Grapefruit refreshes with its natural astringency, helping to tighten pores and brighten skin over time. When added to shea butter, it tones and purifies without stripping moisture.

    13.) Vanilla and Shea Body Butter

    Recipe:

    • 1 cup (8 oz) shea butter
    • 1/4 cup coconut oil
    • 1/4 cup olive oil
    • 48 drops vanilla oil

    Vanilla oil’s sweet, sensual aroma creates a mood-boosting moisturizer when blended with rich shea butter. There are few scents as comforting as vanilla, which is why it’s one of our favorite EOs to add to body butter and creams. Add a few drops of sandalwood essential oil for a spicy twist on the overall sweet scent.

    14.) Carrot Seed and Shea Body Butter

    Recipe:

    • 1/2 cup (4 oz) shea butter
    • 1/4 cup coconut oil
    • 1/4 cup jojoba oil
    • 24 drops carrot seed essential oil

    Carrot seed essential oil supports natural cell turnover and an even skin tone with its antioxidants. In addition to that, it’s known to contain anti-inflammatory properties. As part of a shea butter moisturizer, it enhances the skin’s clarity and radiance over the long term, diminishing imperfections and signs of aging for a youthful-looking complexion.

    Benefits for Hair Health

    Shea butter is known for its nourishing and moisturizing properties, making it an excellent choice for hair care. When combined with essential oils, it can provide additional benefits for hair health. Here are some of the benefits that shea butter and essential oil mixtures can offer for hair:

    • Moisturizing: Shea butter is a natural emollient that can help to moisturize dry and brittle hair. When combined with essential oils like lavender or rosemary, it can provide additional moisture and nourishment to the hair and scalp.
    • Strengthening: Shea butter contains vitamins A and E, which can help to strengthen hair and reduce breakage. Essential oils like peppermint or tea tree can also help to strengthen hair and promote a healthy scalp.
    • Promoting hair growth: Some essential oils, such as rosemary, tea tree, peppermint, and cedarwood, have been shown to promote hair growth. When combined with shea butter, they can help to stimulate hair follicles and promote healthy hair growth.
    • Reducing scalp irritation: Essential oils like chamomile and lavender have anti-inflammatory properties that can help to soothe an irritated scalp. When combined with shea butter, they can help to reduce scalp irritation and promote a healthy scalp.

    Mixing essential oils with shea butter can provide a range of benefits for hair health, including moisturizing, strengthening, promoting hair growth, and reducing scalp irritation.

    Different Types of Shea Butter

    There are different types of shea butter available in the market, and it is essential to understand the differences between them to choose the right one for your needs. So, it would be good to familiarize yourself with the most common types of shea butter before purchasing it as an ingredient in your DIY skincare creations.

    Raw Shea Butter

    Raw shea butter is unrefined and has a yellowish color and nutty aroma. It is extracted from the shea tree nuts using traditional methods and retains all its natural properties. Raw shea butter is rich in vitamins A, E, and F, and it is excellent for moisturizing and nourishing the skin. It is also effective in reducing inflammation and promoting healing.

    Refined Shea Butter

    Refined shea butter is processed to remove impurities and odor, and it has a white color and a neutral scent. It is still rich in vitamins and minerals, but it may not have all the natural properties of raw shea butter. Refined shea butter is smoother and easier to apply, making it a popular choice for cosmetic products.

    Unrefined Shea Butter

    Unrefined shea butter is similar to raw shea butter, but it may undergo some processing to remove the impurities and debris. It retains most of its natural properties and has a nutty aroma and yellowish color. Unrefined shea butter is excellent for moisturizing and healing the skin, and it is suitable for all skin types.

    In conclusion, the choice of shea butter depends on the intended use and personal preference. Raw shea butter is the most natural and potent, while refined shea butter is smoother and easier to apply. Unrefined shea butter is a good compromise between the two. It is essential to choose high-quality shea butter from a reputable source to ensure maximum benefits.

    Other Carrier Oils to Consider

    While shea butter is an excellent carrier oil for essential oils, other oils can be combined with it for added benefits. Here are a few other carrier oils to consider:

    Jojoba Oil

    Jojoba oil is a popular carrier oil that is known for its moisturizing properties. It is rich in essential fatty acids and is easily absorbed by the skin, making it an excellent choice for dry or sensitive skin. Jojoba oil is also non-comedogenic, meaning it won’t clog pores. Combined with shea butter, it can help soothe and nourish the skin.

    Almond Oil

    Sweet almond oil is another carrier oil that is commonly used in skincare products. It is rich in vitamins A and E, which can help to improve the overall appearance of the skin. Almond oil is also lightweight and easily absorbed, making it a good choice for all skin types. When combined with shea butter, it can help to hydrate and soften the skin.

    Apricot Oil

    Apricot oil is a carrier oil that is derived from the kernels of apricots. It is rich in vitamins A, C, and E, as well as essential fatty acids. Apricot oil is known for its moisturizing properties and can help improve the skin’s texture and tone. When combined with shea butter, it can help to soothe and nourish the skin, leaving it feeling soft and supple.

    Overall, there are many carrier oils that can be combined with shea butter to create a nourishing and moisturizing blend. When choosing a carrier oil, it is important to consider your skin type and any specific concerns you may have. By experimenting with different oils, you can find the perfect blend to meet your skincare needs.

    Practical Tips for Mixing Essential Oils with Shea Butter

    When it comes to mixing essential oils with shea butter, there are a few practical tips to keep in mind. Whether you’re making body butter, lotion, creams, or lip balms, these tips will help you achieve the perfect texture, elasticity, absorption, toning, and softening properties.

    First and foremost, it’s important to choose high-quality, organic shea butter and essential oils.

    • This will ensure that you’re getting the best possible results and that you’re not exposing your skin to any harmful chemicals or additives.
    • Due to the natural benefits of essential oils (like rosemary), they can also extend the typical shelf-life of shea butter.

    When mixing essential oils with shea butter, it’s important to use the right proportions. A good rule of thumb is to use 1-2 drops of essential oil per tablespoon of shea butter. This will give you a nice, subtle scent without overpowering the shea butter.

    Another important factor to consider is the texture of your final product. If you’re making body butter or lotion, you’ll want to ensure that the shea butter and essential oils are well-mixed and have a smooth, creamy texture. If you’re making a lip balm, you’ll want to ensure that the mixture is firm enough to hold its shape but soft enough to apply easily.

    In terms of absorption, shea butter is known for its excellent moisturizing properties. When combined with essential oils, it can help to tone and soften the skin while also regulating sebum production. It’s also important to note that shea butter is non-comedogenic, which means that it won’t clog pores or cause breakouts.

    In summary, mixing essential oils with shea butter can be a great way to create high-quality, organic skincare products that are both effective and affordable. By following these practical tips, you can achieve the perfect texture, absorption, and toning properties for your specific needs.

    Conclusion

    Essential oils have many benefits for the skin when used topically in homemade body butter and other natural skincare products. The recipes provided above incorporate carrier oils like shea butter, coconut oil, and jojoba oil, which hydrate and nourish the skin.

    Using six drops of essential oil per ounce of butter ensures the oils are diluted safely for topical application. These recipes offer natural alternatives to store-bought body products. With the right essential oil blend chosen based on individual skin needs, homemade body butters are an affordable, effective way to care for your skin.

    Proper dilution and skin patch testing are still recommended when using any new essential oils topically to check for allergic reactions. But when made following these recipes, the natural ingredients in these essential oil-infused body butter DIYs can provide numerous skincare benefits without harsh chemicals.

    It is remarkable how easily one can incorporate natural beauty practices into their skincare routine with just a few key ingredients.

    Frequently Asked Questions

    What are some good essential oils to mix with shea butter for dry skin?

    Shea butter is an excellent moisturizer for dry skin, and when combined with the right essential oils, it can provide even more benefits. Some of the best essential oils to mix with shea butter for dry skin include lavender, geranium, chamomile, and frankincense. These oils have anti-inflammatory and soothing properties that can help reduce redness and irritation while also promoting healing and hydration.

    What are the best essential oils to use with shea butter for hair?

    Shea butter is a great natural conditioner for hair, and when combined with essential oils, it can provide even more benefits. Some of the best essential oils to mix with shea butter for hair include rosemary, peppermint, lavender, and tea tree oil. These oils can help promote hair growth, reduce dandruff, and soothe an itchy scalp.

    What are some popular essential oil combinations or blends for body butter?

    Body butter is a luxurious moisturizer that can be customized with essential oils to provide a variety of benefits. Some popular essential oil combinations for body butter include lavender and vanilla, grapefruit and peppermint, and bergamot and sandalwood. These combinations can provide a relaxing, invigorating, or grounding experience, depending on your preferences.

    How do I mix shea butter with essential oils for my face?

    When mixing shea butter with essential oils for your face, it’s important to use oils that are gentle and non-irritating. Some good options include lavender, chamomile, geranium, and rose. To mix, simply melt the shea butter in a double boiler, then add a few drops of your chosen essential oil and stir well. Let the mixture cool and solidify before using.

    What are some recommended fragrances to add to shea butter?

    Shea butter has a natural nutty scent, but it can be customized with essential oils to provide a pleasant fragrance. Some recommended fragrances to add to shea butter include vanilla, lavender, peppermint, and citrus oils like lemon or grapefruit. These oils can provide a refreshing, calming, or energizing scent, depending on your preferences.

    Can I use any essential oils with shea butter soap?

    Yes, you can use essential oils with shea butter soap to provide additional benefits and fragrance. Some good options include tea tree oil for its antibacterial properties, lavender for its calming scent, and peppermint for its refreshing aroma. When adding essential oils to soap, it’s important to use oils that are skin-safe and properly diluted.

  • Can Raw Shea Butter Go Bad? Shelf Life and Storage Guide

    Can Raw Shea Butter Go Bad? Shelf Life and Storage Guide

    Can Raw Shea Butter Go Bad? Shelf Life and Storage Guide

    Raw shea butter is a natural ingredient that is widely used in skincare products and hair care products. While it is known for its moisturizing and nourishing properties, many people wonder if it can go bad. The answer is yes: raw shea butter can go bad, but it has a long shelf life if stored properly.

    The shelf life of raw shea butter depends on several factors, such as the quality of the butter, the storage conditions, and the presence of contaminants.

    • Raw shea butter that is unrefined and pure has a longer shelf life than refined shea butter.
    • It’s important to store shea butter in a cool, dry place away from direct sunlight and moisture.
    • Contaminants such as water, dirt, and bacteria can cause shea butter to spoil quickly.

    In the next many sections, we’ll explore shea butter, its properties, why it can go bad, and how to store it optimally.

    Understanding Shea Butter

    Shea butter is a fat extracted from the nuts of the African shea tree (Vitellaria paradoxa). It has been used for centuries in African countries for its moisturizing and healing properties. Shea butter is rich in fatty acids, vitamins, and antioxidants, making it a popularly used ingredient in natural beauty and natural skin care products in general.

    It’s so popular by demand that according to a 2022 report by Grand View Research, the global shea butter market size was valued at approximately USD 2.17 billion in 2022.

    Types of Shea Butter

    There are three types of shea butter: raw, refined, and ultra-refined.

    • Raw shea butter is unprocessed and has a yellowish color and a nutty scent.
    • Refined shea butter has been processed to remove impurities and has a white color and a milder scent.
    • Ultra-refined shea butter has been further processed to remove any remaining impurities, has a white color, and has no scent.

    Raw shea butter can go bad over time if it is not stored properly. Exposure to heat, light, and air can cause the butter to spoil and lose its beneficial properties. It is important to store raw shea butter in a cool, dark place to prevent spoilage.

    When purchasing shea butter, it is important to read the label carefully to ensure that you are getting the type of shea butter that you want. Raw shea butter is often labeled as unrefined or virgin, while refined shea butter may be labeled as processed or bleached.

    Shea butter is a versatile and beneficial ingredient in skincare products. Understanding the different types of shea butter and how to properly store them can help you get the most out of this natural ingredient.

    Properties of Shea Butter

    Shea butter contains high concentrations of fatty acids and vitamins that make it an effective moisturizer for the skin. Some of the key beneficial properties of shea butter include:

    Moisturizing – Shea butter is rich in fatty acids like oleic acid that help hydrate and moisturize dry skin. According to WebMD, it works like an emollient to form an oily layer on the skin’s surface to help it retain moisture more efficiently and longer. The fatty acids form a protective barrier on the skin to seal in moisture.

    Anti-inflammatory – Pure shea butter contains anti-inflammatory compounds like cinnamic acid that can reduce skin redness and irritation caused by conditions like eczema. This makes it a good option for soothing inflamed or sensitive skin.

    Softens skin – The fatty acids in shea butter, such as stearic acid, soften the skin and improve its texture by filling in fine lines and moisturizing the dermis (inner skin layer).

    Heals wounds – Shea butter’s anti-inflammatory and moisturizing properties help speed up wound healing. It forms a protective barrier over wounds and burns to keep them from drying out.

    Protects from UV damage – Shea butter contains antioxidants like vitamins A and E that protect skin from sun damage by neutralizing free radicals caused by UV exposure.

    In summary, shea butter’s high concentration of fatty acids, vitamins, and antioxidants makes it effective for moisturizing, soothing, softening skin, and promoting wound healing. Beyond that, it’s especially useful for those with sensitive and dry skin.

    How Shea Butter is Stored: 6 Storage Tips

    Shea butter is a natural product that can last for years if stored properly. The key to storing shea butter is to keep it cool, dry, and away from light. Here are some tips on how to store shea butter:

    1. Store shea butter in an airtight container: Shea butter can easily absorb odors and moisture from the air, which can affect its quality. To prevent this, store shea butter in an airtight container.
    2. Keep shea butter in a cool, dry place: Shea butter should be stored in a cool, dry place away from direct sunlight. Heat can cause shea butter to melt, and moisture can cause it to go rancid.
    3. Use a glass jar: Shea butter can react with plastic containers, so it’s best to use a glass jar to store it. Glass jars are also less likely to leach chemicals into the shea butter.
    4. Store shea butter in the fridge: If you live in a hot and humid climate, it’s best to store shea butter in the fridge to keep it cool and fresh. However, make sure to keep the shea butter in an airtight container to prevent it from absorbing odors from the fridge.
    5. Keep shea butter at room temperature: If you don’t have space in your fridge, you can store shea butter at room temperature. Just make sure to keep it in a cool, dry place away from direct sunlight.
    6. Store shea butter in a pantry: If you have a pantry, you can store shea butter in there. Just make sure to keep it in an airtight container and away from any sources of heat or moisture.

    In summary, storing shea butter properly is essential to keep it fresh and prevent it from going rancid. Following these tips ensures that your shea butter lasts for years and retains its quality.

    Factors Affecting Shea Butter Shelf Life

    Shea butter has a long shelf life, but it can go bad if not stored properly. Several factors can affect the shelf life of shea butter, including heat, light, temperature, humidity, and expiration date.

    Heat is a primary factor affecting the shelf life of shea butter. Exposure to high temperatures can cause the butter to melt, which can lead to spoilage. It is best to store shea butter in a cool, dry place away from direct sunlight and heat sources.

    Light is another factor that can affect the shelf life of shea butter. Exposure to light can cause the butter to oxidize, which can lead to rancidity. It is best to store shea butter in an opaque container or a dark place.

    Temperature fluctuation is also a crucial factor in shea butter shelf life. Extreme temperatures, both hot and cold, can cause the butter to melt or solidify, which can affect its texture and quality. It is best to store shea butter at room temperature.

    Humidity can also affect the shelf life of shea butter. High levels of humidity can cause the butter to become rancid or moldy. It is best to store shea butter in a dry place with low humidity levels.

    Lastly, it is essential to check the expiration date of the shea butter. Expired shea butter can go bad, lose its potency, and become ineffective. It is best to use shea butter within its expiration date or within a reasonable time frame after opening.

    As you can see, several factors can affect the shelf life of shea butter, including heat, light, temperature, humidity, and expiration date. Proper storage and handling can help ensure the quality and longevity of shea butter.

    5 Signs of Shea Butter Going Bad

    Shea butter is a natural product that can last for years without going bad if stored properly. However, like any other natural product, it can go bad over time. There are some key signs you can be on the lookout for if you think your shea butter may be going bad. Here are some clues to look out for to determine whether your shea butter has gone bad or is in the process of spoiling.

    1.) Rancid Smell

    One of the most obvious signs that shea butter has gone bad is a rancid smell. Fresh shea butter has a nutty, earthy scent, but when it goes bad, it can develop a sour, unpleasant odor. If your shea butter smells bad, it’s best to throw it out.

    2.) Changes in Color

    Shea butter can change color over time, especially if it’s exposed to light or heat. Fresh shea butter is usually ivory or pale yellow, but it can turn darker or even brown as it ages. If your shea butter has changed color significantly, it may be a sign that it’s gone bad.

    3.) Grainy Texture

    Fresh shea butter should have a smooth, creamy texture. However, if it’s been stored for a long time or exposed to heat, it can become grainy or lumpy. If your shea butter feels grainy or has a lumpy texture, it’s likely gone bad.

    4.) Mold or Mildew

    If your shea butter has been exposed to moisture, it can develop mold or mildew. Mold can appear as black or green spots on the surface of the shea butter. Mildew can cause a fuzzy growth on the surface. If you see any signs of mold or mildew, it’s best to throw out the shea butter.

    5.) Smokey Smell

    Shea butter can also develop a smokey smell if it’s been exposed to heat or smoke. This can happen if the shea butter is stored near a stove or fireplace. If your shea butter smells smokey, it’s likely gone bad. At the very least, using it as an ingredient in your natural DIY skincare products (like body butter) may not be as appealing if it’s absorbed a smoky scent.

    So, there are several signs to look out for when determining whether shea butter has gone bad. These include a rancid smell, changes in color, grainy texture, mold or mildew, and a smokey smell. If you notice any of these signs, it’s best to throw out the shea butter and purchase a fresh batch.

    Effects of Spoiled Shea Butter

    Spoiled shea butter can have a number of negative effects on the skin. It can cause irritation, allergic reactions, and clog pores. This can lead to rashes, dry skin, and even acne. In addition, using spoiled shea butter on insect bites can actually make the itching and swelling worse.

    Remember, spoilage means shea butter is no longer in its ideal pure form.

    Negative Effects of Using Spoiled Shea Butter

    • Skin irritation – Spoiled shea butter may cause the skin to become irritated, inflamed, or break out in spots due to the growth of bacteria or mold. This is because rancid oils can create free radicals that damage skin cells.
    • Allergic reactions – Using shea butter that has gone rancid could trigger allergic reactions in people sensitive to mold or bacterial growth. Symptoms may include redness, itching, or hives.
    • Acne – The bacterial and mold growth in spoiled shea butter could lead to clogged pores and acne breakouts, as dead skin cells and oils clog follicles.
    • Rashes – Applying rancid shea butter to the skin may cause irritation and small red rashes to develop due to inflammatory reactions.

    Using spoiled shea butter can have negative effects on the skin, including irritation, allergic reactions, and clogged pores. It is important to check for signs of spoilage, such as a change in smell or texture, and to avoid using shea butter that has gone bad.

    Shea Butter in Beauty and Skincare

    Shea butter is a popular ingredient in many beauty products, including moisturizers, body butter, lip balms, deodorants, and soaps. Its moisturizing properties make it ideal for dry and sensitive skin, and it is often used to soothe conditions such as eczema and psoriasis. Shea butter is also believed to have anti-inflammatory properties, which may make it beneficial for acne-prone skin.

    In hair care, shea butter is often added to homemade conditioner and used to moisturize and nourish the hair, promoting healthy growth and preventing breakage. It is particularly useful for curly and kinky hair types, which tend to be dry and prone to damage. Shea butter can be used as a leave-in conditioner or as an ingredient in hair masks and styling products.

    When using shea butter in beauty and skincare products, it is important to ensure that the product is fresh and has not gone bad. While shea butter has a long shelf life, it can go rancid over time, especially if it is not stored properly.

    Preserving Shea Butter

    To preserve the quality of shea butter, it is important to take certain precautions.

    Firstly, shea butter should be stored in a cool, dry place away from direct sunlight. Exposure to heat and light can cause the butter to melt and oxidize, which can affect its texture, color, and scent. It is also important to keep shea butter away from water, as moisture can cause it to spoil.

    To prevent the growth of bacteria and other microorganisms, it is recommended to use a natural preservative when making shea butter products. Several natural preservatives, such as vitamin E oil, grapefruit seed extract, and rosemary extract, can be used. These preservatives can help extend the shelf life of shea butter products and prevent them from going rancid.

    When ordering shea butter, choosing a reputable supplier that sells fresh, high-quality products is important. Some suppliers may sell shea butter that has been sitting on the shelf for a long time, which can affect its quality and potency.

    To preserve the freshness of shea butter, it is recommended to seal it in an airtight container. This can help prevent exposure to air and moisture, which can cause the butter to spoil. To prevent contamination, it is also important to use clean utensils and containers when handling shea butter.

    Preserving shea butter requires proper storage, the use of preservatives, ordering from a reputable supplier, and sealing the butter in an airtight container. By taking these precautions, you can extend the shelf life of shea butter and ensure that it remains fresh and potent.

    Shea Butter in Cooking

    Shea butter is a popular ingredient in many recipes, especially in West African cuisine. It is often used as a substitute for palm oil and can add a unique flavor and texture to dishes.

    Shea Butter for Cooking:

    • Grade A unrefined shea butter is considered safe to eat since it has not been chemically treated. It has a mild nutty flavor.
    • It has a high smoke point of about 450°F, making it suitable for sautéing vegetables or meats. Its thick consistency prevents burning easily.
    • Shea butter can be used similarly to butter or oil in baking and recipes. It adds moisture and nutrition to baked goods.
    • In Africa, shea butter is commonly used to cook peanuts and other nuts due to its high heat tolerance. The nuts take on a subtle flavor.
    • Some cooks add a small amount of shea butter to pan sauces, stews, or soups for its creaminess.
    • As with any new cooking ingredient, shea butter should first be tested in small amounts since its flavor profile is unfamiliar to many.

    Additionally, shea butter can be used in both sweet and savory dishes.

    • In sweet dishes, it can be used as a substitute for butter or oil in recipes such as cookies, cakes, and brownies. It can also be used to make chocolate truffles and other confections.
    • In savory dishes, shea butter can be used to add flavor to soups, stews, and sauces. It can also be used as a spread on bread or used as a base for salad dressings.

    When using shea butter in cooking, it is important to use raw, Grade A, unrefined shea butter. Refined shea butter has been processed and may not have the same nutritional benefits as raw shea butter. So, definitely try this ingredient in cooking. You’ll fall in love with the creamy and subtle nutty flavor.

    Buying Shea Butter

    When purchasing raw shea butter, it is important to consider several factors to ensure that you are getting a quality product. Here are some things to keep in mind:

    Quality

    Look for shea butter that is unrefined and organic. This ensures that the butter has not been processed with chemicals or additives that can compromise its quality. Additionally, organic shea butter is often produced by women’s cooperatives, which helps support the economic empowerment of women in West Africa.

    Manufacturer

    Shea butter is traditionally made by hand in West Africa, where the shea tree is native. Look for products that are sourced from reputable manufacturers who follow sustainable and ethical production practices. This helps ensure that the shea butter is of high quality and that the people who produce it are treated fairly.

    Packaging

    Shea butter should be packaged in a way that protects it from light and air, which can cause it to spoil. Look for products that are sold in opaque or dark-colored containers, and avoid products that are sold in clear or plastic containers.

    Gold

    Some shea butter products are marketed as “gold” or “premium” shea butter. While these terms may suggest higher quality, they are not regulated and do not necessarily indicate better quality. It is important to read the label and look for products that are unrefined and organic, regardless of how they are marketed.

    Women

    As previously mentioned, purchasing shea butter that is produced by women’s cooperatives can help support the economic empowerment of women in West Africa. Look for products that are labeled as fair trade or that indicate that they support women’s cooperatives.

    By considering these factors when purchasing raw shea butter, you can ensure that you are getting a quality product that is produced sustainably and ethically.

    Frequently Asked Questions

    How long can raw shea butter last before going bad?

    Raw shea butter can last up to two years if it is stored properly.

    What are the signs that raw shea butter has gone bad?

    The signs that raw shea butter has gone bad include a rancid smell, a change in color, and a grainy or oily texture.

    Is it safe to use raw shea butter past its expiration date?

    It is not recommended to use raw shea butter past its expiration date as it may cause skin irritation or other issues listed earlier in this article.

    What is the best way to store raw shea butter to prevent it from going bad?

    Raw shea butter should be stored in a cool, dry place away from direct sunlight. It should be kept in an airtight container to prevent exposure to air.

    Can raw shea butter develop mold or bacteria?

    Raw shea butter can develop mold or bacteria if it is not stored properly or if it comes into contact with water.

    What is the difference between rancid and expired raw shea butter?

    Rancid raw shea butter has a distinct unpleasant odor and taste, while expired raw shea butter may not have any noticeable signs but can cause skin irritation or infection if used.

  • DIY Aloe Vera Moisturizer for Acne: 3 Simple Recipes

    DIY Aloe Vera Moisturizer for Acne: 3 Simple Recipes

    DIY Aloe Vera Moisturizer for Acne: 3 Simple Recipes

    Aloe vera is perhaps the most popularly used plant ingredient known for its ability to soothe and heal the skin. It’s quite popularly used in skincare products and is a go-to for relieving sunburn. Did you know Aloe vera is particularly effective in treating acne as well due to its anti-inflammatory and antimicrobial properties?

    For those who suffer from acne, finding the right moisturizer can be a challenge, to say the least. Many commercial moisturizers contain ingredients that can clog pores and exacerbate acne, making it difficult to find a product that works well without causing further breakouts. DIY aloe vera moisturizers for acne can be a great solution for those who are looking for a natural, gentle alternative to commercial products.

    Making your own aloe vera moisturizer for acne is simple and affordable. By using natural ingredients, you can avoid harsh chemicals and other irritants that can aggravate acne-prone skin. Plus, you can customize your moisturizer to suit your specific skin type and needs. Whether you have dry, oily, or combination skin, a DIY aloe vera moisturizer can help to hydrate and soothe your skin while also reducing acne and preventing future breakouts.

    All About Aloe Vera

    Aloe Vera is a succulent plant with healing properties that has been used for centuries to treat various skin conditions and promote overall health. The plant is native to North Africa, but it is now widely cultivated around the world.

    The clear gel that is found inside the aloe leaf is the most commonly used part of the plant for medicinal purposes. The pure aloe vera gel is rich in vitamins, minerals, and antioxidants that help nourish and hydrate the skin. It also contains enzymes that help exfoliate dead skin cells and promote cell renewal.

    It is known for its ability to soothe and calm irritated skin, making it an excellent choice for those with sensitive skin or acne-prone skin.

    Using fresh aloe vera gel is easy and inexpensive. Simply cut open a leaf of the aloe vera plant and scoop out the clear gel. Being that aloe is such a versatile plant, you can use a tablespoon of aloe vera gel as a moisturizer, while a cup of aloe vera juice can be consumed as a health drink. Aloe is even included in some popular mouthwashes for oral health.

    Key Facts About Aloe Vera:

    • Aloe vera contains over 75 active components, including vitamins, minerals, enzymes, amino acids, and polysaccharides.
    • Aloe vera has been shown to have anti-inflammatory, antimicrobial, and antioxidant properties.
    • A study published in the Journal of Ethnopharmacology found that aloe vera gel can be effective in treating psoriasis, a chronic autoimmune skin disease.
    • Another study found that aloe vera can be effective in treating acne vulgaris, a common skin condition.
    • Aloe vera has been shown to help improve wound healing, as well as reduce the risk of infection in wounds.
    • According to a report by the National Institutes of Health, aloe vera is commonly used in cosmetics and personal care products due to its moisturizing and soothing properties.
    • Aloe vera is also commonly used in sunscreens, as it can help protect the skin from UV damage.
    • Another available on PubMed shows Aloe “significantly improves wrinkles and skin elasticity“.
    • According to Verified Market Research, the global aloe vera market was valued at was valued at USD 735.88 Million in 2022. That’s expected to reach over 1.2 billion by 2030.

    Aloe vera has numerous health and skincare benefits backed by scientific research.

    From treating skin conditions like psoriasis and acne to improving wound healing and reducing the appearance of fine lines and wrinkles, aloe vera is a versatile and valuable plant.

    Its healing properties and natural moisturizing abilities make it an excellent choice for those looking for a natural remedy for acne-prone skin.

    Why DIY Aloe Vera Moisturizer

    As mentioned previously, aloe vera is known for its anti-inflammatory and antibacterial properties, making it an effective ingredient for acne-prone skin. However, many commercial moisturizers that contain aloe vera can be expensive, and some may also contain other ingredients that can irritate the skin.

    Making your own moisturizer using aloe vera is a cost-effective and natural solution. By creating your own moisturizer, you can control the ingredients and avoid any unnecessary additives that may be present in store-bought products. Additionally, making your own moisturizer can be a fun and creative process that allows you to customize the product to meet your specific needs.

    DIY aloe vera moisturizer is also a great option for those with sensitive skin. Many commercial moisturizers contain fragrances, preservatives, and other additives that can irritate the skin and cause breakouts. By making your own moisturizer, you can avoid these potential irritants and create a gentle and soothing product for your skin.

    Overall, making your own moisturizer using aloe vera is a simple and effective way to care for your skin without the extra cost of expensive moisturizers. With just a few simple ingredients, you can create a homemade face cream that is gentle, effective, and tailored to your specific needs.

    Benefits for Acne-Prone Skin

    When mixed with other ingredients such as vitamin E oil, tea tree oil, and jojoba oil, aloe vera can be used to make a face moisturizer that helps prevent acne breakouts. These ingredients’ benefits, combined with their anti-inflammatory and antibacterial properties, make for an incredibly skin-nourishing solution.

    Aloe vera gel contains salicylic acid, which is a common ingredient in many acne treatments. Salicylic acid helps to unclog pores, reducing the risk of acne breakouts. Additionally, aloe vera gel has anti-inflammatory properties that can help reduce redness and swelling associated with acne.

    When combined with vitamin E oil, aloe vera can help to repair damaged skin cells, reducing scarring caused by acne breakouts. Vitamin E oil is also a natural antioxidant that helps to protect the skin from damage caused by free radicals.

    Tea tree oil is another ingredient that can be added to aloe vera to make a face mask or moisturizer for acne-prone skin. Tea tree oil has antibacterial properties that can help kill acne-causing bacteria, reducing the risk of future breakouts.

    Jojoba oil is a lightweight oil that is easily absorbed by the skin, making it a good choice for use in aloe vera face masks and moisturizers. Jojoba oil has anti-inflammatory properties that can help reduce redness and swelling associated with acne.

    Using aloe vera as a base for a face mask or moisturizer can be very beneficial for those with acne-prone skin. By combining aloe vera with other ingredients such as vitamin E oil, tea tree oil, and jojoba oil, you can create a natural remedy that helps prevent acne breakouts and reduces scarring caused by previous breakouts. For best results, it is recommended to use aloe vera face masks and moisturizers on a regular basis.

    Understanding Different Skin Types

    When it comes to creating a DIY aloe vera moisturizer for acne, it’s important to understand your skin type. Knowing your skin type can help you choose the right ingredients and customize your moisturizer to suit your unique needs.

    Dry Skin

    If you have dry skin, your skin may feel tight, itchy, and flaky. This skin type lacks natural oils and moisture, which can make it more prone to fine lines and wrinkles. When creating a DIY aloe vera moisturizer for dry skin, it’s important to use ingredients that will hydrate and nourish the skin. Some good options include jojoba oil, sweet almond oil, and shea butter.

    Sensitive Skin

    Sensitive skin is easily irritated and can be prone to redness and inflammation. When creating a DIY aloe vera moisturizer for sensitive skin, it’s important to avoid harsh ingredients that can cause irritation. Look for gentle, soothing ingredients like chamomile, lavender, and calendula.

    Oily Skin

    If you have oily skin, your skin may feel greasy and shiny, especially in the T-zone (forehead, nose, and chin). Oily skin is caused by an overproduction of sebum, which can clog pores and lead to acne breakouts. When creating a DIY aloe vera moisturizer for oily skin, it’s important to use lightweight, non-greasy ingredients that won’t clog pores. Some good options include grapeseed oil, witch hazel, and tea tree oil.

    Combination Skin

    Combination skin is a mix of oily and dry skin. This skin type can be tricky to manage, as different areas of the face may require different types of moisturizers. When creating a DIY aloe vera moisturizer for combination skin, it’s important to use ingredients that will balance oil production and hydrate dry areas. Some good options include rosehip oil, aloe vera gel, and green tea extract.

    Skin Conditions

    If you have a skin condition like acne, eczema, or rosacea, it’s important to choose ingredients that will help soothe and heal the skin. When creating a DIY aloe vera moisturizer for acne-prone skin, for example, it’s important to use ingredients that will help reduce inflammation and kill acne-causing bacteria. Some good options include tea tree oil, witch hazel, and honey.

    Overall, understanding your skin type and any skin conditions you may have can help you create a DIY aloe vera moisturizer that will work best for your skin.

    Choosing the Right Ingredients

    Not only is it important to understand your skin type, but it’s important to choose the right ingredients, too. Using the wrong ingredients can worsen acne or cause other skin problems. Here are some ingredients to consider:

    • Aloe Vera Gel: Aloe vera gel is the main ingredient in this moisturizer. It is a natural moisturizer that offers hydration to the skin. It also has anti-inflammatory properties that can help reduce acne inflammation.
    • Essential Oils: Essential oils like tea tree oil and lavender oil can be added to the moisturizer to help fight acne. Tea tree oil has antimicrobial properties that can help kill acne-causing bacteria. Lavender oil has anti-inflammatory properties that can help reduce acne inflammation. When Palmarosa essential oil and Tea Tree oil are mixed, they’re a powerful combination for acne treatment.
    • Coconut Oil: Coconut oil is a popular ingredient in many DIY skincare products. However, it can be comedogenic, meaning it can clog pores and worsen acne. If you have acne-prone skin, it is best to avoid using coconut oil.
    • Vitamin C: Vitamin C is a powerful antioxidant that can help brighten the skin and reduce the appearance of acne scars. It can be added to the moisturizer in the form of a powder or serum.
    • Lemon Juice: Lemon juice is a natural astringent that can help reduce oiliness and acne. However, it can also be irritating to the skin, so it should be used in moderation and not be applied directly onto the skin without first being diluted.
    • Shea Butter: Shea butter is a natural moisturizer that can help soothe and hydrate the skin. It is also non-comedogenic, meaning it won’t clog pores.
    • Sweet Almond Oil: Sweet almond oil is a lightweight oil that can help moisturize the skin without clogging pores. It is also rich in vitamin E, which can help reduce the appearance of acne scars.
    • Grapeseed Oil: Grapeseed oil is another lightweight oil that can help moisturize the skin. It is also rich in antioxidants that can help protect the skin from damage.
    • Cocoa Butter: Cocoa butter is a natural moisturizer that can help soothe and hydrate the skin. It is also rich in antioxidants that can help protect the skin from damage.
    • Argan Oil: Argan oil is a lightweight oil that can help moisturize the skin without clogging pores. It is also rich in vitamin E, which can help reduce the appearance of acne scars.
    • Rosehip Oil: Rosehip oil is a lightweight oil that can help moisturize the skin. It is also rich in vitamin A, which can help reduce the appearance of acne scars.

    When choosing ingredients for a DIY aloe vera moisturizer for acne, it is important to consider your skin type and any allergies or sensitivities you may have. It is also important to use high-quality, natural ingredients to ensure the best results.

    3 DIY Aloe Vera Moisturizer Recipes for Acne

    Here are three DIY aloe vera moisturizer recipes that can help alleviate acne symptoms.

    1. Aloe Vera and Tea Tree Oil Moisturizer

    Tea tree oil has antibacterial and anti-inflammatory properties that can help reduce acne breakouts. To make this moisturizer, mix 1/4 cup of aloe vera gel with 10 drops of tea tree oil. Apply to the face after cleansing.

    2. Aloe Vera and Jojoba Oil Moisturizer

    Jojoba oil is a non-comedogenic oil that can help balance the skin’s natural oils. To make this moisturizer, mix 1/4 cup of aloe vera gel with 1 tablespoon of jojoba oil. Apply to the face after cleansing.

    3. Aloe Vera and Witch Hazel Moisturizer

    Witch hazel is a natural astringent that can help reduce inflammation and redness associated with acne. To make this moisturizer, mix 1/4 cup of aloe vera gel with 1 tablespoon of witch hazel. Apply to the face after cleansing. Both aloe vera and witch hazel are known for their ability to soothe the skin, as also confirmed in this study of a variety of moisturizers for acne.

    It’s important to note that while aloe vera can help soothe and hydrate acne-prone skin, it may not be a cure-all for acne. It’s always best to consult with a dermatologist for personalized acne treatment recommendations.

    Preparation and Storage

    Making a DIY aloe vera moisturizer for acne is relatively easy. Once the ingredients are gathered, the process can be completed in just a few simple steps.

    1. To start, the aloe vera gel should be extracted from the plant. This can be done by cutting off a mature leaf from the plant and slicing it open lengthwise. The gel can then be scooped out using a spoon or knife.
    2. Next, other ingredients, such as rose water or essential oils, can be added to the aloe vera gel. Using a double boiler to heat the mixture gently while stirring continuously is recommended. This will help to combine the ingredients and create a smooth texture. Do not boil the mixture. The idea is to get it warm (for mixing), not hot.
    3. Once the mixture has been heated and stirred, it can be transferred to a bowl and left to cool to room temperature. At this point, a hand mixer can be used to whip the mixture until it becomes light and fluffy.
    4. The final product should be stored in an airtight container such as a glass jar or spray bottle. It is important to keep the moisturizer at room temperature and away from direct sunlight. This will help to extend the shelf life of the product.

    Tip: Use a hand blender or blender to mix the aloe vera gel with other ingredients like jojoba oil, linoleic acid, or other essential oils.

    Overall, making a DIY aloe vera moisturizer for acne is a simple and effective way to care for your skin. By following these preparation and storage tips, you can create a high-quality product that will leave your skin feeling soft, smooth, and healthy.

    Safety Considerations

    When creating a DIY face moisturizer with aloe vera for acne, it is essential to keep safety in mind. A patch test should always be performed before using a new essential oil in the moisturizer. This helps to ensure that the skin does not have an allergic reaction to the ingredients.

    Aloe vera is generally considered safe for use on the skin, but there are potential side effects and precautions to consider. For example, aloe vera can cause skin irritation in some people. If you experience any redness, itching, or burning sensation after applying aloe vera to your skin, discontinue use immediately.

    It is also important to note that homemade skincare products do not contain natural preservatives, which means that they have a shorter shelf life than store-bought products. Therefore, making small amounts of the moisturizer and storing it in a cool, dry place is recommended.

    In summary, when making a DIY aloe vera moisturizer for acne, it is important to perform a patch test, be aware of potential allergic reactions, use natural preservatives, and make small amounts of the product to ensure its effectiveness and safety.

    Application and Skincare Routine

    When using a DIY aloe vera moisturizer for acne, it’s important to use it as part of a regular skincare routine. Aloe vera can help to soothe and moisturize the skin while also reducing inflammation and redness. Here are some tips for using a homemade aloe vera moisturizer:

    • Start by cleansing the skin with a gentle cleanser to remove any dirt, oil, and makeup. Rinse with lukewarm water and pat dry.
    • Apply the aloe vera moisturizer to the skin, focusing on any areas that are affected by acne.
    • Let the moisturizer absorb into the skin for a few minutes before applying any other skincare products, such as a night cream or eye cream.
    • For best results, use the aloe vera moisturizer twice daily, in the morning and at night. This will help to keep the skin hydrated and reduce the appearance of fine lines and wrinkles.
    • Be sure also to exfoliate the skin regularly to remove dead skin cells and prevent excess oil buildup. This can be done with a gentle scrub or chemical exfoliant.
    • When using aloe vera as a common ingredient in beauty products, it’s important to check for any allergies or sensitivities. Test a small patch of skin before applying the product to the entire face.

    By incorporating a DIY aloe vera moisturizer into a regular skincare routine, individuals can help to reduce the appearance of acne and keep their skin looking healthy and radiant.

    Frequently Asked Questions

    How can aloe vera gel help with acne?

    Aloe vera gel has anti-inflammatory and antibacterial properties that can help reduce acne breakouts. It can also soothe irritated skin and reduce redness, making it an ideal natural remedy for acne-prone skin.

    What are the benefits of using aloe vera gel on the face?

    Aloe vera gel can provide a range of benefits for the face, including hydrating and moisturizing the skin, reducing inflammation and redness, and promoting healing and cell repair. It can also help to reduce the appearance of fine lines and wrinkles, making it a popular ingredient in many skincare products.

    What’s the latest research on aloe vera for acne?

    While there is limited research on the use of aloe vera for acne, some studies have shown that it can be an effective natural remedy for reducing acne breakouts and improving skin health. However, more research is needed to fully understand the benefits of aloe vera for acne-prone skin.

    What are the best ingredients to mix with aloe vera for acne-prone skin?

    Some of the best ingredients to mix with aloe vera for acne-prone skin include tea tree oil, witch hazel, and jojoba oil. These ingredients have natural antibacterial and anti-inflammatory properties that can help to reduce acne breakouts and promote healthy skin.

    Can aloe vera help with acne scars and dark spots?

    Aloe vera gel can help to reduce the appearance of acne scars and dark spots by promoting cell repair and regeneration. It can also help to reduce inflammation and redness, which can make scars and dark spots less noticeable over time.

    Is it safe to use aloe vera as a daily moisturizer for acne-prone skin?

    Yes, aloe vera is generally safe to use as a daily moisturizer for acne-prone skin. However, choosing a high-quality aloe vera gel free from additives and preservatives that can irritate the skin is important.

    How long does it take to see improvement when using aloe on the face?

    The amount of time it takes to see improvement when using aloe vera on the face can vary depending on the individual and the severity of their acne. However, many people report seeing improvements in their skin within a few weeks of regular use.

    Are all aloes the same, or are there certain kinds that are better than others for use on the skin?

    Not all aloes are the same, and some varieties may be better suited for use on the skin than others. Aloe vera is the most commonly used variety for skincare, as it has been shown to have the most potent healing and moisturizing properties.

    What are some tips for purchasing quality aloe?

    When purchasing aloe vera gel for use on the skin, it’s important to choose a high-quality product that is free from additives and preservatives. Look for products that are labeled as 100% pure aloe vera gel and that have been certified by reputable organizations. It’s also a good idea to read reviews and do research on the brand before making a purchase.

  • How to Make Homemade Bath Powder: 3 Soothing DIY Recipes

    How to Make Homemade Bath Powder: 3 Soothing DIY Recipes

    How to Make Homemade Bath Powder: 3 Soothing DIY Recipes

    Bath powders have been used for centuries as a way to relax and rejuvenate the body. A bath powder recipe is a mixture of common and natural ingredients that can be added to a warm bath to help soothe sore muscles and promote relaxation.

    While there are many different types of bath powders available on the market, making your own bath powder recipe can be a fun and easy way to customize your bath experience.

    It is important to choose high-quality ingredients that will provide the desired benefits. Some key ingredients to consider include Epsom salt, baking soda, sea salt, and essential oils. These ingredients can be combined in different ratios to create a customized bath powder that meets your specific needs.

    Key Takeaways

    • Bath powders are a natural way to relax and rejuvenate the body.
    • A bath powder recipe typically includes natural ingredients such as Epsom salt, baking soda, and essential oils.
    • Choosing high-quality ingredients is essential when creating a customized bath powder recipe.

    Understanding Bath Powders

    Bath powders are a popular way to add a luxurious touch to your bath experience. They come in various forms and are made from different ingredients, but they all serve the same purpose – to enhance your bath time. This section will explore the different types of bath powders and how they can benefit you.

    Types of Bath Powders

    Bath Powder Fizzes

    Bath powder fizzes are a popular type of bath powder that adds a fun and playful element to your bath time. They are made from a combination of baking soda, citric acid, and essential oils, and when added to your bath, they fizz and release a pleasant aroma. Bath powder fizzes are perfect for those who want to add a little excitement to their bath time.

    Homemade Bath Powder

    Homemade bath powder is a great way to customize your bath experience. You can create your own bath powder using a combination of ingredients that suit your needs. Homemade bath powders can be made from various ingredients, including Epsom salt, baking soda, essential oils, and dried herbs.

    Whether you want fizz, flower petals, or both, the benefit of homemade bath powders is that you can create them according to your own preferences. Plus, they’re very easy to make.

    Shimmering Bath Powder

    Shimmering bath dust is a type of bath powder that is perfect for those who want to add a little sparkle to their bath time. It is made from a combination of baking soda, citric acid, and shimmering mica powder (or a biodegradable glitter), and when added to your bath, it creates a beautiful shimmer effect. Bath dust is perfect for those who want to add a touch of glamour to their bath time.

    Natrasorb Bath Powder

    Natrasorb bath powder is a type of bath powder that is perfect for those who want to add a silky touch to their bath time. It’s essentially a tapioca starch that is easily dissolved in water and is commonly used as a fragrance fixative, oil absorbent, and thickening agent. It’s a great ingredient when you want your scents (like essential oils) to really absorb well into your homemade bath powder.

    Benefits of Bath Powders

    Bath powders offer a range of benefits, including:

    • Relaxation: Bath powders can help to soothe your muscles and promote relaxation.
    • Hydration: Bath powders can help to moisturize your skin and prevent dryness.
    • Aromatherapy: Bath powders can help to promote relaxation and reduce stress through the use of essential oils.
    • Customization: Homemade bath powders can be customized to suit your needs and preferences.

    Thus, bath powders are a great way to enhance your bath time. With so many different types of bath powders available, you are sure to find one that suits your needs. Or, since they’re so easy to make, why not create your own?

    Whether you want to add a little excitement to your bath time with bath powder fizzes or a touch of glamour with shimmering bath dust, there are so many fun options to choose from.

    Key Ingredients for Bath Powders

    Bath powders are easy to make at home and can be customized to suit your skin type and preferences. Here are some key ingredients that you can use to make your own bath powders.

    Essential Ingredients

    The essential ingredients for bath powders include baking soda, citric acid, and Epsom salts.

    • Baking soda helps soothe dry skin and helps remove dead skin cells.
    • Citric acid is a natural preservative that can help to balance the skin’s pH, plus it will react with the baking soda for a fizzing effect.
    • Epsom salts are rich in magnesium and can help to soothe sore muscles and improve skin tone.

    Additional Ingredients

    In addition to the essential ingredients, you can also add other ingredients to your bath powder. Some popular options include essential oils, fragrance oil, and spice powder. Essential oils and fragrance oils can add a pleasant scent to your bath powder, while spice powder can help to invigorate the senses.

    Several essential oils and spice powders are also very beneficial for skin health, so you can make quite a well-rounded bath powder recipe depending on what you include in the mix.

    Skin Beneficial Ingredients

    If you want to make a bath powder that is specifically designed to benefit your skin, consider adding skin-beneficial ingredients such as arrowroot powder, powdered milk, herbal powder, multani mitti, khus roots, fenugreek seeds, and tapioca powder. Arrowroot powder can help soothe sensitive skin, while powdered milk can help moisturize dry skin.

    Herbal powder can help to improve skin tone, while multani mitti can help to remove impurities from the skin. Khus roots and fenugreek seeds can help soothe irritated skin (anti-inflammatory), while tapioca powder can help maintain a uniform and free-flowing bath powder mix.

    Natural IngredientBenefits
    OatmealSoothes and moisturizes the skin, relieves itching.
    Epsom SaltRelaxes muscles, relieves aches and pains.
    Baking SodaSoftens water, exfoliates, and balances skin pH.
    Lavender FlowersCalming, reduces stress, and promotes relaxation.
    Rose PetalsHydrates, refreshes, and imparts a floral scent.
    ChamomileAnti-inflammatory, soothes sensitive skin.
    CalendulaPromotes skin healing and reduces inflammation.
    Peppermint LeavesRefreshing and invigorating, relieves muscle pain.
    Eucalyptus LeavesClears sinuses, rejuvenates, and boosts circulation.
    RosemaryStimulates circulation and enhances mental clarity.
    Lemon or Orange PeelBrightens skin, adds a refreshing citrus aroma.

    These ingredients can be combined in various proportions to create a customized bath powder to suit your preferences and address specific skin or relaxation needs. When using these ingredients, ensure they are finely ground or processed into a powder to make them safe for the bath.

    By using these and other key ingredients, you can create a bath powder that is tailored to your skin’s needs. Whether you want to soothe dry skin, improve skin tone, or simply relax and unwind, there is a bath powder recipe out there for you.

    Preparation of Bath Powder

    Dry Ingredient Preparation

    To prepare the dry ingredients for the bath powder recipe, start by measuring out one cup of the mixture. This can be a mixture of baking soda, cornstarch, and citric acid in a 2:1:1 ratio respectively. Next, sift the dry ingredients together in a large mixing bowl until they form a fine powder. This will ensure that the mixture is smooth and free of any clumps.

    Wet Ingredient Preparation

    In a small bowl, mix together a few drops of your favorite essential oils with a tablespoon of oil (infused oil works well too). You can use any essential oil of your choice, but popular options include lavender essential oil, lemon essential oil, jasmine, rose, frankincense, and many others. The infused oil can be made by steeping dried herbs in a carrier oil for a few weeks.

    Mixing and Storing

    Slowly pour the wet ingredients into the large mixing bowl with the dry ingredients, stirring constantly to prevent any fizzing. Mix until the ingredients are well combined and the mixture is slightly damp. The mixture should hold together when squeezed in your hand but should not be too wet.

    Store the bath powder in an airtight container, such as a mason jar or sealed container, to prevent moisture from entering. The bath powder can be used immediately or stored for later use. Simply add a few tablespoons to your bath and enjoy a relaxing and fragrant soak.

    How to Make Homemade Bath Powder: 3 Simple Recipes

    Lavender and Oatmeal Fizzing Bath Powder

    Ingredients:

    • 1 cup of baking soda
    • 1/2 cup of citric acid
    • 1/2 cup of rolled oats
    • 1/4 cup of Epsom or Sea Salt
    • 1/2 cup of dried lavender buds
    • 15-20 drops of lavender essential oil

    Instructions:

    1. Grind the oats into a fine powder using a blender or food processor.
    2. Mix the baking soda, citric acid, salt, ground oats, and dried lavender buds together in a bowl.
    3. Add the lavender essential oil and mix well.
    4. Store the mixture in an airtight container.
    5. To use, add a few tablespoons of the powder to a warm bath and watch it fizz. Soak for 20-30 minutes.

    Eucalyptus and Peppermint Shimmering Bath Powder

    Ingredients:

    • 1 cup of Epsom salt
    • 1/2 cup of baking soda
    • 1/4 cup of dried eucalyptus leaves
    • 10 drops of peppermint essential oil
    • 1 tablespoon of biodegradable glitter

    Instructions:

    1. Grind the eucalyptus leaves into a fine powder using a blender or food processor.
    2. Mix the Epsom salt, baking soda, and eucalyptus powder together in a bowl.
    3. Add the peppermint essential oil and mix well.
    4. Add the biodegradable glitter and mix again.
    5. Store the mixture in an airtight container.
    6. To use, add a few tablespoons of the powder to a warm bath and soak for 20-30 minutes. Enjoy the shimmering effect!

    Chamomile and Rose Bath Powder

    Ingredients:

    • 1 cup of Epsom salt
    • 1/2 cup of baking soda
    • 1/4 cup of dried chamomile flowers
    • 1/4 cup of dried rose petals
    • 15-20 drops of rose essential oil

    Instructions:

    1. Grind the chamomile flowers and rose petals into a fine powder using a blender or food processor. If you prefer a few whole flower petals in the bath, keep some separate for adding later.
    2. Mix the Epsom salt, baking soda, and flower powder together.
    3. Add the essential oil and mix well.
    4. Store the mixture in an airtight container.
    5. To use, add a few tablespoons to a warm bath and soak for 20-30 minutes. Enjoy this relaxing fragrance, and feel free to experiment with other essential oils, like jasmine.

    Using Bath Powder

    Bath powder is a great addition to your bath time ritual. It is an easy way to enhance your bathing experience while also enjoying the therapeutic benefits. Here are some tips on how to use bath powder for a better way to relax and unwind.

    Bath Time Ritual

    To use bath powder, fill your bathtub with warm water and add the desired amount of bath powder.

    • Stir the water and soak in the bath for 20-30 minutes. Rinse off with warm water and pat dry with a towel.
    • Start with a small amount and experiment with different scents.
    • If you have sensitive skin, choose a bath powder for sensitive skin. If you experience any irritation, stop using it and consult a dermatologist. For an even more relaxing experience, perhaps put on some nice relaxing music or light some candles.

    So, go ahead and make a ritual out of it. Your bath time is more than just about bathing; relax, treat yourself, and enjoy the fragrance and tranquility of your bathtime experience.

    Therapeutic Benefits

    Bath powder can provide a variety of therapeutic benefits, depending on the ingredients used. For example, lavender can help to promote relaxation and reduce stress, while a number of herbs and other oils have wide-ranging benefits.

    Safety Precautions

    Before using bath powder, it is recommended to do a patch test to ensure that you are not allergic or sensitive to any of the ingredients. To do this, apply a small amount of the powder to a small area of skin and wait 24 hours to see if any irritation occurs.

    Additionally, make sure to rinse off thoroughly after your bath to avoid any skin irritation. It is also important to store bath powder in a cool, dry place away from children and pets.

    Safety Tips Quick List:

    • Start with a small amount of bath powder and gradually increase the amount as you become more comfortable with the product.
    • Experiment with different scents and formulations to find the bath powder that works best for you.
    • If you have sensitive skin, choose a bath powder that is formulated for sensitive skin, or formulate your own.
    • If you experience any irritation or discomfort while using bath powder, discontinue use and consult a dermatologist.

    Using bath powder can be a great way to enhance your bath time ritual and enjoy therapeutic benefits. By following these simple tips and taking necessary safety precautions, you can have a relaxing and enjoyable bathing experience that will leave you feeling refreshed and rejuvenated.

    Purchasing Bath Powder Ingredients

    When it comes to purchasing ingredients for bath powder, there are a variety of options available. In this section, we will explore the two main options: grocery store and online.

    Grocery Store Options

    For those who prefer to shop in person, grocery stores can be an excellent option for purchasing bath powder ingredients. Most grocery stores carry basic ingredients like baking soda, Epsom salt, and cornstarch, which are all common ingredients in bath powder recipes. Some popular grocery stores to consider include:

    • Walmart
    • Target
    • Whole Foods
    • Kroger

    It’s important to note that not all grocery stores carry the same selection of ingredients. It may be helpful to call ahead or check the store’s website to ensure they have the ingredients you need before making a trip.

    Online Options

    Online shopping can be a convenient option for those who prefer to shop from the comfort of their own home. There are a variety of online retailers that carry bath powder ingredients, including:

    • Amazon
    • Vitacost
    • iHerb

    When purchasing ingredients online, it’s important to read reviews and check the seller’s reputation to ensure you are getting a quality product. Additionally, some online retailers offer affiliate links, which can earn the seller a small commission. It’s important to be aware of this and do your research before making a purchase.

    Overall, whether you choose to purchase your bath powder ingredients from a grocery store or online retailer, there are plenty of options available. By doing your research and shopping around, you can find the most popular options and excellent alternatives to create the perfect bath powder recipe.

    Gifting Bath Powder

    Bath powder makes a great gift for anyone who loves to pamper themselves. Here are some ideas for gifting bath powder:

    Fun Containers

    One way to make bath powder a fun gift is to put it in a unique container. Some ideas for containers include:

    • Mason jars
    • Vintage tins
    • Glass bottles with cork stoppers
    • Decorative bags or boxes

    Themed Gift Baskets

    Another idea is to create a themed gift basket. Here are some themes to consider:

    • Relaxation: Include bath powder, candles, and a soft bathrobe.
    • Spa Day: Include bath powder, body butter, and a loofah.
    • Winter Wonderland: Include bath powder with a peppermint scent, a cozy blanket, and a mug for hot cocoa.

    Bath Powder Ideas for Kids

    Bath powder can be a fun addition to bath time for kids. Here are some ideas for kid-friendly bath powders:

    • Fizzy Bath Powder: Add citric acid and baking soda to bath powder to make it fizz.
    • Glitter Bath Powder: Add biodegradable glitter to bath powder for a sparkly bath.
    • Scented Bath Powder: Use kid-friendly scents like bubblegum or cotton candy.

    Bath Powder Ideas for Adults

    Bath powder can also be a luxurious addition to an adult’s bathtime routine. Here are some ideas for adult-friendly bath powders:

    • Lavender Bath Powder: Lavender is known for its calming properties and is a popular scent for bath products.
    • Eucalyptus Bath Powder: Eucalyptus can help clear sinuses and provide a refreshing scent.
    • Rose and Sandalwood Bath Powder: Rose and sandalwood are both classic scents for bath products and can provide a romantic atmosphere.

    Whether for personal use or as a gift, bath powder is a versatile product that can be customized to fit anyone’s preferences. Consider these ideas when gifting bath powder for a thoughtful and personalized present.

    Frequently Asked Questions

    What are the ingredients needed to make bath powder?

    The basic ingredients needed to make bath powder are baking soda, cornstarch, and citric acid. Additional ingredients such as Epsom salt, essential oils, and natural colorants can be added based on personal preference.

    How do you add fragrance to bath powder?

    Essential oils or fragrance oils can be added to bath powder to provide a pleasant scent. It is important to use high-quality oils and to add them slowly to avoid clumping. You can use tapioca starch to make the powder more free-flowing and less likely to clump.

    Can bath powder be used for sensory play?

    Yes, bath powder can be used for sensory play. It can be mixed with water to create a fun and sensory experience for children.

    What is the difference between bath powder and bath bombs?

    Bath powder and bath bombs are similar in that they are both used to create a relaxing bath experience. The main difference is that bath bombs are in a solid rather than powder form. Homemade bath bombs are fun to make as well, something we’ll cover in a different article soon!

    Are there any safety precautions to consider when making bath powder?

    It is important to wear gloves and a mask when handling the ingredients to avoid irritation. Citric acid can be harmful if ingested, so it is important to keep it out of reach of children and pets.

    Can essential oils be added to bath powder?

    Yes, essential oils can be added to bath powder for fragrance and aromatherapy benefits. It is important to use high-quality oils and to add them slowly to avoid clumping.

    How can you make homemade fizzing bath powder?

    To make homemade fizzing bath powder, simply add citric acid to the basic bath powder recipe. When added to water, the citric acid will react with the baking soda and create a fizzing effect.

    What are some natural coloring ingredients I can use for bath powder?

    Natural coloring ingredients such as beetroot powder, turmeric, and spirulina can be used to color bath powder. It is important to use a small amount and to mix well to avoid staining the skin or bathtub.

    What ingredients should I not use in bath powder?

    Ingredients such as synthetic glitter and food coloring should not be used in bath powder as they can harm the skin and stain the bathtub. It is important to use high-quality, skin-safe ingredients when making bath powder.

  • Amber Essential Oil Benefits: A Comprehensive Guide

    Amber Essential Oil Benefits: A Comprehensive Guide

    Amber Essential Oil Benefits: A Comprehensive Guide

    Amber essential oil is a lesser-known yet incredibly beneficial option for aromatherapy and skincare. The oil is derived from fossilized tree resin and has been used for centuries to promote wellness and healing. This article will explore the benefits of amber essential oil and how it can be used for aromatherapy and skincare.

    Amber essential oil is known for its anti-inflammatory and analgesic properties, making it an effective natural remedy for pain relief. It is also believed to have a calming effect on the mind and body, making it a popular choice for those seeking relief from anxiety and stress.

    Additionally, the oil is known to have antimicrobial properties, which can help to prevent infections and promote healing.

    Key Takeaways

    • Amber essential oil is derived from fossilized resin and has been used for centuries to promote wellness and healing.
    • The oil is known for its anti-inflammatory and analgesic properties, making it an effective natural remedy for pain relief.
    • Amber essential oil is also believed to have a calming effect on the mind and body and has antimicrobial properties that can help prevent infections and promote healing.

    Origins of Amber Essential Oil

    Amber essential oil has a long history dating back to ancient times. It is derived from the resin of trees, specifically the hardened resin of ancient trees. This resin has been fossilized over time, resulting in the formation of amber.

    Baltic amber is one of the most popular sources of amber essential oil. It is found in the Baltic region of Europe and is known as the “gold of the north”. Baltic amber is formed from the resin of ancient conifer trees that grew in the region in ancient times.

    White amber essential oil is a type of amber oil that is extracted from a different type of tree resin. It has a lighter color and aroma compared to pure amber oil.

    The process of extracting amber essential oil involves steam distillation of the resin. The resulting oil has a warm, woody, and slightly sweet aroma that is highly prized in aromatherapy and perfumery. Due to its anti-inflammatory and pain-relieving effects, it’s a popular choice for massage and topical applications.

    These unique properties and therapeutic benefits have made it a valuable resource for centuries.

    Extraction and Composition

    Amber essential oil is extracted from the fossilized resin of ancient pine trees, which is also known as amber stone. The solid resin is heated and distilled to obtain the essential oil. The composition of amber essential oil varies depending on the raw material used for its extraction.

    Amber essential oil contains a combination of organic compounds, including terpenes, sesquiterpenes, and alcohols. It also contains succinic acid, which is a natural anti-inflammatory and antioxidant. This acid is responsible for many of the therapeutic benefits of amber essential oil.

    The chemical composition of amber essential oil may vary depending on the location and age of the amber stone. However, the oil is generally considered safe for topical and aromatherapy use.

    Characteristics of Amber Essential Oil

    As far as the scent is concerned, it has a woody scent and warm aroma that makes it a favorite among aromatherapy enthusiasts. This oil is typically stored in amber-colored glass bottles to protect it from UV light and maintain its potency, like most essential oils.

    When purchasing amber essential oil, it is important to ensure that it is in its pure form and of high quality.

    This oil is often used in perfumes, candles, and soaps due to its unique scent and therapeutic properties.

    Amber essential oil is known for its calming and grounding effects on the mind and body.

    • It is believed to help reduce stress and anxiety, promote relaxation, and improve sleep quality.
    • Additionally, this oil is said to have antibacterial and anti-inflammatory properties, making it useful for treating skin conditions like acne and eczema.

    Overall, amber essential oil is a versatile and beneficial oil that can be used in a variety of ways. Its unique characteristics and therapeutic properties make it a popular choice among those with an essential oil collection.

    Amber Essential Oil and Aromatherapy

    Amber essential oil is a popular choice for aromatherapy and is one of many essential oils used for reducing stress and anxiety.

    • When inhaled following proper aromatherapy guidelines, the oil stimulates the olfactory system and triggers the release of hormones that promote emotional well-being.
    • The limbic system, which is responsible for regulating emotions and memory, is also activated by the scent of amber essential oil.
    • This can help to reduce stress and anxiety, promote relaxation, and improve overall mood.
    • Amber essential oil is also known for its ability to promote a good night’s sleep. Less stress and more calm equals better sleep, so this essential oil can make it easier to fall asleep and stay asleep throughout the night.

    To use amber essential oil for aromatherapy, it can be diffused in a room using an essential oil diffuser or added to a shower. Even better, put a few drops in a warm bath for a relaxing soak. It can also be applied topically when diluted with a carrier oil, such as coconut or jojoba oil.

    Amber essential oil is a great choice for those looking to improve their emotional well-being, reduce stress, and promote a good night’s sleep through the use of aromatherapy.

    Amber Essential Oil for Skin Care

    Amber essential oil is a popular choice for skin care due to a few notable benefits. It has been used for centuries for its anti-inflammatory, antiseptic, and skin-regenerating properties. Below are some of the ways in which amber essential oil can benefit your skin.

    Never apply essential oils directly to the skin without a carrier oil. Always perform a patch test.

    Skin Inflammation

    Amber essential oil has anti-inflammatory properties that can help reduce redness, swelling, and irritation on the skin. It can be used to soothe skin conditions such as eczema, psoriasis, and rosacea. It can also help calm down acne breakouts and prevent future ones from occurring.

    Skin Conditions

    Amber essential oil is known for its antiseptic properties, which can help prevent infections and promote healing in skin conditions such as cuts, scrapes, and burns. It can also help reduce the appearance of scars and stretch marks.

    Skin Regeneration

    Amber essential oil is rich in antioxidants, which can help protect the skin from damage caused by free radicals. It can also stimulate collagen production, which can help improve skin elasticity and firmness. This can help reduce the appearance of fine lines and wrinkles.

    Skincare

    Amber essential oil can be used as a natural moisturizer for the skin. It can help hydrate dry, flaky skin and leave it feeling soft and supple. It can also help balance the skin’s natural oil production, making it a good choice for all skin types.

    Stretch Marks

    Amber essential oil can help reduce the appearance of stretch marks by promoting skin regeneration and increasing collagen production. It can also help improve skin texture and tone, making stretch marks less noticeable.

    Amber essential oil is a versatile and effective ingredient for skin care. It can help soothe inflammation, promote skin health, hydrate the skin, and reduce the appearance of stretch marks.

    Amber Essential Oil Blends

    Amber essential oil blends well with many carrier oils, including jojoba oil, castor oil, and sunflower oil. When combined with these carrier oils, amber oil can enhance its therapeutic benefits and create a unique aroma.

    • One popular amber oil blend is with jojoba oil as a carrier oil. Jojoba oil is an excellent carrier oil that is easily absorbed by the skin, making it an ideal choice for massage oils and aromatherapy blends.
    • Another popular amber oil blend is with sandalwood oil. Sandalwood oil has a warm, woody aroma that blends well with the sweet, musky scent of amber oil.
    • The above two essential oils can help to promote a sense of calm and relaxation, reduce inflammation, and improve skin health. Mix them with your favorite carrier oil, and you’ve got a great massage oil.
    • Sunflower oil is another carrier oil that can be used to create an amber oil blend. Sunflower oil is rich in vitamin E, which helps to nourish and protect the skin. When combined with amber oil, it can help reduce the appearance of fine lines and wrinkles, hydrate the skin, and improve overall skin health.

    Whether used for massage, aromatherapy, or skincare, amber oil blends can provide a range of benefits for the mind and body.

    Safety and Side Effects

    While amber essential oil is generally considered safe for use, there are a few precautions that should be taken to avoid any potential side effects.

    • Pregnant women should avoid using amber essential oil, as there is not enough research to determine its safety during pregnancy.
    • Some potential side effects of using amber essential oil include skin irritation, allergic reactions, and respiratory issues.
    • It is important to test a small amount of the oil on a small patch of skin (patch test) before using it more extensively. If any irritation occurs, discontinue use immediately.
    • It is also important to keep amber essential oil out of reach of children, as ingestion can be harmful and even fatal. If ingested, seek medical attention immediately.

    It is important to use amber essential oil responsibly and follow proper safety precautions to avoid any potential side effects.

    Conclusion

    Amber essential oil has been used for centuries in the world of essential oils due to its numerous benefits. It can be used for various purposes, such as aromatherapy, skincare, and medicinal purposes.

    When you use this oil, be sure to follow proper guidelines and always perform a patch test when applying it topically. For both aromatherapy and skincare, this essential oil can be an excellent addition to your EO collection.

    Frequently Asked Questions

    Where can I buy amber essential oil?

    Amber essential oil can be purchased from various online retailers, as well as some health food stores and specialty shops. It is important to ensure that the essential oil is pure and of high quality before purchasing.

    What are the benefits of using organic amber essential oil?

    Organic amber essential oil is believed to have numerous benefits, including promoting relaxation, reducing stress and anxiety, improving skin health, and providing relief from pain and inflammation.

    What is the difference between amber essential oil and amber resin?

    Amber essential oil is extracted from the fossilized resin of ancient trees, while amber resin is the raw, unprocessed form of the resin. Amber essential oil is more concentrated and has a more potent aroma than amber resin.

    What are the differences between amber essential oil and musk essential oil?

    Amber essential oil has a warm, sweet, and woody scent, while musk essential oil has a strong, musky aroma. Amber essential oil is believed to have more therapeutic benefits, while musk essential oil is often used for its fragrance in perfumes and colognes.

    How can amber essential oil be used in perfume making?

    Amber essential oil is a popular ingredient in perfume-making due to its warm and sweet aroma. It can be blended with other essential oils to create unique and complex fragrances.

    Can amber essential oil be used as a substitute for other essential oils?

    While amber essential oil has unique properties and benefits, it cannot be used as a substitute for other essential oils. Each essential oil has its own unique properties and uses. However, it can be easily mixed with other essential oils.

    Is amber essential oil beneficial for hair health?

    Amber essential oil contains succinic acid. Succinic acid is beneficial to promote hair flexibility and elasticity. It can be added to hair care products or used as a scalp massage oil. Furthermore, when combined with carrier oils like jojoba, it nourishes the scalp, leading to more healthy hair.

    What other essential oils blend well with amber essential oil?

    Amber essential oil blends well with other warm and woody essential oils, such as cedarwood, sandalwood, and frankincense. It can also be blended with citrus oils for a more complex fragrance.