Category: Beauty

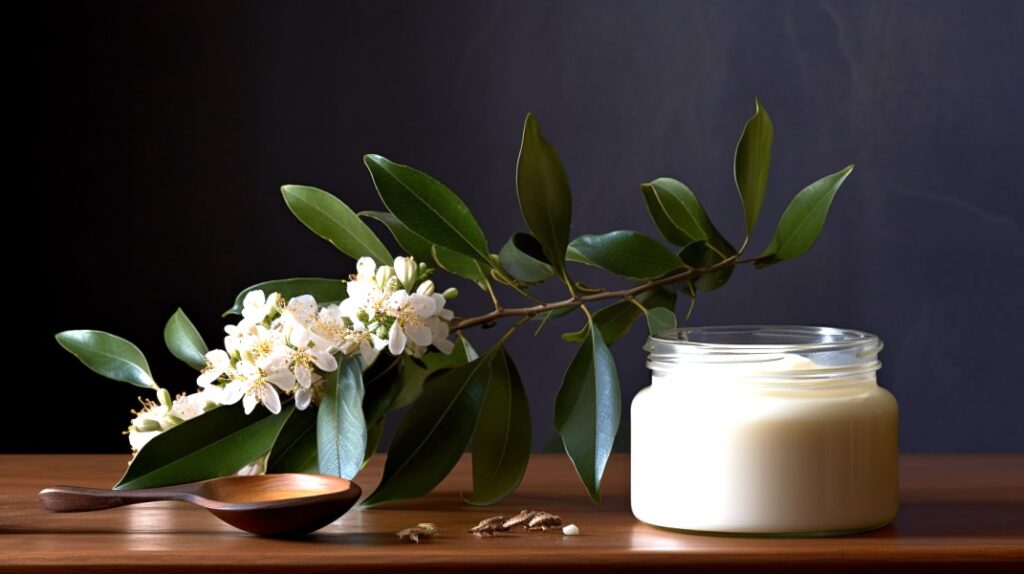
Body butter is super effective at rejuvenating dry skin, especially on more vulnerable areas like elbows and knees. To keep your skin hydrated all day with homemade body butter, I always recommend applying it after a shower to lock in your skin’s moisture.

Making your own homemade body butter is another way of at least attempting to limit your exposure to all those nasty and questionable chemicals found in most lotions and moisturizers. Making your own body butter is so quick and easy that anyone can use it to complement their natural skincare regimen.

More on that here: “What is Tallow?

A Brief Look at Common Body Butter Ingredients

The options for the various main ingredients you can use in your own homemade body butter are almost endless. So, let’s take a deeper look at some of the most common ingredients. Remember, there’s no hard-fast rule for homemade beauty concoctions, so experiment a bit with the ingredients you decide to use.

I’d suggest trying each main ingredient by itself if you haven’t used it before to see which one has the qualities you like the best.

Shea Butter

Shea butter comes from the oil-saturated seeds of the African Shea tree. It’s a superb moisturizing oil with well-known anti-inflammatory properties that protect the skin from sunburn while helping the skin heal from abrasions and minor cuts. It also nourishes skin with vitamins A, E, and K, as well as a number of essential fatty acids.

Plus, it’s nutty scent makes it a good natural base for homemade body butter.

Cocoa Butter

Cocoa oil is a very commonly used vegetable oil that’s extracted from cocoa beans. We all know what cocoa beans are used for. That’s right, chocolate.

Due to the strong aroma and taste of cocoa beans, cocoa butter retains these same characteristics. This oil is edible but also quite high in fat. Much of the marketing surrounding cocoa butter claims that it’s a miracle oil for stretch marks, but one scholarly study from 2008 says otherwise.

While it may not be a miracle oil for stretch marks, it is still incredibly useful for optimal skin health.

Jojoba Oil

Jojoba oil is actually not an oil but a liquid wax derived from the jojoba plant. It keeps moisture in the skin and is more like skin sebum or whale oil than other kinds of vegetable oils. Jojoba oil is non-digestible, meaning that it will pass through the human digestion system without being broken down and absorbed into the body.

Jojoba oil is commonly used for the hair and scalp due to its close similarities to human skin sebum.

Coconut Oil

Among the variety of uses for coconut oil, it’s very commonly used as a base in body butter. One scholarly study even showed that coconut oil naturally has an SPF of about 8, so it’s also a moderate protectant against the sun’s harmful rays.

Not only has coconut oil been demonstrated to be a wonderful skin moisturizer, but one study shows that it’s also proven to be an effective treatment against gingivitis and plaque buildup in the mouth. Besides all the health benefits, coconut oil is especially great for cooking as well, especially in brownies.

Whipped Body Butter

Whipped body butter makes use of the basic natural ingredients above. To make your own, you need ½ cup of shea butter, ¼ cup of coconut oil, ¼ cup of jojoba oil, and 5-10 drops of an essential oil such as peppermint.

Instructions:

  1. Put all ingredients (except the essential oil) in a glass bowl and place in a saucepan filled with water. You may also place the ingredients in a double boiler if available.
  2. Melt and mix all the ingredients on medium heat.
  3. When ready, the mixture goes from white to semi-clear.
  4. Place the mixture in the fridge for one hour or until it begins to thicken and solidify.
  5. Whip the mixture with a hand or cake mixer until it’s fluffy, like whipped cream. While beating, incorporate the essential oil.
  6. Place the body butter in your desired container and refrigerate for 1 hour.

You should know that this whipped body cream normally softens during warm seasons because of the coconut oil. To keep it solid, try to store it in a cool place, even in the fridge. Its shelf life is six months at room temperature. Apply this body butter anytime for beautifully supple skin.

Olive Oil Body Butter Recipe

Another homemade body butter that’s so easy to make is olive oil body butter. You’ll only need three ingredients for this recipe. All you’ll need is 4 ounces of unrefined shea butter, two tablespoons of olive oil (preferably homemade herbal-infused oil), and 10-20 drops of your favorite essential oil (optional).

Instructions:

  1. Place the shea butter and olive oil in a bowl and place the bowl in a saucepan with water (or put the ingredients in a double boiler). Melt and mix over medium heat.
  2. Once the ingredients melt, add any essential oils of your choice and remove them from the heat.
  3. Allow the mixture to cool until it reaches an opaque color.
  4. Using a hand or cake mixer, whip all the ingredients for a few minutes until they reach an airy and creamy consistency. If you’re having trouble reaching this consistency, you should allow your mix to cool a bit more, then try blending again.
  5. Refrigerate until it cools thoroughly and store in a cool, dark place.

Now you have your own homemade body butter! Put it inside a jar with a very tight-fitting lid. It has a shelf life of six months if placed in a cool, dry place.

Whipped Body Butter With Cocoa

To make this unique body butter, you need the following ingredients: ½ cup shea butter, ½ cup coconut oil, ½ cup jojoba oil OR almond oil, ½ cocoa butter, and an optional 10-30 drops of any essential oil of your choice. As you may have noticed, making body butter is quite easy, this one is too!

Instructions:

  1. Put all ingredients (except the essential oil) in a glass bowl and place in a saucepan with water, or use a double boiler.
  2. On medium heat, melt and mix all the ingredients.
  3. When melted, remove from heat and allow the mixture to cool in the fridge for an hour until it begins to solidify.
  4. With a hand or cake mixer, whip it for 10 minutes or until fluffy.
  5. Place the mixture in the fridge until thoroughly cooled.

Store your homemade body butter in a glass jar with a tight lid.

Body Butter Bars

These body butter bars are all-natural and wonderful for your beautiful skin. They also make for great gifting opportunities because people love them! Here are the ingredients you need to make these body butter bars: 1 cup of coconut oil, 1 cup of beeswax, 1 cup of shea butter OR cocoa butter OR mango butter, and 1 teaspoon of vitamin E oil.

For fragrance purposes, add any essential oil of your choice.

Instructions:

  1. Combine all the ingredients (except the vitamin E oil and essential oil) in a glass bowl and place the bowl in a saucepan with water (or use a double boiler).
  2. Bring the water to a boil over medium heat and stir the ingredients until they’re mixed and melted.
  3. Remove from heat and add the vitamin E oil and any essential oil of your choice. Stir by hand until the oils are integrated into the mix.
  4. Carefully transfer the mixture into your desired molds.
  5. Allow the mixture to cool and solidify in your molds.

For extra fun, use various shaped molds for different occasions. Use a heart shape for Valentine’s Day, snowflakes or stars for Christmas, etc. Now, you have an easy-to-make, affordable, and personalized gift! You may become a hit in your town as the go-to person for amazing body butter bars!

It Really Is That Simple

Regardless of which body butter recipe you decide to use, each kind of body butter is incredibly easy to make. Plus, they can be stored at room temperature for up to 6 months, or you can put them in the fridge for a longer shelf life.

Also, it’s very important to understand that the goal of heating up the ingredients in each recipe is simply for meltingThe point is not to cook the ingredients!

So, as soon as the ingredients are melted enough to mix, remove them from the heat. If you’re leery, melt your ingredients on low heat the first few times.


Making body butter is one of the easiest ways to proactively take a step in getting your family out of the habit of using products that contain harmful or questionable ingredients. Besides that, making it with your kids will be quite enjoyable.

Don’t have any children? Then, spend time with a friend and show them just how amazing you are at making body butter. Your friends will be impressed and will learn how to make their own nourishing skin balm at home.

Homemade DIY Body Butter FAQs

What are the basic ingredients needed to make homemade body butter?

To make homemade body butter, you typically need a combination of shea butter, cocoa butter, coconut oil, and a carrier oil like almond or jojoba oil.

Can I add essential oils to my body butter, and how much should I use?

Yes, you can add essential oils for fragrance and added skin benefits. Usually, a few drops to a teaspoon, depending on the size of the batch and the strength of the essential oil, is sufficient.

How long does homemade body butter last?

Homemade body butter can last for several months. To extend its shelf life, store it in a cool, dry place and use clean hands or a utensil to scoop it out.

Do I need to refrigerate my body butter?

It’s not necessary to refrigerate body butter, but if your home is very warm and the butter is melting, refrigerating it can help maintain its whipped consistency.

What’s the difference between whipped body butter and traditional body creams?

Whipped body butter is typically made with natural butter and oils without water, giving it a thicker, more luxurious texture. Traditional body creams often contain water, emulsifiers, and preservatives, resulting in a lighter feel.

How do I achieve a whipped texture for my body butter?

To whip body butter, use an electric mixer to beat the combined oils and butter until they become light and fluffy, similar to the consistency of whipped cream.

Is it necessary to use a preservative in homemade body butter?

Since homemade body butter is an anhydrous product (does not contain water), it doesn’t require a preservative. Rosemary essential oil is known to be a fairly good preservative, so that could be added if preferred (one drop would be plenty). Regardless, avoid introducing water into the container to prevent bacterial growth.

  • Jojoba Oil for Hair: 3 Amazing Benefits – Feeling Beautiful?

    Jojoba Oil for Hair: 3 Amazing Benefits – Feeling Beautiful?

    Jojoba Oil for Hair: 3 Amazing Benefits – Feeling Beautiful?

    Nature has many wonders, one of which is jojoba oil. The oil itself is extracted from the seeds of the jojoba plant (Simmondsia chinensis), which is native to Southwestern North America. This “oil” is actually what’s known as a wax ester and is more similar to human sebum and whale oil than it is to other vegetable oils.

    Jojoba oil is similar to human skin oil in that it helps balance the production of skin sebum and is structured as a very long straight-chain wax ester. There are many natural beauty wonders of jojoba oil as well. To name a few, jojoba oil is wonderful for acne treatments, healing wounds, hair loss prevention, hair conditioning, and more.

    Many people with acne and sensitive skin commonly use jojoba oil because it has no negative side effects. It is also rich in vitamins and minerals that contribute to healthy skin and hair.

    Jojoba Oil for Hair

    One amazing benefit of jojoba oil is its application for hair improvement and growth. It moisturizes hair without leaving any greasy residue and prevents moisture loss from the scalp. Let’s take a moment to understand how hair grows.

    • Human hair grows out of hair follicles.
    • In each hair follicle, there’s what’s called a sebaceous gland that produces sebum for new hair growth.
    • Whenever a new hair shaft grows within a follicle, it carries with it a coating of sebum that keeps it nourished and protected.
    • As you may already know, sebum and other debris can sometimes clog the hair follicle.

    A clogged hair follicle can become infected and irritated, as well as result in the prevention of new and healthy hair growth. Jojoba oil works by penetrating hair follicles and dissolving away the build-up of debris or any blockages that otherwise would prevent new hair from surfacing.

    Jojoba Oil Treatments for Hair and Scalp

    Using jojoba oil for your hair has a lot of benefits without any of the negative side effects that commercial hair products may cause. Not only that, but it doesn’t contain an endless list of nasty chemicals that most people wouldn’t be able to pronounce.

    This oil is an effective and natural alternative to the potentially dangerous chemicals found in many of today’s hair care products. Below, we will take a look at some of the advantages of using jojoba oil in the hair.

    Scalp Psoriasis Treatment

    People with psoriasis often tend to experience problems with their scalp. Psoriasis causes the skin on the scalp to be very dry and peeling, oftentimes very closely resembling dandruff symptoms.

    There are topical skin creams for psoriasis, but they’re usually very limited or not as effective at relieving psoriasis on the scalp. Also, applying and washing off these topical creams on hair-covered skin may be very difficult when compared to using them on exposed skin.

    On the other hand, jojoba oil is easy to apply and spread throughout the scalp because of its overall liquid-wax consistency. It helps to lift up sebum and dead skin cells, which are easily washed away, similar to the oil cleansing method of “oil dissolves oil”.

    Since it has anti-inflammatory properties as well (source), it soothes the irritation on the scalp, reduces swelling, and relieves itching. The vitamin E content of jojoba oil helps to restore and maintain healthy skin.

    Frizzy, Dry Hair Treatment

    Jojoba oil prevents shampoo from washing off the natural oils in the hair that keep it healthy. Just apply the oil to your hair before washing it with shampoo, and it will lock in the natural oils that your hair needs to look amazing. Another alternative method is to apply the oil to the hair while it is still damp after washing.

    You’ll have to see how much works best for your hair’s thickness and length, but a little goes a long way.

    You’ll have to see how much works best for your hair’s thickness and length, but a little goes a long way. The application of jojoba oil before and after hair washing will prevent it from being frizzy and dry later. By using this nourishing oil, you will give your hair a second line of defense against any number of environmental factors that dry it out every single day.

    Hair Loss Prevention

    Hair loss is caused by many factors, such as poor diet, skin conditions, and aging. The sad thing is that hair loss can’t be prevented since every hair strand has its own life cycle, causing it to fall out. Did you know that the average person may lose upwards of 50-100 strands of hair per day? That’s just scary!

    However, there’s no real cause for concern because it’s quite normal. New hair growth will replace older fallen-out hair strands. But as we discussed earlier, sebum and other debris can clog hair follicles, preventing hair strands from growing efficiently.

    What often happens is that new hair growth isn’t able to happen as quickly, meaning that it’s more difficult for new hair growth to catch up with normal hair loss.

    Therefore, if your hair is thinning due to blocked follicles, you should definitely use jojoba oil before trying anything more drastic. When you use it, add a few drops of peppermint oil to the mixture due to its similar properties of promoting hair growth (source). Rosemary essential oil also shows promise in terms of helping with hair loss, as described in multiple studies.

    Even if your hair isn’t thinning, jojoba oil will nourish your scalp and prevent hair loss in the future. Due to the nature of the oil, it helps hair follicles to grow new hair strands more quickly by keeping them free and clear of any pollutants. It easily seeps into the follicles and dissolves the sebum buildup while nourishing your scalp at the same time.

    Misconceptions About Jojoba Oil

    While jojoba oil is proven to improve hair and scalp conditions, there are a few common misconceptions.

    • “Jojoba oil is best for thicker hair, while almond oil is best for thinner hair.” False. Many people with thin hair who apply jojoba oil have achieved amazing results. It’s difficult to have a “one size fits all” for these kinds of things. Why not just try both to see what works best for your hair type?
    • “Jojoba oil causes hair to fall out.” False. However, hair loss may be caused by other ingredients found in products that may be added to certain brands of jojoba oil. This is why it is important to read the labels first before purchasing any beauty product. Be sure to buy pure jojoba oil if you plan to apply it to your hair.
    • “Jojoba oil smells terrible.” False. Pure jojoba oil has no smell at all. Other types of jojoba oil have a very weak, smoky smell but are not that strong. If, for some reason, you purchase a pure variation of jojoba oil that does smell less than desirable to you, just add a few drops of peppermint essential oil or another scent you’d prefer.

    Jojoba Oil Applications

    Applying jojoba oil is really easy, as we discussed a bit earlier. Since hair types are different and sometimes quite unique, you should experiment and see which one of the following three methods works best for your hair. You can use jojoba oil more casually or as a treatment for some specific hair or scalp deficiency you’re currently facing.

    First, you can apply jojoba oil to your hair in the morning before washing it and leave it in for 20-30 minutes. Remember, you don’t need a lot, just enough to coat each strand of your hair. Some people found it was best for them to leave it in their hair overnight and wash it out the following morning. Either way, it will improve the look and feel of your hair and scalp even after the first use.

    Second, you can apply jojoba oil by combining it with your shampoo or conditioner. This technique is similar to mixing coconut oil with shampoo or conditioner. The difference is that jojoba oil doesn’t need any melting before mixing it in, so application is a bit easier. If you’ve used coconut oil before, give jojoba oil a try to see which your hair likes best.

    Third, you can use jojoba oil as a leave-in conditioner after shampooing. Some people might find this undesirable because they may not like the feel of jojoba oil in the hair, even though I personally wouldn’t describe it as being greasy at all (unless you use way too much). Just a few drops of this oil will go a very long way for long-lasting protection from dryness and breaking.

    Wrap-up

    Jojoba oil helps to improve the overall health of your hair and scalp. With proper application, it will make your hair livelier and moisturized, making you feel more beautiful.

    Go ahead and see which application method works best for you. If you have a very dry scalp and don’t mind the feel of jojoba oil in your hair, I’d suggest leaving it in your hair all day for maximum effect.

    Nature really does provide us with lots of helpful and amazing natural remedies. Jojoba oil will prove to be an invaluable addition to your natural beauty regimen if it isn’t already.

    Jojoba Oil for Hair FAQs

    What are the key benefits of using jojoba oil for hair care?

    Jojoba oil is known for its moisturizing properties, its ability to help control dandruff and promote a healthy scalp, and for adding shine and softness to the hair.

    Can jojoba oil promote hair growth?

    While jojoba oil itself doesn’t cause hair to grow, its beneficial properties for the scalp and hair can create an optimal environment for hair growth by maintaining healthy hair follicles.

    How often should I apply jojoba oil to my hair?

    For best results, jojoba oil can be used as a hair treatment once or twice a week. You can adjust the frequency based on your hair’s response and personal needs.

    Is jojoba oil suitable for all hair types?

    Yes, jojoba oil is lightweight and suitable for all hair types, including oily, dry, or fine hair. It can help balance oil production for oily scalps and provide moisture for dry hair.

    How do I use jojoba oil as a hair treatment?

    Apply jojoba oil to your scalp and hair, massaging it thoroughly. You can leave it on for at least 30 minutes or overnight before washing it out with your regular shampoo.

    Can jojoba oil be used as a leave-in conditioner?

    Yes, jojoba oil can be used as a leave-in treatment. Apply a small amount to damp or dry hair, focusing on the ends, to help detangle and add shine without weighing hair down.

    Will jojoba oil help with a dry, itchy scalp?

    Jojoba oil’s moisturizing properties can alleviate dryness and soothe an itchy scalp. Its similarity to the scalp’s natural oils allows it to deeply hydrate the skin without causing buildup.

    How does jojoba oil protect hair from damage?

    Jojoba oil can help protect hair strands from damage by forming a protective layer around each strand, which can help prevent breakage and keep moisture locked in.

    Does jojoba oil have any benefits for color-treated hair?

    Jojoba oil is beneficial for color-treated hair as it can help maintain hair health and prevent color from fading by sealing in moisture and adding a protective layer to the hair cuticle.

    What is the shelf life of jojoba oil, and how should it be stored?

    Jojoba oil has a long shelf life compared to other oils because it’s technically a wax ester. It should be stored in a cool, dark place to preserve its quality. When stored properly, it can last for several years.

  • Birchbox Reviews: “Special Occasion February” – You Missed Out!

    Birchbox Reviews: “Special Occasion February” – You Missed Out!

    Birchbox Reviews: “Special Occasion February” – You Missed Out!

    Sometimes, it’s nice to watch a good movie, enjoy a smoothie, take a relaxing bath, or eat a tasty piece of chocolate. But did you know that you can treat yourself to some top-notch beauty products every month, too?  

    Today, I want to share with you everything you need to know about Birchbox and all the fantastic treasures that come with it!

    What is Birchbox?

    Trying out the latest beauty products can be a little challenging these days. With all the newest lotions, creams, shampoos, and perfumes coming out, it can be quite overwhelming and confusing to know which ones to spend money on. You may be asking yourself,”Which product should I try first?” or “I can’t possibly afford all the latest beauty gear at once!” You can throw all that confusion away with a monthly subscription to Birchbox.

    Birchbox is the perfect way for you to try many of the latest beauty products easily and conveniently without spending a fortune! Inside these cute little boxes, you will discover all kinds of top-notch beauty products that you will enjoy treating yourself to every month. It’s like receiving a surprise secret gift every month.

    Another really amazing aspect of Birchbox is that once you sign up, you can customize the different products you will receive to your own style. Each item you will get in your box is a sample version of a full-size product. Some of these sample sizes are what I’d consider more than samples. I’ve been using one particular “sample” of shampoo for about a week now!

    If you fall in love with the sample, you can purchase the full-size version on the Birchbox website.

    That’s right. You won’t ever need to experience the frustration of buying a large size of any particular product only to find out that you don’t like it in the slightest bit. To this day, I still have products I can’t stand that I bought over a year ago. I’ll never have this problem again now that I have Birchbox.

    Birchbox History

    Six years ago, founders Katia and Hayley had a dream they wanted to make a reality. They each saw a problem with the always-growing beauty product market. With new products being released all the time, it increasingly gets more difficult for customers to try out all of the latest products and not spend a fortune.


    Their dream was to make a way for women to enjoy all the latest products at once without going bankrupt in the process. And that is when they came up with a monthly subscription box. After they created their subscription box (with multiple different beauty products), they began to ship boxes once a month right to the doorstep of excited customers. They shipped their first box in September of 2010.

    With the success they experienced that September, they realized that they should reach out not only to women but also to men. In April of 2012, a Birchbox subscription for men was launched. With millions of boxes shipped, Katia and Hayley made their dream of helping people find products they love and enjoy a reality.

     Why I Love Birchbox

    Fireworks

    I love beauty supplies! I mean, what gal doesn’t? And this is one reason why I love Birchbox. Every month, I wait in anticipation of the surprise of a new lip balm, perfume, eyeliner, or any other kind of beauty-related product that will arrive in my monthly Birchbox. It is so much fun because every month there is always a little package on my doorstep just waiting for me to open it.

    I love the surprise waiting inside the box, and it makes my day whenever I receive my adorable little package. Some months, they’ll even throw in an extra gift!

    I have never gotten anything I didn’t like, and I am always looking forward to the next box. I’ve always been completely satisfied with every product I have gotten so far and have never had any reason to complain. Ever since I first signed up, I’ve been using Birchbox’s products daily.

    I also love how each box I get goes with the season. For example, in the July box, you might receive moisturizing sunscreen, a sun filter for color-treated hair, coconut-scented lotion, and a light floral-scented perfume. In the winter months, I’ve received lots of different leave-in conditioners and moisturizing lotions for those dry and cold days that are so harsh on hair and skin.

    Customize
    Customize according to your special tastes!

    Another reason why I adore Birchbox is that I can customize my preferences according to the kinds of products I like. Once you’ve created an account, you will have your own personal beauty profile.

    There, you can fill out your hair type, skin type, and personal style. Based on what you fill out in your beauty profile, you will receive products that match your description. Whether you like glitz and glamor or earthy and natural, Birchbox will send you your favorite style.

    The only negative I have about some of the products I’ve received thus far is that not all of them are all-natural. That being said, many of the products I’ve gotten are natural, organic, and vegan! I at least wanted to mention this so that any of you readers who sign up wouldn’t be confused if you received a chapped stick with a synthetic ingredient in it. In any case, since they’re only samples, I’m not actually wasting money and don’t need to use them long-term.

    I love Birchbox, and if you’re looking for a monthly beauty box to subscribe to, Birchbox is the obvious choice.

    Why is Birchbox a Good Choice?

    It’s important that we, as women, pamper ourselves once in a while. With all the hustle and bustle we get ourselves into, sometimes it’s nice to just stop and relax. Whether you enjoy relaxing in a hot bath or going out on a date with your hubby, it’s important for you to pamper yourself.

    With the products you will receive in your Birchbox, you can create your own spa at home or give yourself a makeover for your night out with your spouse. Indulge in each new surprise product you get!

    Another great perk with Birchbox is that you can receive points that accrue over time! For every 100 points, you get 10 dollars off in the Birchbox store. I’ve prepared a list to show you how to earn points and use them.

    How to Earn Points With Birchbox:

    • You can earn points by inviting friends
    • Every 1$ you spend in the Birchbox store is 1 point earned
    • 100 points earned is 10$ in the Birchbox store
    • Win points by reviewing products
    • Combine your points with coupon codes for even more savings

    There are a lot of fantastic benefits to subscribing to Birchbox. Without a doubt, you will always enjoy and indulge in your monthly box!

    Fabulous February’s Box

    Birchbox mail
    This is what your Birchbox will look like right out of the mailbox.

    The Reveal

    opened box
    This is the February box style.

    What’s really fun about these little boxes is you can use them for all kinds of different things. You can use them for organization and storage (I like to store makeup and hair supplies). And you can even use them as gift boxes.

    Now, let’s see what’s inside!

    Inside
    The cover comes off, and many things are to be revealed!

    February Box Contents:

    1. I really enjoyed this month’s box a lot. The shampoo and conditioner smelled amazing! My hair smelled great for days after washing it once with the shampoo and conditioner.
    2. The lip balm was another really great product. It goes on clear, but after applying it, the balm slightly colors your lips to match your very own skin tone.
    3. The exfoliating peel-off face mask refreshed my skin and made it feel soft and smooth. I love face masks anyway, and this one in particular not only smells fantastic but really moisturizes my face.
    4. The perfume was my favorite! The fragrance had a light, sweet, refreshing scent. It also lasted a long time after I applied it to my wrists. I think I’ll have to buy the full version of it when I’m finished with the sample!
    Contents

    So far, I have always loved each box I’ve received, and I’m very excited to see what they come up with in future months. February’s box, in particular, was really great! I can’t wait to see what I will get in March!

     Buying the Full-Size Products

    Trying out the new products you receive in your Birchbox has a lot of great benefits! Not only do you get a lot of great stuff each month, but just being able to sample these lovely products helps you to get a feel of their quality and whether or not you’d actually like to use them.

    After you try out the different beauty supplies, you can know exactly which products are the best for you. Once you’ve found that ‘really great product’, you can simply go to Birchbox.com and buy the full version. As new beauty products come out, Birchbox will enable you to keep up-to-date with the latest and greatest.

    Birchbox Shop

    The Birchbox shop has full-sized versions of the sample products you get in your monthly Birchbox. The Birchbox shop also has detailed categories to help you find the products you want. Shopping on Birchbox is incredibly easy, and you can read hundreds of reviews on all the products represented.

    You can browse other products in the shop too! You may want to try out something new, like a full-size mascara that really appeals to your style. Or, if you’ve received perfume from a particular company on Birchbox, you may want to try their other scents as well.

    Gifts
    Great gifting opportunities!

    Want to find that perfect gift for your best friend? The Birchbox shop is the best place to find that special gift. You could get them something you’ve sampled (and loved) in your monthly Birchbox, or you may want to give them a trending product with all the very best reviews.

    Ultimately, it’s up to you, but whatever you decide, you will be completely satisfied with your purchase. When you’re friend gets their gift from you, they’ll be like, “Where did you get this? It’s absolutely amazing?”.

    Did you know you can also shop by the brand? You can choose your favorite brand or browse through hundreds of other top-quality name brands. Also, one thing I like about Birchbox is that there are a lot of high-quality brands available that aren’t affiliated with the big names in the beauty industry that we’re all familiar with. That means that I can help support a smaller company that makes a high-quality product, which is what I’d prefer anyway.

    If you’re like me, I often can’t decide which specific products I want when I shop because I want them all! To prevent my husband from having a coronary from tons of purchases, there’s an option to check out the best sellers. If I’m not able to make a choice, I can go with an item that a lot of other people like as opposed to buying items I’m unsure about.

    I can then purchase other items later if I’m feeling adventurous after I’ve used up my existing products. Every item you click on will have lots of detailed reviews of that particular product. Some of the products even have up to 60,000 reviews! There are also helpful product filters to make your time shopping more efficient.

    Birchbox shop makes shopping for your favorite beauty supplies fun and easy! Plus, you get free shipping with every purchase over $50! I think you will find that shopping on Birchbox is pleasant and fun.

    Why You Need to Try Birchbox

    It really is important for you to pamper yourself, and that is why I recommend Birchbox. Getting a little package in the mail once a month is so much fun. The anticipation of knowing that new beauty supplies are on the way is always so exciting! Birchbox is a wonderful experience that every lady can enjoy. So don’t hesitate to treat yourself. Birchbox is the best and most enjoyable monthly beauty subscription box out there.

    Warning:

    • Addictions relating to checking the mail have been reported.
    • Frequent feelings of anticipation may be experienced
    • If your Birchbox hasn’t arrived, you may experience feelings of disappointment or tragedy.

    Thanks for reading!

    Birchbox FAQs

    What is Birchbox?

    Birchbox is a monthly subscription service that sends subscribers a box with multiple beauty product samples tailored to their preferences.

    What do the reviews say about the quality of Birchbox products?

    Reviews are mixed – some love the brands sampled, while others feel many products are cheap or repetitive. I happened to like the products and samples when I tried them out.

    How much does a Birchbox subscription cost?

    Birchbox costs $17-$20 per month, depending on the length of the subscription you choose. It’s $17 for a 12-month subscription.

    Do subscribers get to choose the samples?

    Subscribers fill out a beauty profile but do not get to pick specific samples. Birchbox selects based on preferences.

    What are the most common complaints in Birchbox reviews?

    Negative reviews cite small sample sizes, frequent repetition of brands/products, and samples that don’t match beauty preferences. I suppose that’s true for some, but I like a lot of variation, and I’m glad they aren’t too restrictive about what they send. When in double, just opt for a three-month subscription and see what your experience is.

    Do subscribers get full-sized or deluxe samples?

    Some samples are one-time-use packets. Some boxes include a mix of deluxe and full sizes. I find that I have multiple uses for many products, like perfumes, shampoos, lotions, etc.

    What do positive Birchbox reviews highlight?

    Satisfied reviewers say it’s fun to discover new brands, sample prestige items, and build a starter kit. Without Birchbox, there’s no way I would have known about some of the brands I really liked. When I’m in the mood to purchase a beauty product rather than make my own, Birchbox has really helped to give me some great options.

    How does Birchbox’s customer service rate?

    Reviews are very mixed – some cite great experiences while others faced long response times and lack of resolution for issues. It looks like this is an area where there could be some improvement.

    Is it easy to cancel a Birchbox subscription?

    Yes, you can easily log in and cancel a monthly subscription. But you may still receive a final box after canceling.

    Are there other beauty boxes that compete with Birchbox?

    Yes, competitors like Ipsy, Sephora Play, and Allure

  • Almond Oil for Dark Circles: Amazingly Simple Solution

    Almond Oil for Dark Circles: Amazingly Simple Solution

    Almond Oil for Dark Circles: Amazingly Simple Solution

    We all have dark circles under our eyes from time to time. For us ladies, dark circles are probably one of the most frequent of problems. I don’t know about you, but sometimes I have them even when I’ve gotten a full night’s sleep. But as I’m sure you already know, women aren’t alone in this problem because men and children have them, too.

    So what causes those tired-looking eyes? Well, according to the Mayo Clinic, dark circles are, of course, caused by fatigue and lack of sleep. Other causes include allergies, eczema, heredity, pigmentation irregularities, sun exposure, aging, and more. Also, since the skin around our eyes is thinner, reddish-blue blood vessels are more readily seen than in other parts of the body.

    Not only that, but due to the thinness of the area, the skin also tends to be somewhat more delicate and easily loses moisture. Other reasons for dark circles may include stress, iron deficiency, dryness around the eyes, unhealthy lifestyle, liver problems, and pregnancy.

    If you have dark eye circles, panic no more! There’s a great natural homemade remedy that can combat your dark eye circles: sweet almond oil. Almond oil is obtained from almond kernels and has a pale, light yellow color.

    It’s a natural ingredient with a high content of monounsaturated fats and vitamin E and is used for many cosmetic preparations as well. Besides that, it’s commonly used for medicinal purposes and flavorings.

    Sweet Almond Oil vs Bitter Almond Oil

    Almond Tre

    Before we get into how to use almond oil, we need to draw a clear distinction between the two most common kinds that are used. Whatever you do, do not confuse “sweet” almond oil with “bitter” almond oil!

    “Sweet” Almond Oil

    This oil is what we will refer to as “almond oil” throughout our article. This is the only oil derived from an almond that should be used on the skin. This particular oil comes from the Sweet Almond Tree (Prunus Dulcis, Var. Amygdalus).

    Sweet almond oil is a carrier oil that can be applied to the skin directly, just like coconut or jojoba oil. Sweet almond trees generally have white blossoms.

    “Bitter” Almond Oil

    This oil comes from the Bitter Almond Tree (Prunus Dulcis, Var. Amara). The oil, often called “bitter almond oil,” usually refers to the actual essential oil produced from bitter almond trees.

    Bitter almond trees typically have pink blossoms. This oil is incredibly more potent than sweet almond oil. Bitter almond oil should never be used on the skin.

    Almond Oil Properties

    • Almond oil has anti-inflammatory properties that reduce the dark circles around tired and puffy eyes. It’s an excellent addition to any natural skincare regimen.
    • It’s an effective moisturizer for the delicately thin skin under your eyes.
    • Almond oil is very rich in antioxidants (vitamins A and E).
    • It’s said to aid in contracting dilated blood vessels that cause discoloration around the eye.
    • It is a great source of vitamin K, which may reduce dark circles when applied topically, though there is some debate about this. (Source)
    • It’s a natural emollient and causes the skin to better retain moisture.

    As you can see, almond oil has very impressive properties that your skin will love. Furthermore, applying almond oil is quite easy!

    Direct Almond Oil Application

    In this method, the almond oil is directly applied to the skin. All you’ll need for direct application is almond oil and a bit of water!

    1. Wash your face with mild facial cleanser and rinse. Pat dry.
    2. Put a few drops of almond oil on your hands and apply it below the eye on your dark circles.
    3. Spread it evenly while massaging your eye area in circular motions for a few minutes. Leave it on overnight.
    4. The next morning, wash the almond oil off with the cold water.

    *Try this method consecutively over a number of days for better results.

    Almond Oil with Manuka Honey

    You need 5-6 drops of almond oil, 1 tablespoon of manuka honey, and lukewarm water for this application.

    1. In a small bowl, mix the almond oil and honey.
    2. Before bedtime, apply this mixture to your dark circles. Keep it on overnight.
    3. Rinse with lukewarm water when you wake up in the morning.

    *Try this application daily until you achieve your desired result.

    Almond Oil with Night Jasmine

    Night jasmine is an effective ingredient to help eliminate dark eye circles because it’s said to have anti-inflammatory properties and acts as a natural astringent as well. Due to those benefits, it can help heal many eye-related problems, such as puffy eyes and dark eye circles.

    In this method, you need two tablespoons of almond oil, 2 to 3 drops of jasmine essential oil, and lukewarm water. By the way, I absolutely love the smell of jasmine!

    1. In a small bowl, mix the jasmine oil and almond oil.
    2. Apply the mixture to your affected eye area.
    3. Massage it into the area for a few minutes to encourage blood circulation around the eyes. Leave it for 20 to 30 minutes. 
    4. Rinse it off with lukewarm water.

    *Continuous application of this almond and jasmine oil mixture will give you the best results for eliminating dark eye circles.

    Almond Oil with Milk Powder

    1. Take an equal amount of milk powder and almond oil. (If you use 1 teaspoon of almond oil, use 1 teaspoon of milk powder as well.)
    2. Stir them well to make a thick paste.
    3. Apply the almond/milk paste on your dark eye circles.
    4. Leave it on your eye area for 10 minutes or until it dries completely.
    5. Wash it off with water, and pat dry your skin.

    *Repeat as necessary.

    Almond Paste

    With a few almonds, water, lemon juice, and milk, you can make an almond paste that effectively removes dark eye circles. To change things up a bit, I wanted to include this recipe because it doesn’t require actual almond oil, just almonds!

    1. Put a few almonds in a bowl and pour in the water to cover the almonds. Let it sit undisturbed overnight.
    2. When you wake up the next morning, you’ll find the almonds are soft enough to peel their skins. Peel the skin from the almonds.
    3. After peeling the skins, place the almonds in a food processor or mortar and pestle. Grind the almonds until they reach a paste-like consistency.
    4. Apply this almond paste to your dark circles. Leave it there for 20 – 30 minutes.
    5. Gently rinse with warm water.

    Optional:

    • For natural bleaching properties, add a few drops of lemon juice.
    • For natural exfoliation and softening, add a few drops of milk.

    *Repeat every day for best results.

    Wrap-Up

    There are many other methods besides the ones above that you can use to reduce those pesky circles under your eyes, but you will love the ones we mentioned. Regardless of what you put on your skin to remove your dark circles, bad health and lifestyle habits will always bring them back. If dark circles are a daily problem for you, your body may be telling you that you need to take some time for rest and relaxation.

    Relaxation

    So, be sure to get adequate sleep, drink enough water, and eat a balanced diet.  A healthy lifestyle combined with nourishing skin habits will keep your eye area free of those frustratingly common dark circles. Sweet Almond oil is an amazing ingredient that your skin will love!

    Keep in mind that you shouldn’t use almond oil as a topical solution if you have nut allergies! Nutty ingredients such as almond oil are known to cause allergies in people.

    Sweet Almond Oil for Dark Circles: FAQs

    Can almond oil be combined with other ingredients to enhance its effectiveness on dark circles?

    Yes, almond oil can be mixed with other natural ingredients like vitamin E or rosehip oil to potentially boost its effectiveness in treating dark circles.

    Is there a particular type of almond oil that’s best for use on the delicate skin around the eyes?

    Cold-pressed and organic almond oil is often recommended for skin care because it’s minimally processed, retaining more of its natural nutrients that are beneficial for the skin.

    How does almond oil compare to other natural oils for treating dark circles?

    Almond oil is lighter than many other oils, which makes it a good choice for the sensitive and thin skin around the eyes. It’s less likely to clog pores compared to heavier oils.

    Are there any side effects of using almond oil for dark circles?

    Almond oil is generally safe, but some people may experience irritation or an allergic reaction, especially if they have a nut allergy. Always do a patch test before applying it to your face.

    Can I use almond oil if I wear contact lenses or have sensitive eyes?

    You should be cautious when applying any product near the eyes. Almond oil is generally safe, but make sure it does not get into your eyes or onto your contact lenses. If you have sensitive eyes, consult with an optometrist beforehand.

    Will almond oil help with wrinkles and fine lines as well as dark circles?

    Almond oil’s moisturizing properties can help improve the appearance of fine lines by hydrating the skin and improving its elasticity.

    How should almond oil be stored to maintain its potency for dark circle treatment?

    Almond oil should be stored in a cool, dark place to prevent oxidation. A dark glass bottle is ideal for preserving its quality.

  • What is Tallow? – Natural Solution for Beautiful Skin

    What is Tallow? – Natural Solution for Beautiful Skin

    What is Tallow? – Natural Solution for Beautiful Skin

    As you know, all-natural skincare products are safe and gentle, even for sensitive skin. However, some people are allergic to coconut oil or may have other nut allergies preventing them from using sweet almond oil. While there are other great natural solutions for healthy skin besides almond and coconut oil, our subject today is tallow.

    Again, if you have sensitive skin, you likely can’t use most store-bought skincare products because most of them contain chemicals and other substances that might cause undue damage to your skin. What’s surprising is that tallow, a natural ingredient that is usually used for cooking, can also be a safe alternative ingredient for skin care.

    So, what may already be found in your kitchen may turn out to be one of the best skincare ingredients you’ve ever used. Believe it. 

    Beef Tallow Properties

    Tallow is rendered fat from just about any meat other than pork, usually beef. Animal fat for beauty products? Well, believe it or not, tallow is already found in many skincare products like lipstick, eye-shadow, shampoo, and some moisturizers. The problem, of course, is that those same products oftentimes contain other terrible ingredients or don’t use high-quality grass-fed tallow.

    Tallow for skincare use definitely isn’t unheard of in the skincare industry. It’s believed that most large beauty companies use it because it’s less expensive than other ingredients.

    Tallow is made of 42% monosaturated fat, 50% saturated fat, and 4% polyunsaturated fat. It’s more heat resistant to damage from heat compared to unfiltered coconut oil and lard. Tallow, especially the tallow that comes from grass-fed animals, also consists of cancer-fighting conjugated linoleic acid (CLA) (Source)

    Compatibility of Tallow to Human Skin Biology

    Some animal rights activists disapprove of the use of animal-derived ingredients for skin care products. Therefore, tallow easily makes it onto the “naughty” list for many. But Tallow is for you if you’re not entirely opposed to animal products for your own skincare. The truth is that many animal products are beneficial for skin health.

    As long as animals are sustainably raised, there’s no ethical dilemma in utilizing every part of the animal in order to prevent needless waste. In our case, using tallow for skincare is one way to reduce the amount of things that may otherwise go to waste without ever being used.

    Tallow and human skin biology are quite compatible. Our skin is made of cell membranes, which are primarily made up of 50% saturated fats. Therefore, healthy skin is quite high in fat content overall. Surprisingly, like the cell membrane of human skin, tallow fat is also rich in saturated fat and monounsaturated fat. Therefore, using tallow fat for your personal skin health makes a lot of sense because of its skin compatibility.

    Moreover, tallow fat is abundant in naturally fat-soluble vitamins A, D, K, and E that promote overall skin health. Furthermore, tallow also contains palmitoleic acid, which is known to have anti-microbial properties. (Source)

    Tallow Beauty Recipes

    Well, our verdict is that tallow is very beneficial for skin care. So, if you’re ready to try out this natural skincare remedy for yourself, that’s great because you will love the results. Here are some homemade skin care products that you can easily make to incorporate tallow into your daily beauty regimen.

    Tallow Lotion Bars

    Tallow lotion bars

    Tallow lotion bars make skin feel silky and smooth while also soothing any existing skin irritation. These lotion bars can also be used as an effective remedy for mild sun protection (but not a replacement for sunscreen), because of the fat-soluble content of tallow and the natural SPF properties of shea butter. It’s also effective in treating skin with eczema scars and scratches.

    Ingredients:

    • 1/3 cup of shea butter, cocoa butter, or mango butter
    • 2 tablespoons of beeswax
    • 20 drops of essential oil of your choice – citrus oil, lavender, peppermint, or almond oil
    • 1/3 cup of beef tallow (grass-fed)

    Instructions:

    1. In a quart-size mason jar, combine all the ingredients except the essential oil. Place this mason jar in a saucepan with water.
    2. Bring the water in the saucepan to a low simmer. Constantly stir the ingredients to melt and combine them evenly.
    3. When they’re melted and mixed, remove from the heat. Add the essential oil and stir.
    4. Pour the mixture into the soap mold of your choice. Allow to settle and harden.

    Once you have your own tallow lotion bars, store them in a cool, dry place. Feel free to place them inside your dresser drawer or wherever you keep other beauty supplies. Also, they have a shelf life of 6 months or even longer.  Once they’ve hardened and are cool enough, just rub your new lotion bars directly onto your skin as part of your beauty regimen.

    Lotion bars can be used in the same way that you’d use body butter, the only difference being that they’re in solid form.

    Whipped Tallow Facial Cleanser

    Tallow facial cleanser

    Tallow is also a great oil cleansing product because of the basic chemistry principle of “fat dissolves fat”. It can clear your pores from bacteria and dirt and gives your skin protection and nourishment. With continuous use and proper application, this whipped tallow facial cleanser will normalize your skin chemistry.

    If you have problems with your skin being oily, dry, sensitive, or acne-ridden, these lotion bars can be made according to your specific skin needs.

    Ingredients:

    • ½ cup beef tallow
    • Castor oil (1-2 tsp. OR 1 tbsp).
    • 10 drops of essential oils of your choice

    Instructions:

    1. With a hand or cake mixer, whip up the tallow until it reaches a fluffy consistency.
    2. Once it’s all whipped up beautifully, add the castor oil. The amount of castor oil depends on your skin type. For oily or acne skin, pour in 1 tablespoon. For dry skin, put 1 teaspoon. For balanced or normal skin, put 2 teaspoons. It’s always safe to use a lesser amount of castor oil at first, then add more later according to your needs.
    3. Add the essential oil to enhance the scent according to your liking. You can also use a specific kind of essential oil depending on your skin type as well. For oily skin, you may use lavender, clary sage, bergamot, or geranium; for sensitive skin, use helichrysum or roman chamomile; for dry skin or anti-aging, use lavender, rosemary, roman chamomile, or sandalwood; and lastly, for acne, use cedarwood, sandalwood or helichrysum.
    4. Continue to whip until everything reaches a fluffy and creamy consistency.

    Here’s how to use this amazing cream:

    • Scoop out some whipped tallow facial cleanser with your fingers and gently rub it on your face. Cover your entire face with a thin layer and massage it lightly.
    • Then, cover your face with a hot washcloth and keep it in place until it cools. This steams the facial cleanser into your pores.
    • After steaming your face, rinse the washcloth and gently pat your face. Continue this process of rinsing and patting until the cleanser has been removed from your face. Do not rub!
    • Pat dry, and you’re finished!

    Now, your face is clean and moisturized without stripping your skin of all the oils it needs to remain healthy. With proper and consecutive application, your skin will improve and balance its natural oil content without the use of harsh chemicals. If you find that the cream cleanser is too oily or not oily enough, simply adjust it to your preference.

    Tallow for Skincare: FAQs

    What is Tallow?

    Tallow is rendered fat, traditionally from cattle or sheep, that is used in cooking and skincare. In skincare, it’s valued for its similarity to human skin oils, providing deep moisturization and nourishment.

    Why is Tallow considered good for the skin?

    Tallow contains vitamins A, D, E, and K, along with essential fatty acids, making it deeply nourishing for the skin. Its composition is similar to the oils naturally produced by our skin, which can help to maintain healthy skin barrier function.

    Can Tallow be used on all skin types?

    Tallow is generally suitable for all skin types, but as with any skincare product, it’s recommended to patch test first, especially if you have sensitive skin.

    How do you use Tallow in your skincare routine?

    Tallow can be used as a moisturizer by applying a small amount to the skin and massaging it in until absorbed. It can also be found as an ingredient in soaps, balms, and other skincare products.

    Is Tallow skincare better than plant-based alternatives?

    Whether tallow is better than plant-based alternatives depends on individual skin types and preferences. Tallow is praised for its compatibility with human skin lipids, but plant-based oils can also be highly effective and might be preferred by those seeking vegan options.

    How can Tallow benefit dry skin?

    Tallow is an excellent emollient, meaning it can help to soften and moisturize dry skin. Its rich fatty acid profile helps to replenish lipids in the skin, which can improve hydration and elasticity.

    Does Tallow clog pores?

    Pure tallow is considered non-comedogenic for most people, meaning it does not clog pores. However, individual reactions can vary, and it’s important to monitor your skin’s response when trying any new product.

    Can Tallow help with skin conditions like eczema?

    The natural fats and nutrients in tallow may help soothe and repair the skin barrier, potentially providing relief for conditions like eczema. However, consult with a healthcare provider for advice on managing medical skin conditions.

    Is Tallow an ethical skincare choice?

    The ethics of using tallow depend on personal views on animal products and sustainability. Tallow is a byproduct of the meat industry, and using it in skincare can be seen as a way of minimizing waste.

    How does Tallow compare to synthetic moisturizers?

    Tallow is free from synthetic chemicals and preservatives, which can be beneficial for those looking to reduce their exposure to potentially harmful substances often found in conventional skincare products. Its composition is rich in nutrients that are naturally compatible with our skin, potentially offering more holistic benefits.

  • Best Blow Dryer for Natural Hair: Keep Your Hair Beautiful!

    Best Blow Dryer for Natural Hair: Keep Your Hair Beautiful!

    Best Blow Dryer for Natural Hair

    It may very well be said that the blow dryer is one of the most important hair essentials for any woman. Day in and day out, we use it to dry our preciously beautiful hair. After it’s reached what we’d consider “peak” dryness, we then move on to styling with all manner of brushes and combs.

    We take for granted just how much more difficult getting prettied up would be without such a handy little invention!

    The wonderful devices they are, blow dryers really are quite simple in function. We pretty much already know their function though right? Aren’t they basically just electrically powered devices that cause moving air to pass through a hot coil, that in turn evaporates water from the hair? Well yea, that’s basically their function. But, as you already know, no two blow dryers are alike!

    Lots of Options to Choose From

    There are many varieties of blow dryers for different types of hair. Some of them may even more easily damage your hair if they’re lacking in quality. So, make sure to choose a good quality blow dryer from the beginning (and use it properly).

    If you find that it takes an incredibly long time to dry your hair, that’s probably because the wattage of your current blow dryer is too low, meaning that it really isn’t all that powerful. Hair stylists recommend choosing a blow dryer that is at least 1800 watts.

    Without listing each and every single feature available in blow dryers today, I will list a few of the areas where you will see great diversity from one model to the next.

    Key Blow Dryer Features

    When it comes to what kinds of options and add-ons are available, the list is almost endless. There are a number of specifications and features you should keep in mind when shopping for a blow dryer.

    When shopping, ask yourself a few questions: 

    – What features are lacking with your current blow dryer?

    – What don’t you like about your blow dryer?

    – Do you want extra attachments?

    When buying a blow dryer, pay attention to the details before you spend your money because you don’t want to buy a piece of junk! 

    A Few Key Areas of Comparison:

    • Wattage
    • Attachments
    • Ease of Use
    • Speed Settings
    • Heat Settings
    • Heat Protection Features
    • Construction Quality (materials, safety, etc.)

    * As you consider your options, be sure to take notice of what each model has to offer as relates to the above features and specifications.

    Amazing Blow Dryers for Natural Hair

    The blow dryers in our list below are all top-notch. Not only do they have raving reviews, but the first option is the most popular blow dryer on Amazon. Depending on your preferences, at least one of these blow dryers below will definitely meet and exceed the needs of your beautifully natural hair.

    Down the road, we also plan to make a blow dryer buying guide that will go into greater detail regarding more expensive blow dryers as well. But, the models on our list below will give you Professional results at an affordable price.

    1.) Xtava Allure Professional Ionic Ceramic Hair Dryer

    Xtava Allure

    Out with the old and in with the new! You will style with ease using this 2200-watt lightweight Xtava Allure Professional Ionic Ceramic Hair Dryer. Its sleek and stylish design includes a concentrator nozzle that helps you concentrate the air on the area you’re targeting while adding precision and focus for frizz control. With this more targeted approach to styling, you’ll see better overall results.

    What makes this model special is its tourmaline ionic ceramic technology that helps dry hair up to 80% faster, without over-drying, while at the same time adding volume. This technology helps break up water quickly, therefore reducing your overall time blow drying.

    Not only that, but while it dries your hair it also emits powerful negative ions that seal the outer layer of the hair to protect it from frizz and increase shine. Your hair will surely look good and hydrated after blowing it dry with this hair dryer. It features two speeds and three heat settings for more versatility and control.

    Pros

    • Lightweight
    • Sleek and stylish design
    • Tourmaline ionic ceramic technology
    • Emits negative ions
    • Two speed settings
    • Three heat settings
    • Includes concentrator nozzle
    • Dries hair faster
    • 2200-watt professional motor
    • Cold shot button
    • Quiet motor

    Cons

    • No diffuser
    • Stiff cord

    The Xtava Allure Professional Ionic Ceramic Hair Dryer ensures the high quality and cruelty-free professional hair drying that every woman deserves. Purchase one for yourself and treat your hair to a salon-like result without spending a fortune, and without damaging your hair!

    2.) Rusk W8less Professional Lightweight Ceramic Tourmaline Hair Dryer

    Rusk W8less

    After washing your hair, drying it with the Rusk W8less Professional Lightweight Ceramic Tourmaline Hair Dryer gives your hair more volume and shine without unwanted frizz.

    It packs a 2000-watt motor with an ion generator that protects the outer layer of your hair, making it shinier and better protected. This hair dryer dries hair quickly because of its ceramic grill infused with tourmaline. It also has seven heat and speed settings with a cold shot feature for added versatility.

    If you’ve ever had issues with a cord being too short before, you won’t have that issue with the Rusk because its cord measures up to 8 feet. Plus, its concentrator nozzle will help you focus the hot air on one area, drying it quickly and gently while still maintaining precision control.

    Pros

    • 2000 watt motor
    • Lightweight
    • Ion generator
    • Ceramic grill with tourmaline
    • 8 feet power cord
    • 7 speed and heat settings
    • Concentrator nozzle
    • Cold shot
    • Quiet

    Cons

    • The cord is too long if you don’t need all 8 feet (bulky storage)
    • No diffuser

    The Rusk W8less Professional Lightweight Ceramic Tourmaline Hair Dryer is a smart buy if you need a good blow dryer. It has everything you need. The negative ions seal in nutrients and prevent hair frizz, the concentrator nozzle helps you work on one section at a time, and a ceramic grill with tourmaline helps to dry hair faster. It’s also lightweight and can be moved in any direction because the cord has an 8-foot length.

    3.) Chromatique Professional E3 5200 Tourmaline Ionic Ceramic Salon Hair Dryer

    Chromatique Professional E3 5200

    Dry and style your hair with this convenient and sleek metallic red blow dryer! It’s modern and professional look might catch your attention, but this hair dryer boasts more than just sleek looks. This Chromatique Salon Hair Dryer has unique features you will love. It also uses nanotechnology that brings out your hair’s natural shine, resulting in frizz-free and healthier hair.

    The ceramic tourmaline ionic technology makes for a faster dry time while protecting hair from damage as well. It’s also built with a long-lasting quality motor with two speed settings, as well as three heat settings (cool shot too). With the proper amount of heat and faster application, your hair will have very good results with this blow dryer!

    Pros

    • Ergonomic design
    • Comes with a diffuser!
    • Heavy-duty cord with hang-up hook
    • Three heat settings
    • Two speed settings
    • Two concentrator attachments
    • Cool shot
    • Ion generator
    • Ceramic grill with tourmaline

    Cons

    • Some say it’s a bit heavy

    This blow dryer will keep your hair looking beautiful. It comes with a sleek metallic red finish and ergonomic design for easier use and control. It will effectively style your hair with proper use. You will not be disappointed with its unique features, especially the nano tourmaline ionic ceramic technology and extra diffuser attachment. It even has two concentrator attachments! Some people do say it’s a bit on the heavy side, but that’s because of the quality motor.

    Wrap-Up

    All of these blow dryers work great for natural hair because they all use technology that works to produce dry hair without damaging results. They all have concentrator nozzles to help you focus on one area at a time and use technologies that make for faster and gentler drying times. The tourmaline will allow for faster dry times while preventing your hair from damage caused by heat. At the same time, negative ions will seal in moisture and nutrients to protect the outer layer of hair.

    The things that differ between all three of the above options are the cord lengths, speed and heat settings options, and overall design. Also, the Chromatique does include a diffuser attachment, but attachments can be purchased with the Xtava and Rusk as well. Whichever blow dryer you choose out of these 3, you will be satisfied!

    Best Blow Dryer for Natural Hair FAQs

    What features should you look for in a blow dryer for natural hair?

    Look for ionic technology, adjustable heat settings, a cool shot button, a diffuser attachment, and wattage between 1800-2500W.

    Which type of blow dryer is best?

    A hooded dryer or bonnet attachment allows hands-free drying. Handheld dryers allow more styling flexibility.

    What makes a blow dryer good for avoiding heat damage?

    Tourmaline or ceramic coating helps evenly distribute heat and minimize damage from hot spots.

    Is ionic technology important for blow drying natural hair?

    Yes, ionic tech helps reduce frizz and static by sealing the hair cuticle. This helps curls stay defined.

    How can you minimize hair damage when blow drying?

    Use lower heat settings, diffuse hair partially dry, and finish with a cool shot to seal cuticles.

    Should you use a diffuser attachment for natural hair?

    Yes, a diffuser evenly distributes airflow to gently dry curls without disrupting the curl pattern.

    What is a good wattage for quickly drying thick or coarse hair?

    Look for 1875-2500W for power and fast drying time on thicker natural hair textures.

    How can you add volume when blow drying natural hair?

    Use a diffuser on low heat and turn your head upside down while drying the roots.

  • Manuka Honey for Skin: Tremendous Benefits for Healthier Skin

    Manuka Honey for Skin: Tremendous Benefits for Healthier Skin

    Manuka Honey for Skin: Tremendous Benefits for Healthier Skin

    Why buy expensive skincare products or undergo skin treatments when you’ve got an alternative? There’s an amazing all-natural skincare ingredient that can be applied by itself, added to your own DIY skincare recipes, and tailored to your skin type.

    As you may have guessed by the title, I’m talking about Manuka honey!

    I know you’ve heard all kinds of things about honey in general, but how does Manuka honey differ from other kinds of honey in general?  Well, we’ll address the below questions and more as we learn about this amazing and natural remedy.

    – Does Manuka honey actually work?

    – Where does Manuka honey come from?

    – How is it being used to improve skin?

    What is Manuka Honey?

    Manuka honey is produced by bees that feed on the manuka shrub (Leptospermum scoparium) that grows throughout New Zealand. The shrub can actually grow into a moderately sized tree, anywhere from 7-16 ft tall (source).  

    Its scented flowers are usually white or pink colored and, at first glance, appear to be identical to Kanuka flowers (Kunzea ericoides), which grow on a tree that reaches upwards of 30 feet tall.

    Manuka Flower
    Manuka Flower.

    The honey produced from the Manuka plant is more effective and has more health benefits when it’s raw and unheated. Plus, it has better therapeutic properties than other kinds of honey overall. Interestingly, it’s said that earlier settlers considered the plant an invasive shrub, which proved a frustration because it would keep growing after they cleared their lands of it.

    However, nowadays, the plant is used in revegetation efforts and on bare or otherwise eroded slopes.

    To make this wonderful honey, it’s really just a matter of location for the beekeeper.  In order to be sure their honeybees pollinate Manuka plants as opposed to other flowering plants, the beekeepers place themselves and their bees in close proximity to areas where the Manuka plant grows.  

    Their bees then gather nectar and pollen until enough honey has been produced in the honeycomb.

    Manuka Honey Properties

    Manuka honey has anti-inflammatory properties that are great in eliminating inflammation and redness of acne breakouts, cysts, and pimples. All around the world, and especially in New Zealand, the best manuka honey is often called “medical manuka honey.”

    Medical Manuka honey is useful for the treatment of burns, wounds, and infections. One property of this honey is that it seems to enhance immune activity at wound sites where it’s applied due to the arabinogalactan proteins it contains.

    Further studies show that the honey releases other anti-inflammatory proteins known as cytokines as well. (Source)

    Manuka honey also exhibits antimicrobial activity against Staphylococcus Aureus (that resists many antibiotics) and Helicobacter Pylori, which causes stomach ulcers. In 2008, Thomas Henle, a professor at the University of Dresden, discovered that it was Methylglyoxal that gave Manuka honey its antimicrobial activity.

    Lab Equipment

    Therefore, research is promising in regards to Manuka honey being used as a functional food treatment for various kinds of wounds and ulcers (source).  With the ever growing body of science in regards to this special honey, more and more exciting beneficial properties are discovered one after another.

    How Has It Been Used in History?

    The first medicinal reference to honey we see in history was found in an ancient writing on a Sumerian tablet dating back to 2100-2000 BC. It mentions the use of honey as a kind of drug and also as a beneficial ointment.

    Even Aristotle (384-322 BC) described more pale variations of honey as being “good as a salve for sore eyes and wounds”. 

    For centuries, Manuka honey has been used as a natural wound dressing because it aids in the fast healing of wounds and prevents bacterial infections.

    Honey has been used medicinally for quite some time.

    Also, due to technological advances, this honey can now be more efficiently produced in a humane manner without harm to the bees.  

    Not only have we been able to enhance the production methods of Manuka honey, but we are also now able to study the chemical makeup of honey in general so that we can differentiate specific properties from one kind of honey to another.

    Tremendous Benefits for Healthier Skin

    Manuka honey is pretty amazing at improving skin health for a multitude of reasons. It generally makes skin youthful, clearer, and more hydrated because of its hygroscopic properties. Among its specific skin benefits, here are a few:

    Anti-Aging

    Collagen is an important part of skin cells. Healthy collagen makes for healthy and youthful-looking skin. Manuka honey is known to increase the cross-linking of collagen, thus improving its structural growth. It also contains amino acids, which are the building blocks of collagen.

    Skin Cleansing

    Have you tried many skincare products and treatments, none of which work to repair your blemished skin? If that’s the case, you probably also experienced your skin becoming worse due to certain products. How about trying Manuka honey instead?

    Since it has anti-inflammatory and antimicrobial properties, Manuka honey soothes inflamed skin and heals blemishes. This sticky substance may not be your best option when it comes to texture and feel, but it’s one of the best all-natural remedies for keeping the pH level of your skin optimal, as well as for sloughing away dead skin cells.

    After using this honey consecutively as part of your healthy skin regimen, your skin will look clearer and brighter.

    Hydrates Skin

    Again, Manuka honey draws moisture into the skin because it’s naturally hygroscopic, meaning that it naturally absorbs and retains water from the air. Because of this hydration, it improves skin elasticity and cell regeneration. It also helps hasten the healing of any skin blemishes and irritations.

    How to Nourish the Skin with Manuka Honey

    There are many other ways you can use Manuka honey, depending on your purpose. However you use it, remember, it’s honey.  That means that it’s very sticky. So, try to keep it out of your hair. The following will guide you on how to use Manuka honey for a couple of specific uses:

    Manuka Face Mask

    Manuka honey as a face mask:

    1. Wash your face with your regular cleanser first in order to get the best results.
    2. After washing and drying your skin, wet or mist it a bit in order to make the application of the honey easier.
    3. Apply one tablespoon of the honey evenly over your entire face. Leave it there for 15 to 20 minutes. During this time, the antibacterial activity of Manuka honey takes place.
    4. Wash it off with warm water and pat dry.

    Overnight Scar Treatment

    If you’ve got a special occasion the next day and you have accidental or unwanted scars on your face, your best friend for the night is Manuka honey. It’s great for soothing redness and treating scars.

    Plus, it keeps skin moisturized. Nothing will instantly heal your skin, and as always, real results happen over time. 

    Be sure to make Manuka honey part of your regular beauty regimen because it quite effectively assists in skin healing.

    To use it overnight:

    1. Apply a thin layer of honey to the moistened face and gently massage it into the skin for further skin absorption.
    2. Now, I’m sure you don’t want to mess up your pillow or bedding, so just cover them with a towel or old cloth.
    3. When you wake up the next morning, wash your face and remove any remnant of honey.
    4. Once your face is clean, pat dry.

    Skin Cleanser

    Manuka honey makes a great natural skin cleanser since it helps to eliminate bacteria. If you don’t have the time to apply a face mask or let the honey remain on your skin overnight, you can use it as a quick facial cleanser as well.

    Even though you may not have as much time to let the honey remain on your skin, you can increase the amount of time by simply spreading the honey on your skin before you floss, brush your teeth, or do anything else that’s part of your morning routine.

    That way, the honey will nourish your skin the entire time as you get ready to jump in the shower.

    Use it as a skin cleanser:

    1. Apply honey to moistened skin before getting a shower
    2. Thoroughly massage honey into the skin.  If the honey is too thick, add more water.
    3. Jump into the shower and rinse.

    Acne and Pimple Treatment

    As you may know, other anti-acne facial cleansers have ingredients that can worsen your skin’s condition. On the other hand, Manuka honey is a natural and easy remedy for reducing inflammation and speeding up the healing of acne and pimples. It can even be combined with aloe and other natural ingredients known to help with acne.

    To Treat Acne:

    1. Apply a thin amount of the honey to the affected area. For single pimples or blemishes, apply the honey to a small band-aid.
    2. Cover it with a band-aid to restrain the spread of the honey while keeping it in contact with the affected area.
    3. Leave it on overnight for faster healing. You can also leave it on for at least 30 minutes if you don’t want to do the overnight solution.
    4. Remove the band-aid with warm water and rinse off.
    5. Repeat this application until your acne blemishes and pimples fade away.

    *Note: In order to keep your skin moisturized after cleansing with any of the above methods we mentioned, just add a bit of this honey into your favorite all-natural moisturizer.

    How to Buy Manuka Honey

    When purchasing a bottle of Manuka honey, it is important to read and understand its bioactivity or “strength,” as indicated by numbers ranging from 5 to 25 (NPA/UMF) or MGO (Methylglyoxal). Let us take a look at these two classifications below.

    UMF

    Usually, Manuka honey bottles have measurements of their bioactivity notated as “UMF” (Unique Manuka Factor). UMF is a grading system that measures and identifies whether the honey is unadulterated by testing for “non-peroxide activity” (NPA).

    • UMF 5-9 means low activity levels
    • UMF 10-15 means moderate activity levels
    • UMF 16+ means high activity levels.

    MGO

    The MGO notation refers to the actual amount of methylglyoxal contained in the honey (parts per million/ppm). There is a relationship between non-peroxide activity and Methylglyoxal (MG). As noted earlier, methylglyoxal is the antibacterial compound that gives this honey its uniquely beneficial properties.

    *To see how UMF relates to MGO quantitatively, click here.

    Decoding Manuka Honey Product Labels

    Honey Jar
    Choose UMF 16+ / MGO 500+ Manuka Honey

    As usual, these ratings can be quite confusing!  If you’re searching for the best Manuka honey to buy and are presented with either of the above rating methods, you can check out this handy UMF/MGO calculator here in order to see the equivalent value in the opposite rating method.

    In any case, the research is solid. Manuka honey is indeed packed full of benefits! Therefore, be sure to include Manuka honey as part of your beauty regimen to experience healthier skin.

    *Note: Choose UMF 16+ or MGO 500+ Grades of Manuka Honey For the Best Results

    Manuka Honey FAQs

    What makes Manuka honey beneficial for the skin?


    Manuka honey’s antibacterial and anti-inflammatory properties are what make it particularly beneficial for skin health, helping to soothe irritation and potentially reduce the occurrence of acne.

    How can Manuka honey improve skin health?


    Its hydration properties and ability to promote wound healing can lead to clearer, more moisturized skin.

    Can Manuka honey be used on sensitive skin?


    Sensitive skin can often tolerate Manuka honey, but it’s always best to perform a patch test before applying it more broadly.

    How do you use Manuka honey on your face?


    Manuka honey can be used as a face mask by applying a thin layer, leaving it on for 15-20 minutes, and then rinsing with warm water.

    Is Manuka honey good for acne-prone skin?


    The antibacterial nature of Manuka honey makes it suitable for acne-prone skin, helping to cleanse pores and reduce bacteria.

    What skin types can benefit from Manuka honey?


    Oily, dry, and combination skin types can all enjoy the moisturizing and soothing effects of Manuka honey.

    Can Manuka honey help with skin aging?


    The antioxidants in Manuka honey may help protect against oxidative stress, which is beneficial in managing the visible signs of skin aging.

    How often should you use Manuka honey on your skin?


    While it can be used daily for general skincare, more intensive treatments like masks are recommended 2-3 times a week.

    What should you look for when buying Manuka honey for skincare?


    A high Unique Manuka Factor (UMF) rating is key as it indicates the level of beneficial active compounds.

    Can Manuka honey be mixed with other ingredients for skincare?


    Yes, it pairs well with other natural ingredients like oatmeal or aloe vera to enhance its skincare benefits.