DIY Sea Salt Hair Treatment: Easy Spray for Beach Waves
Craving soft beach waves without heat or perfume-heavy sprays? You’re in the right spot. This simple, low-tox DIY sea salt hair treatment gives touchable texture, light hold, and that just-back-from-the-shore look in minutes.
Click here to skip to the recipe.
We’ll mix a quick spray with pantry staples and a few smart add-ins. I’ll show you what each ingredient does, based on hair-science principles, so you know why it works, not just how. You’ll get easy styling tips, options for fine, wavy, or thick hair, plus safe storage so your bottle stays fresh.
I use this on busy mornings when I want lift and movement without a curling iron. It’s budget-friendly and, when used wisely, family-safe. If you enjoy simple, natural routines, this fits right in. Pair it with gentle care like these homemade leave-in conditioner recipes for softness without buildup.
Ready for the spray recipe, light hydration boosters, and a scalp-friendly salt ratio that won’t leave hair crunchy? Let’s make your own DIY sea salt hair treatment that’s clean, quick, and easy to tweak for your hair type.
What Is Sea Salt Hair Spray and Why It Works
Sea salt hair spray is a light styling mist that adds texture, grip, and soft hold. Salt increases gentle friction along the hair shaft, which helps strands catch and curve into loose waves. Think of it like giving hair a little grit so it can hold shape without heat. A well-made DIY sea salt hair treatment balances that grip with moisture. Aloe vera calms the scalp and hydrates, while a lightweight oil cushions dry ends so your hair feels touchable, not crunchy.
Key Benefits for Everyday Hair
On busy mornings, this spray is a small helper that does a lot. It gives heatless beach waves in minutes, which saves time and protects hair. Salt adds soft texture and lift, so volume happens at the roots without teasing. You get a light, flexible hold that moves, not a stiff shell.
One more perk, salt helps absorb oil at the roots, so hair looks fresh between washes. The scent can be clean and light if you add a drop or two of an essential oil you already love. To keep hair comfortable, aloe vera soothes the scalp and adds hydration. A few drops of light oil (like jojoba or argan) soften the ends, which keeps the texture from feeling rough.
I keep a bottle by the mirror for school runs. A quick mist, a scrunch, and I’m out the door with waves that last until evening.
Is Salt Spray Safe for Hair and Scalp?
Used well, salt spray is safe for most hair types. The salt boosts grip by increasing strand friction, which builds waves and volume. But overuse can feel drying, especially on already parched hair. Pair salt with aloe and a little oil, and avoid daily use if your hair is very dry.
If your scalp is sensitive, do a quick patch test behind the ear. If hair ever feels gritty, rinse with lukewarm water or use a gentle wash to reset. I rotate in a simple, no-fuss cleanser like these DIY shampoo recipes without castile soap to refresh without buildup.
Watch how your hair responds. If ends look thirsty, add one extra drop of oil to your next batch or use a hydrating leave-in on the tips.
DIY Sea Salt Hair Treatment vs Store-Bought
Homemade gives you control. You choose the salt level, the scent strength, and the add-ins. Want barely-there texture for fine hair? Use less salt. Need more grip for thick hair? Add a touch more. You also pick clean, simple ingredients, which keep the formula family-friendly and budget-wise.
Many store-bought sprays include plasticizers, heavy perfumes, or film-formers that can feel sticky or strong. They work, but sometimes at the expense of comfort or a fresh scent. A DIY sea salt hair treatment lets you skip what you do not want and keep what you do. The result is a light, effective spray that delivers beachy movement without mystery ingredients or extra cost.
Key takeaways:
- Salt builds texture by increasing hair-to-hair friction, which boosts waves and volume.
- Aloe and a lightweight oil protect moisture and keep ends soft.
- DIY means cleaner ingredients, custom strength, and long-term savings.
DIY Sea Salt Hair Spray Recipe (Fast, Low-Tox, Budget-Friendly)

This DIY sea salt hair treatment is simple, affordable, and easy to tweak for fine, wavy, or thick hair. Grab clean tools, label your bottle, and you’re all set.
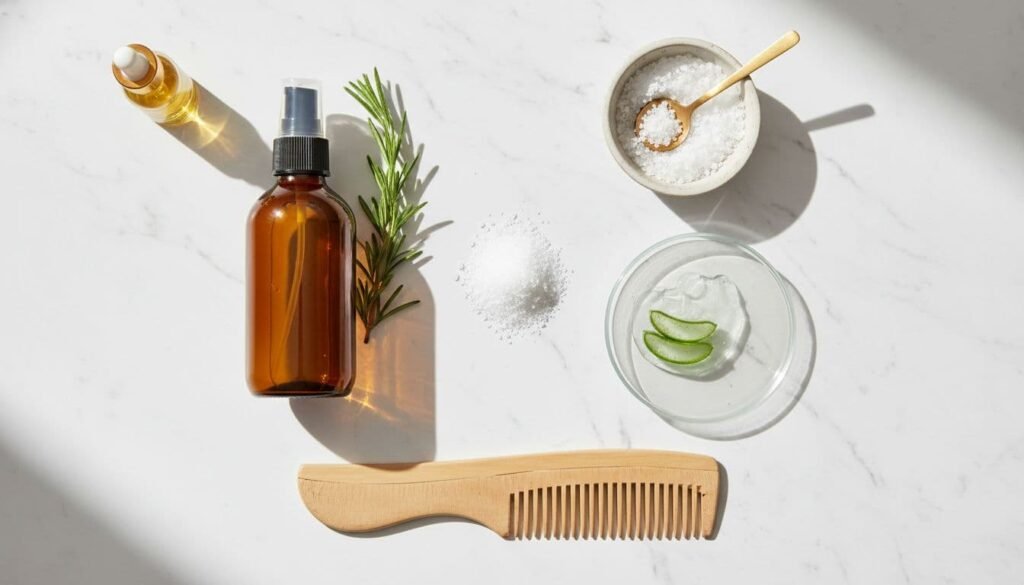
Ingredients and What Each One Does
This recipe sticks to pantry basics and hair-friendly add-ins. Each piece pulls its weight without harshness.
- 1 cup warm distilled water: The base that dilutes salts evenly, reduces mineral buildup, and helps prevent nozzle clogs.
- 1-3 tsp natural sea salt: Provides grip and texture by slightly roughening the cuticle, which builds soft waves and lift. Use less for fine or damaged hair. Use more for thick and coarse hair.
- 1 tsp Epsom salt, optional: Adds airy volume and softness, helpful if your waves fall flat by midday.
- 1 tbsp aloe vera gel: Adds slip and moisture, calms the scalp, and keeps texture from feeling dry or stiff.
- 1 tsp lightweight oil: Cushions the ends, adds shine, and reduces roughness from salt. Coconut, jojoba, argan, or grapeseed oils are fantastic choices.
- 5 to 10 drops essential oil, optional: Lavender, rosemary, or peppermint for a light scent; start with 5 drops if you prefer a subtle fragrance.
Together, salt brings texture, while aloe and oil protect softness. Note your aloe and oil amounts on the bottle so you can repeat results. This balance keeps hair touchable instead of crunchy.
Step-by-Step: Mix, Bottle, and Shake
Keep tools clean. I like an 8-oz amber spray bottle, a small funnel, a spoon, and a measuring cup.
- Warm the water, not boiling. You want it to be comfortable to touch.
- Add sea salt and Epsom salt. Stir until the crystals fully dissolve, no grit at the bottom.
- Whisk in aloe and oil until the mixture looks even and smooth.
- Add essential oils if using, then stir again.
- Funnel into a clean bottle. Leave a little headspace so it shakes well.
- Shake before every use to re-emulsify the oil and aloe.
To avoid clumps, dissolve salts in warm water first, then add the gel and oil. If the nozzle sputters, remove it, rinse it in warm water, and wipe away any salt crystals.
Storage, Shelf Life, and Hygiene
Store your bottle in the fridge for a refreshing spritz, and be sure to use it within 1-2 weeks, then remake another batch. I label my DIYs with the date and the exact formula. Do this especially if you tweak salt content for more or less texture. This is a fresh, unpreserved product. For best results and safety, make small batches.
If the scent changes, the color shifts, or it still looks separated after a good shake, toss it and mix a fresh batch. Wipe the sprayer tip weekly to remove any salt crystals, then flush the sprayer with warm water to keep the nozzle clear.
If you’re balancing scalp care too, pair this spray with a gentle reset like these DIY Apple Cider Vinegar Scalp Scrub Recipes. Clean roots plus light texture make beach waves last longer without buildup.
How to Use Sea Salt Spray for Soft, Natural Beach Waves
Soft, natural waves are all about the right touch and where you aim the spray. With a simple DIY sea salt hair treatment, you can shape texture without heat or crunch. I keep it light at the roots, focus on mid-lengths, and stop once hair feels slightly damp and grippy.
Styling on Damp Hair: Scrunch, Braid, or Bun
Start with clean, towel-dried hair, about 70 percent dry. Hold the bottle 8 to 10 inches away and mist lightly from mid-lengths to ends. Use 4 to 6 sprays for shoulder-length hair, then stop and assess. Hair should feel lightly damp, not wet.
- Scrunch and air-dry: Flip your head to one side and scrunch upward in sections. Repeat on the other side. Let it air-dry. This gives loose, touchable waves with movement.
- Braid or double buns: For more definition, split the hair in half. Do two loose braids or twist into two low buns. Spray one more pass over the braids or buns, then let them dry completely before releasing.
- Diffuse on low: If you want a faster dry, use a diffuser on low speed and low heat. Cup the ends, lift to the roots, and hold for a few seconds per section.
Tip: Avoid over-saturating the roots. A quick mist near the scalp is plenty, since too much salt there can feel gritty or flat.
Refresh on Dry Hair for Lift and Texture
On busy mornings, a light refresh brings waves back to life. Start with dry hair. Mist the mid-lengths with 2 to 3 sprays, then scrunch to reactivate texture. If your ends feel thirsty, add one more tiny spray to the bottom third and scrunch again.
For volume, aim a single short spray at the crown, then gently lift hair at the roots with your fingers. Want extra lift? Flip your hair upside down, scrunch a few times, then flip back and smooth the top layer with your palms. Stop when hair feels textured and airy, not sticky.
How Much to Use and How Often
Use the rule of light first, more if needed. For fine or oily hair, go minimal: 3 to 5 total sprays for the whole head, then wait 60 seconds before deciding on one more. Thick, wavy, or curly hair can handle a bit more, usually 6 to 10 sprays, focused on mid-lengths and ends. You can use the solution 2-4x per week. Do a weekly gentle clarify/ACV rinse if using often.
If hair starts to feel stiff, you have gone too far. Add a pea-size amount of leave-in to the ends next time or reduce sprays. When using salt spray often, plan a weekly clarifying wash or a gentle rinse to reset the scalp and remove buildup. Keep roots light, and your waves will stay soft, not crunchy.
Love This Simple DIY Hair Recipe?
This sea salt spray is just the start. If you’re ready to replace your other store-bought products, my Natural Living Handbook has 60+ of my best DIY formulas for all-natural haircare, skincare, and powerful toxin-free cleaners.

Customize Your Spray for Your Hair Type and Goals
A DIY sea salt hair treatment works best when you tweak it a little for your hair and season. Keep changes small, test once or twice, and write formula notes on the label. Here is how I customize our family bottles at home.
For Fine or Oily Hair: Light and Lifting
Go light on moisture so strands keep lift. Mix 1 cup warm distilled water, 1 tsp sea salt, and the optional 1 tsp Epsom salt for airy volume. Keep oil at 0.5 tsp, and stick with quick-absorbing options like jojoba or grapeseed. Add 1 tbsp aloe if you want slip without weight.
Spray from mid-lengths to ends, then stop and feel. Roots only need a light mist or none at all, since salt already helps absorb oil. Scrunch gently and let it air-dry for touchable waves.
Helpful habits:
- Use fewer sprays first, then add one if needed.
- Skip heavy oils and butters that flatten fine hair.
- Note your final salt and oil amounts on the label for easy refills.
For Thick, Dry, or Curly Hair: Soft, Defined Waves
Give texture room to move with extra hydration. Use 2 tsp sea salt per cup of water, and either skip Epsom or halve it if your hair feels dry. Increase aloe to 1.5 tbsp for slip, and use 1 to 1.5 tsp oil for softness and shine. Argan, sweet almond, or avocado are great picks.
Mist mid-lengths to ends until hair feels lightly damp, not soaked. Scrunch with a microfiber towel to cut frizz, then let it air-dry or diffuse on low. If strands drink it up, add one extra spray to the bottom third and scrunch again.
If you rotate in a deeper treatment, you might be tempted to use a heavy-duty product like Silicon Mix. Before you do, I’ve found a 100% natural alternative to silicon mix (skip to that section in the table of contents after you open the new page) that can give you a similar slip and moisture without the chemical buildup.
Sensitive, Color-Treated, or Kids: Gentle Adjustments
Keep the salt at the low end to protect comfort and color. Try 0.5 to 0.75 tsp sea salt per cup, then increase aloe slightly to 1 to 1.5 tbsp for extra slip. Choose calming essential oils or none at all. Lavender and chamomile are both mild, but fragrance-free is always safe, especially the first time you make it.
Avoid lemon if you do not want any lightening on color-treated hair, as it can lighten and dry, especially with sun exposure.. Always patch test behind the ear. Spray a little on clean skin, wait 24 hours, and watch for redness or itching. On delicate hair, mist fewer sprays and focus on the lower half of the strands.
Practical reminders:
- Label “low salt” and your aloe amount.
- Store in the fridge and regularly make batches as needed. Use a single batch up to 2 weeks.
- Keep the nozzle clean to prevent gritty bursts.
Seasonal Add-Ins and Scents
A few seasonal tweaks keep hair happy year-round. In summer, add up to 1 tsp lemon juice only if you want natural brightening. Use sunscreen on your skin and on exposed strands, since salt and sun can dry hair.
In winter, dryness creeps in. Add a touch more aloe and oil for hydration, then reduce total sprays. For a soothing base anytime, swap the water for a cooled herbal tea, like chamomile for softness or green tea for shine.
Simple scent ideas:
- Lavender for calm, peppermint for a fresh lift.
- One drop of rosemary in larger batches for a clean herbal note.
- Keep fragrance gentle, especially for kids or sensitive scalps.
Troubleshooting, FAQs, and Mistakes to Avoid
Little hiccups happen, even with a well-balanced DIY sea salt hair treatment. Here is how I fix the most common issues fast, plus answers to quick questions and simple habits that keep your routine low-waste and easy.
Fix Crunch, White Cast, or Sticky Ends
Crunchy texture after styling? Mist hair with plain water, then scrunch from ends to mid-lengths. It reactivates the spray and softens the finish.
Seeing a white cast on strands or roots? You likely used too much salt. Open your bottle and dilute with 2 to 4 tablespoons of additional water. Shake well, then test on a small section.
Sticky ends usually mean too much oil. Drop your oil to 0.5 teaspoon in the next batch and avoid spraying the bottom inch of hair. If you need shine, add a tiny drop of light leave-in after hair dries.
Clogged nozzle? Remove the sprayer and rinse it under warm water for 30 seconds. Pump water through the sprayer before reattaching. Wipe any salt crystals from the tip.
Quick FAQs
Can I use table salt?
Sea salt is gentler and gives a softer feel. Table salt can work in a pinch, but it may feel harsher on some hair.
How long does it last?
Store in the fridge and use within 1-2 weeks. Label your bottle with the date.
Is it safe for pregnancy or kids?
Use simple, gentle formulas and avoid strong essential oils. When in doubt, ask your provider. Keep sprays away from eyes and tiny hands.
Can I heat style after?
Yes. Let the hair dry first. Then use low heat on a diffuser or curling iron for touch-ups. A light pass holds shape without crispiness. Use a heat protectant before diffusing or curling; salt + heat can increase dryness.
Pro tip: If you live in a dry climate, add one extra teaspoon of aloe for slip without weight.
Simple, Sustainable Habits
I like to reuse a glass or high-quality plastic spray bottle. Mix smaller batches so you actually finish each batch within a few weeks. Record your favorite formula on masking tape, including salt, oil, and aloe amounts.
Rinse bottles well between refills to prevent salt buildup. Remove the sprayer and flush it with warm water. If crystals form around the nozzle, wipe them off so you get a fine, even mist.
Keep one bottle for hair only and store it in the refrigerator. A clean bottle, a clear label, and a fresh batch every few weeks make this routine easy to keep up with.
Wrap-up
You now have a quick, low-tox DIY sea salt hair treatment that delivers soft waves, simple styling, and easy storage. Start with the base recipe, then tune the salt for texture, aloe for slip, and oil for softness. Keep your sprays light at the roots, focus on mid-lengths, and store a labeled bottle in the fridge so it stays fresh.
I recommend always testing one batch on a busy morning, then jotting notes right on the label. A tiny tweak can make a big difference, especially if your hair is fine, thick, or dry. Keep what works, skip what does not, and enjoy touchable texture without heat.
Mix a small batch today, spritz, scrunch, and see how it feels. Write down the results so your next bottle is even better. Simple, practical, and beachy in minutes.