Comprehensive Guide on Crafting Your Own Homemade Face Oils
Ever wondered how you can elevate your skincare routine with a personal touch? Crafting your own homemade face oil is a fantastic way to pamper your skin while catering to personal skincare needs and preferences.
Imagine blending natural ingredients tailored specifically to your skin’s needs, yielding radiant, nourished results. Whether you’re battling dryness, seeking to balance combination skin, or targeting aging concerns, creating your own face oils means you control which specific ingredients go on your skin.
Benefits of Homemade Face Oils
As mentioned above, by blending your own face oil combinations, you can address specific concerns and create formulations that cater to your skin’s individual needs.
Personalized Skincare Solutions
Homemade face oils provide a bespoke solution for diverse skin types.
- Whether you’re battling dryness, acne, or aging signs, crafting your own face oil blend allows you the freedom to select ingredients that precisely target your skin concerns.
- The flexibility in choosing components empowers you to create a personalized skincare regimen that adapts to your skin’s ever-changing needs.
- Think about it: your skin changes when you get pregnant and when you age, and your skincare needs can even change based on where you live. That means your skincare regimen should be customizable and adaptable as well.
- This customization ensures that your skincare routine remains efficient and effective for your ever-changing, unique needs.
Natural Ingredients for Radiant Skin
When it comes to formulating homemade face oils, natural ingredients take center stage for their nourishing and revitalizing properties.
- Carrier oils like jojoba, rosehip, and sweet almond oil serve as excellent base oils, offering hydration and essential nutrients to the skin.
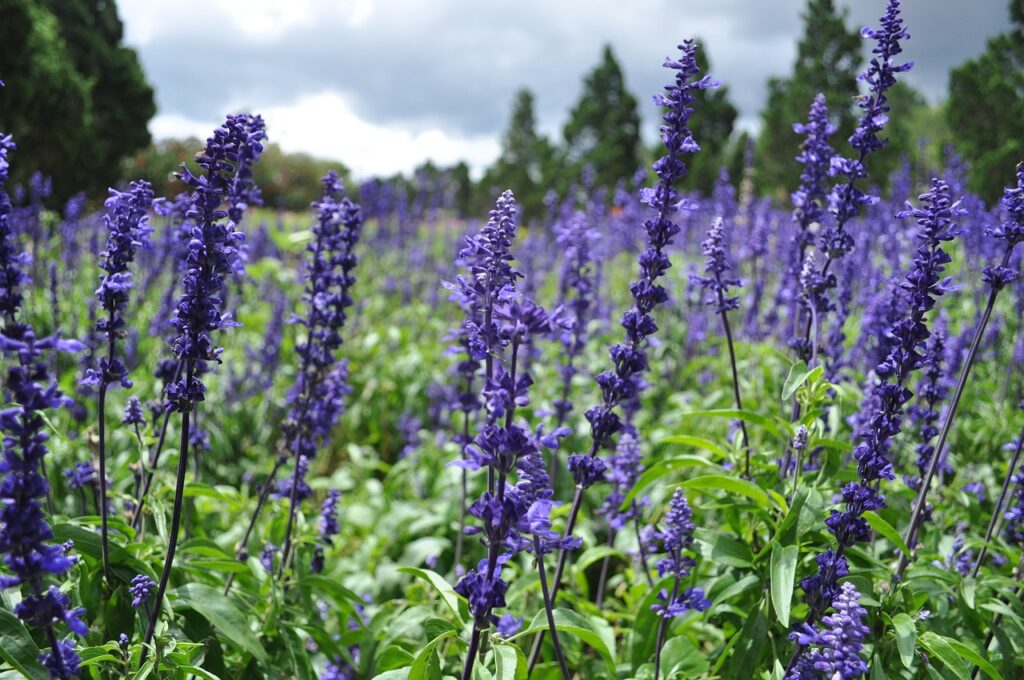
- Essential oils such as lavender, palmarosa, myrrh, patchouli, tea tree, and chamomile bring therapeutic benefits, from soothing sensitive skin to combating blemishes. Their aromatherapy benefits are just as important.
- Emphasizing the purity and quality of ingredients is crucial to unlocking the full potential of natural face oils.
- Opting for organic and unrefined oils ensures that your homemade face oils are free from harmful additives, preserving their efficacy and promoting skin health.
For further reading on the benefits of homemade face oils, you can explore this detailed guide that delves into the transformative effects of facial oils on skin elasticity, oil balance, acne treatment, and more.
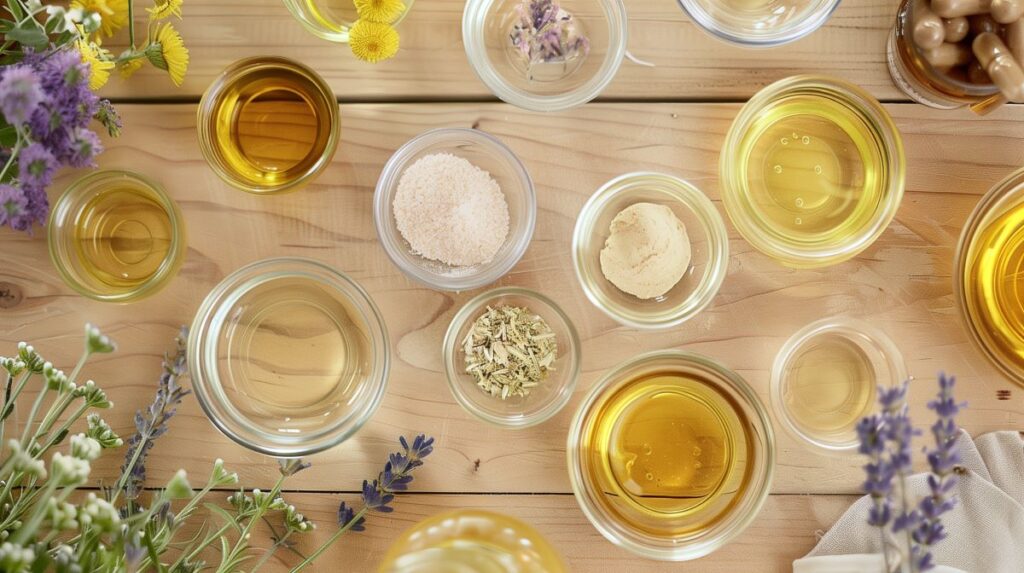
Creating Your Own Face Oil Blend
Blending your own face oil can be a rewarding and personalized experience. When creating your unique concoction, it’s essential to consider the ingredients carefully to cater to your skin’s specific needs.
Choosing the Right Carrier Oils
Selecting the appropriate carrier oils is the first step in formulating your face oil blend.
- Various carrier oils like Sweet Almond, Rosehip, and Evening Primrose possess distinct properties that can benefit different skin types.
- For instance, Sweet Almond oil is lightweight and suitable for most skin types, while Rosehip oil is rich in antioxidants and beneficial for aging skin. Evening Primrose oil is known for its moisturizing properties, making it ideal for dry or acne-prone skin.
By understanding the properties of the carrier oils you choose to use, you can tailor your blend to address your skin concerns effectively.
Comedogenic vs. Non-Comedogenic Oils
Understanding the difference between comedogenic and non-comedogenic oils is crucial in creating a blend that won’t clog pores.
- Comedogenic oils have a higher likelihood of causing breakouts in some individuals, while non-comedogenic oils are less likely to block pores. It’s essential to know where specific oils fall on the comedogenic scale to prevent skin issues.
- Some common non-comedogenic carrier oils include Argan oil and Hemp seed oil, while coconut oil and wheat germ oil are more comedogenic.
Since this topic is so important and there are so many oils to choose from, we’ve dedicated a comprehensive section below to this topic. Jump to the “Specific Oils, Comedogenic Ratings, and Easy Simple Recipes” section below to read about specific oils and their ratings.
Selecting Essential Oils Wisely
Incorporating essential oils into your face oil blend can enhance both the aroma and benefits for your skin.
- Essential oils like Clary Sage, Lavender, Roman Chamomile, and Geranium offer various skincare benefits, such as soothing inflammation, promoting relaxation, and balancing sebum production.
- Depending on your skin concerns, you can mix and match essential oils to create a personalized blend.
For example, combining Lavender and Geranium oils can be calming and suitable for sensitive skin, while Clary Sage and Roman Chamomile are refreshing and ideal for oily skin types.
When blending your face oil, ensure to start with a basic recipe and gradually experiment with different oils to find the perfect combination that works for your skin. Enjoy the process of customizing your skincare routine to meet your unique preferences and needs.
Customizing for Different Skin Types
Choosing the right oils for your skin type can make a world of difference in your skincare routine. Each skin type has unique needs, and customizing your face oil blend can cater to those specific requirements. Let’s delve into tailored recipes for different skin types:
Balancing Oils for Combination Skin
Combination skin can be tricky to manage since it involves both oily and dry areas on the face. A specialized face oil blend for combination skin aims to balance these contrasting elements. One effective recipe includes a combination of jojoba oil, which mimics the skin’s natural oils, along with tea tree oil for its antibacterial properties.
Recipe:
- 1 tablespoon Jojoba Oil: Mimics the skin’s natural oils, hydrating without clogging pores.
- 3 drops Tea Tree Oil: Provides antibacterial properties to control excess oil and prevent breakouts.
Instructions:
- In a small glass bottle, combine 1 tablespoon of jojoba oil.
- Add 3 drops of tea tree oil.
- Shake well to blend the oils together.
- Apply 2-3 drops to clean skin, massaging gently until fully absorbed.
Benefits:
This blend maintains moisture in dry areas while controlling excess oil production in oily zones, promoting an overall balanced complexion.
The synergy of these oils is crucial in maintaining equilibrium on combination skin. Jojoba oil’s lightweight nature hydrates without clogging pores, while tea tree oil targets blemishes and soothes inflammation. This balanced approach addresses the diverse needs of combination skin, providing nourishment without overwhelming oily areas or stripping moisture from dry patches.
Nourishing Dry Skin with Luxurious Oils
Dry skin craves rich, emollient oils to replenish lost moisture and strengthen the skin barrier. Luxurious oils like Argan and Avocado are excellent choices for nourishing parched skin. Argan oil, often referred to as “liquid gold,” is packed with antioxidants and vitamin E, promoting skin repair and hydration. Avocado oil is rich in fatty acids, deeply moisturizing and soothing dry, flaky skin.
To enhance hydration and repair the skin barrier for dry skin, consider blending Argan and Avocado oils with a drop of lavender essential oil. Lavender calms irritated skin and adds a soothing aroma to your blend.
Recipe:
- 1 tablespoon Argan Oil: Packed with antioxidants and vitamin E, promotes skin repair and hydration.
- 1 tablespoon Avocado Oil: Rich in fatty acids, deeply moisturizing and soothing dry skin.
- 2 drops Lavender Essential Oil: Calms irritated skin and adds a soothing aroma.
Instructions:
- In a small glass bottle, combine 1 tablespoon of argan oil with 1 tablespoon of avocado oil.
- Add 2 drops of lavender essential oil.
- Shake well to blend the oils together.
- Apply 2-3 drops to clean skin, massaging gently until fully absorbed.
Benefits:
This combination offers intense nourishment, restoring moisture levels and improving the overall health of your skin.
By customizing your face oil blends according to your skin type, you can address specific concerns and achieve a radiant complexion tailored to your individual needs. Adapt these recipes to accommodate seasonal changes and enjoy the benefits of homemade face oils that cater to your skin’s requirements.
Application and Storage Tips
Incorporating Face Oils in Your Regimen
Knowing how and when to use face oils is key to maximizing their benefits. Ideally, face oils should be applied after cleansing and toning and before heavier creams or lotions. A few drops of your homemade face oil can be gently pressed onto the skin, allowing it to absorb and nourish deeply.
Layering face oils with other skincare products is also a popular technique. You can mix a drop or two of face oil with your moisturizer or foundation for added dewiness. Experiment with different layering methods to find what works best for your skin type and desired results.
How to Apply Face Oils
After crafting your personalized homemade face oil blends, knowing how to apply them effectively is crucial for reaping their full benefits.
- When it comes to Proper Application Techniques, start by cleansing your face before gently massaging a few drops of the homemade face oil onto your skin.
- To ensure maximum absorption, avoid rubbing the oil vigorously.
- Instead, lightly dab or pat the oil onto your skin, allowing it to penetrate deeply for optimal nourishment.
Also, remember to consider how the face oil may interact with other skincare products used in your routine to enhance its effectiveness without causing any conflicts.
How to Store Face Oils
To preserve the freshness and quality of your Homemade Face Oils and pretty much any skincare product, especially homemade skincare products, it’s important to store them correctly.
- Shield your face oil blends from direct sunlight and heat to prevent oxidation, which can degrade their potency over time.
- Opt for dark glass bottles to store the oils, as they help protect against light exposure.
- Storing the oils in a cool, dark place can extend their shelf life and maintain their efficacy.
Remember to check the expiration dates of any carrier oils used in your blends to ensure you can make them last as long as possible.
Comedogenic vs. Non Comedogenic Oils
When it comes to creating your own face oil blends, understanding the difference between comedogenic and non-comedogenic oils is crucial. Comedogenic oils have a higher likelihood of clogging pores and causing breakouts, while non-comedogenic oils are less likely to cause skin issues, making them ideal for various skin types.
What are Comedogenic Oils?
Comedogenic oils are oils that have a higher tendency to clog pores, leading to blackheads, whiteheads, and acne breakouts. These oils are rated on a comedogenic scale, which helps users understand the likelihood of a particular oil causing pore blockages.
Some common comedogenic oils include coconut oil, almond oil, avocado oil, and olive oil.
What are Non-Comedogenic Oils?
Non-comedogenic oils, on the other hand, are oils that are less likely to clog pores and are suitable for all skin types, including oily and acne-prone skin. These oils can help moisturize the skin without causing breakouts.
Examples of non-comedogenic oils are grapeseed oil, sunflower seed oil, rosehip seed oil, neem oil, and castor oil.
Understanding the Comedogenic Scale
The comedogenic scale ranges from 0 to 5, with 0 being non-comedogenic and 5 being highly comedogenic.
Oils with a rating of 0-2 are considered non-comedogenic and are generally safe for most skin types. Oils with a rating of 3 may clog pores for some individuals, while oils with a rating of 4-5 are more likely to cause breakouts.
Choosing the Right Oils for Your Skincare Routine
When blending your own face oils, it’s essential to consider the comedogenic rating of each oil to tailor your blend to your skin’s specific needs. A mix of non-comedogenic oils can provide hydration and nourishment without the risk of clogged pores. Experimenting with different oils can help you discover the perfect combination for your skin type.
Remember, everyone’s skin is unique, so what works for one person may not work for another. It’s always advisable to do a patch test before incorporating new oils into your skincare routine to see how your skin reacts.
Non-Comedogenic Oils + Recipes (Rating 0-1)
These oils are least likely to clog pores and are generally safe for all skin types, including acne-prone skin.
Argan Oil (0)
- Properties: Rich in vitamin E, fatty acids, and antioxidants, moisturizing, anti-inflammatory, anti-aging, promotes skin elasticity, helps with acne and dryness.
- DIY Recipe: Argan & Rose Water Face Mist – Mix 1 tablespoon of argan oil with 1/2 cup of rose water in a spray bottle. Use as a hydrating mist throughout the day. Shake well before using.
Hemp Seed Oil (0)
- Properties: Rich in omega-3 and omega-6 fatty acids, moisturizing, anti-inflammatory, regulates oil production, soothes irritated skin, suitable for all skin types including acne-prone.
- DIY Recipe: Hemp & Aloe Vera Soothing Gel – Combine 1 tablespoon of hemp seed oil with 2 tablespoons of aloe vera gel for a calming, moisturizing treatment.
Sunflower Oil (0)
- Properties: High in vitamins A, D, and E, lightweight, non-greasy, moisturizing, anti-inflammatory, helps protect the skin barrier, suitable for all skin types.
- DIY Recipe: Sunflower & Green Tea Moisturizer – Infuse 1/2 cup of sunflower oil with a green tea bag for 24 hours. Use as a lightweight daily moisturizer.
Safflower Oil (0)
- Properties: High in linoleic acid, lightweight, moisturizing, anti-inflammatory, helps unclog pores, suitable for oily and acne-prone skin.
- DIY Recipe: Safflower & Lavender Oil Cleanser – Mix 2 tablespoons of safflower oil with 5 drops of lavender essential oil. Use as a gentle oil cleanser.
Rosehip Seed Oil (1)
- Properties: High in essential fatty acids and vitamins A and C, regenerates and heals skin, reduces scars and fine lines, anti-inflammatory, brightens skin, suitable for sensitive skin.
- DIY Recipe: Rosehip & Vitamin E Serum – Blend 1 tablespoon of rosehip seed oil with 5 drops of vitamin E oil. Apply nightly for skin regeneration.
Grapeseed Oil (1)
- Properties: Lightweight, rich in linoleic acid, anti-inflammatory, antioxidant, helps tighten and tone skin, reduces appearance of scars, suitable for oily and acne-prone skin.
- DIY Recipe: Grapeseed & Lemon Brightening Mask – Mix 1 tablespoon of grapeseed oil with 1 teaspoon of lemon juice and 1 tablespoon of yogurt. Apply as a brightening mask.
Castor Oil (1)
- Properties: Rich in ricinoleic acid, anti-inflammatory, antimicrobial, helps heal wounds, promotes collagen and elastin production, suitable for dry and acne-prone skin.
- DIY Recipe: Castor & Tea Tree Acne Treatment – Combine 1 tablespoon of castor oil with 3 drops of tea tree oil. Apply to acne-prone areas.
Sea Buckthorn Oil (1)
- Properties: High in vitamins A, C, E, and K, fatty acids, and antioxidants, promotes skin regeneration, anti-inflammatory, helps with acne and aging skin, suitable for all skin types.
- DIY Recipe: Sea Buckthorn & Honey Face Mask – Mix 1 teaspoon of sea buckthorn oil with 1 tablespoon of honey. Use as a hydrating and soothing face mask.
Pomegranate Seed Oil (1)
- Properties: Rich in antioxidants, anti-inflammatory, promotes cell regeneration, helps reduce signs of aging, suitable for mature and sensitive skin.
- DIY Recipe: Pomegranate & Rose Anti-Aging Cream – Blend 1 tablespoon of pomegranate seed oil with 1/2 cup of shea butter and 10 drops of rose essential oil. Use as a night cream.
Moderately Comedogenic Oils + Recipes (Rating 2-3)
These oils are moderately likely to clog pores and are generally safe for most skin types but should be used with caution on acne-prone skin.
Jojoba Oil (2)
- Properties: Mimics the skin’s natural sebum, non-greasy, moisturizing, anti-inflammatory, antibacterial, antioxidant, helps balance oil production, suitable for acne-prone skin.
- DIY Recipe: Jojoba & Chamomile Calming Lotion – Combine 1/4 cup of jojoba oil with 1/4 cup of chamomile-infused water. Use as a calming lotion.
Sweet Almond Oil (2)
- Properties: Rich in vitamins A, E, and D, fatty acids, and proteins, deeply moisturizing, soothing, helps reduce dark circles and puffiness, suitable for dry and sensitive skin.
- DIY Recipe: Sweet Almond & Coffee Eye Cream – Mix 1 tablespoon of sweet almond oil with 1 tablespoon of coffee-infused oil. Apply under the eyes to reduce puffiness.
Neem Oil (2)
- Properties: Antibacterial, antifungal, anti-inflammatory, helps treat acne, eczema, and psoriasis, promotes wound healing, suitable for acne-prone skin.
- DIY Recipe: Neem & Aloe Vera Healing Gel – Blend 1 tablespoon of neem oil with 2 tablespoons of aloe vera gel. Use on affected areas.
Pumpkin Seed Oil (2)
- Properties: Rich in vitamins A, C, E, and zinc, antioxidant, anti-inflammatory, promotes skin regeneration, helps with acne and aging skin, suitable for all skin types.
- DIY Recipe: Pumpkin Seed & Turmeric Face Mask – Mix 1 tablespoon of pumpkin seed oil with 1/2 teaspoon of turmeric powder. Apply as a brightening mask.
Baobab Oil (2)
- Properties: High in vitamins A, D, E, and F, fatty acids, deeply moisturizing, anti-inflammatory, helps improve skin elasticity, suitable for dry and mature skin.
- DIY Recipe: Baobab & Mango Butter Body Balm – Blend 1/4 cup of baobab oil with 1/2 cup of melted mango butter. Use as a nourishing body balm.
Olive Oil (2)
- Properties: High in vitamins A, D, E, and K, antioxidant, deeply moisturizing, anti-inflammatory, helps repair damaged skin, suitable for dry and mature skin.
- DIY Recipe: Olive & Oatmeal Exfoliating Scrub – Combine 1/4 cup of olive oil with 1/2 cup of finely ground oatmeal. Use as a gentle exfoliating scrub.
Tamanu Oil (2)
- Properties: Antibacterial, anti-inflammatory, promotes wound healing, helps reduce scars and stretch marks, suitable for acne-prone and sensitive skin.
- DIY Recipe: Tamanu & Lavender Scar Serum – Mix 1 tablespoon of tamanu oil with 5 drops of lavender essential oil. Apply to scars and stretch marks.
Avocado Oil (3)
- Properties: Rich in vitamins A, D, and E, deeply moisturizing, anti-inflammatory, promotes collagen production, helps heal wounds, suitable for dry and mature skin.
- DIY Recipe: Avocado & Honey Hydrating Mask – Combine 1 tablespoon of avocado oil with 1 tablespoon of honey. Apply as a hydrating mask.
Macadamia Nut Oil (3)
- Properties: Rich in monounsaturated fatty acids, deeply moisturizing, fast-absorbing, anti-inflammatory, helps repair damaged skin, suitable for dry and mature skin.
- DIY Recipe: Macadamia & Shea Butter Hair Mask – Blend 1/4 cup of macadamia nut oil with 1/4 cup of melted shea butter. Use as a deep conditioning hair mask.
Comedogenic Oils + Recipes (Rating 4+)
These oils are more likely to clog pores and are generally recommended for dry skin types. They should be used sparingly on acne-prone skin.
Coconut Oil (4)
- Properties: Antibacterial, antifungal, highly moisturizing, rich in fatty acids, promotes healing, suitable for dry skin but may clog pores in acne-prone skin.
- DIY Recipe: Coconut & Sugar Body Scrub – Mix 1/4 cup of coconut oil with 1/2 cup of sugar. Use as an exfoliating body scrub.
Marula Oil (3-4)
- Properties: Rich in antioxidants, fatty acids, deeply moisturizing, fast-absorbing, helps improve skin elasticity, reduces redness, suitable for dry and mature skin.
- DIY Recipe: Marula & Rosehip Night Serum – Blend 1 tablespoon of marula oil with 1 tablespoon of rosehip oil. Use as an overnight serum for deep hydration.
Wrap-up: Pamper Your Skin with Natural Oils
Blending your own homemade face oil combinations offers a myriad of benefits.
- Customizing your face oils allows you to address specific skin concerns, ensuring your skincare routine is as unique as you are.
- By using natural ingredients, you can avoid harmful chemicals and tailor each blend to suit your skin’s changing needs.
- The process of creating these oils is fun and allows you to be more creative and deliberate about your skincare outcomes.
Embark on your natural skincare journey with confidence, knowing that you are nurturing your skin with the best that nature has to offer. Each drop of your homemade face oil is a step towards healthier, more radiant skin.