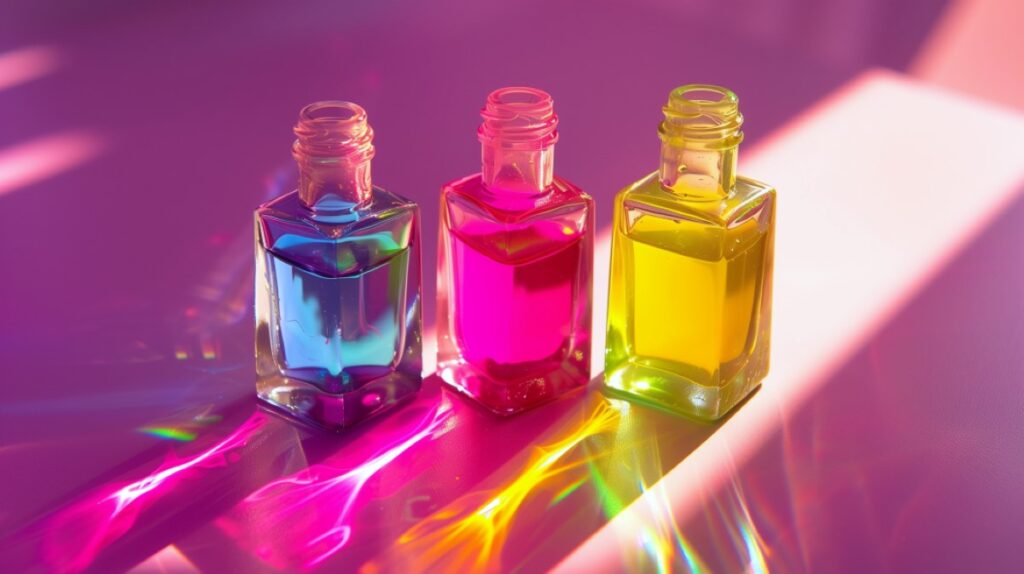
How to Clean Nail Polish Bottles: 7-Minute Method
Maintaining the quality of your nail polish often hinges on the cleanliness of the bottles it’s stored in. Over time, neglected bottles can accumulate dried-up polish around the neck and remnants clustered along the bottom. This can affect the consistency and application of your nail polish.
- 5 Reasons to Reuse Nail Polish Bottles
- Pre-Cleaning Preparation
- 7-Minute Nail Polish Bottle Cleaning Process
- Post-Cleaning Care
- Creative Reuse of Nail Polish Bottles
- Tips and Tricks
- How to Clean Nail Polish Bottles FAQs
- What is the best method to clean out a nail polish bottle without using acetone?
- How can I effectively clean the rim of a nail polish bottle?
- What are the steps to empty a nail polish bottle completely?
- What are some tips for reusing an empty nail polish bottle?
- How can you revive and refresh old or dry nail polish in a bottle?
- How can I make my nail polish last longer?
Cleaning your nail polish bottles is not just about aesthetics; it’s also about preserving the quality and extending the lifespan of your favorite shades, some of which may have been fairly expensive.
Simple household items like nail polish remover can effectively break down the remnants and clean out the interior. However, for a thorough cleanse that protects both the bottle and the polish, other methods may be more suitable.
Utilizing common tools such as paper towels, warm water, and mild soap can successfully restore your nail polish bottles to a near-original state without risking damage to the bottle or altering the composition of the polish.
5 Reasons to Reuse Nail Polish Bottles
Reusing your nail polish bottles is not just an environmentally friendly practice; it also presents creative ways to organize and decorate. In this section, you’ll discover why giving your empty or dry nail polish bottles a second life is beneficial and how keeping them clean boosts their versatility.
Why Clean Nail Polish Bottles?
1.) Preservation: Clean bottles ensure your nail polish remains uncured and contaminant-free. When remnants of old polish mix with new, it can cause the polish to thicken, diminishing its quality and lifespan.
2.) Mixing DIY Nail Polish: For those of you who mix your own nail polish creations with base and mineral colorants, reusing bottles is a great cost-saver. Once you have a nice collection of nail polish bottles, you’ll never need to purchase any additional ones ever again.
3.) Hygiene: While research shows that bacterial growth is unlikely in solvent-based nail polishes and bottles, many of us prefer water-based nail polish because of their lower toxicity. However, those same water-based ingredients mean there’s a greater likelihood of bacterial growth.
Additionally, some tests have shown that nail fungus can live in a nail polish bottle for years.
4.) Product Performance: A dirty bottle of nail polish can lead to uneven application. Bits of dried polish can find their way onto the brush, leaving streaks and lumps on your nails during application.
I know what it’s like to finish painting my nails only to have a clump of old polish on the nail brush or, even worse, on a nail I just painted.
5.) Esthetics: Let’s be honest, dirt nail polish bottles don’t look very appealing. Whether you’re repurposing a gel polish bottle for crafting or for creating your own polish formulations, visible residue can distract from their visual appeal. Clean bottles are simply more attractive.
Pre-Cleaning Preparation
Before embarking on the task of cleaning your nail polish bottle, go ahead and gather a few of the materials we’ll be using for our cleaning method.
Gathering Necessary Items
To clean your nail polish bottle thoroughly, you should have the following items at hand:
- Cotton balls or paper towels: Essential for wiping and absorbing any excess polish or remover.
- Rubber band: Useful for securing a paper towel around the opening of the bottle to aid in the removal of residual polish.
- Hot water: Needed to help dissolve and loosen hardened polish inside the bottle.
- Nail polish thinner: Used to help break up the polish inside the bottle. Acetone can be used as well.
- Clean water: To rinse the bottle after the use of any cleaning agents.
Note: If you would prefer not to use acetone or nail polish thinner, that’s fine! You can just as easily use baby oil as well, as shown in the below video.
Safety Precautions
While cleaning nail polish bottles, bear in mind these safety guidelines:
- Work in a well-ventilated area: Nail polish remover emits strong fumes, so ensure good airflow to avoid inhaling toxic chemicals.
- Avoid direct contact with skin: Nail polish remover can be harsh on the skin, so try to minimize skin contact and consider wearing gloves if necessary.
By following these steps, you’ll set the stage for a successful and safe cleaning of your nail polish bottles.
7-Minute Nail Polish Bottle Cleaning Process
Revitalizing old nail polish bottles involves a few careful steps to remove excess polish and ensure every part of the bottle is clean. A systematic approach will restore your nail polish containers to a near-original state.
Step 1: Removing Excess Polish
To begin, pour out any excess nail polish from the bottle onto a paper towel. If you have nail polish thinner or acetone, adding a small amount can make this step easier by loosening the polish.
This prepares the bottle for a more thorough cleaning.
Step 2: Dealing with Dried Polish
For especially old dried-on nail polish inside the bottle, pour a bit of acetone in the bottle, then shake it multiple times and allow it to soak for 5-10 minutes.
After that, use a small brush to scrub the inside gently. The acetone will dissolve most of the stubborn polish residue but take care to work gently to avoid scratching the bottle’s interior.
Step 3: Thorough Internal Cleaning
Next, fill the bottle with warm water and a bit of soap, shake it well, then rinse to remove any leftover polish or acetone. Repeat if necessary until the water runs clear. This will ensure the bottle’s interior is thoroughly clean.
Step 4: Cleaning the Brush and Cap
Finally, clean the nail polish brush and the cap of the bottle.
For the brush, dip it in a mixture of warm water and soap, or use acetone for a tougher residue. Swirl the brush to loosen the buildup and wipe with a towel.
The cap should be wiped down with a small amount of acetone on a cotton pad to tackle any excess polish around the edges.
Post-Cleaning Care
After cleaning, the most important step is to allow the nail polish brush and bottle to dry completely. Be sure not to put the cap back on until you’re 100% certain everything has dried completely.
Drying and Storage Tips
- To prevent any contamination from dust or cotton fibers, it’s essential to let the bottle dry completely.
- Speed up the drying process by giving the bottle a good shake to remove excess moisture, then let it sit for a while.
- When you refill your nail polish bottle with new polish, always store it upright to avoid spillage and keep the opening clear of dry nail polish residue.
Preventing Future Polish Buildup
- Maintain the cleanliness of your nail polish bottle by wiping the neck of the bottle as needed.
- Nail polish brushes can get caked up with old polish pretty easily. If you notice that happening, give it a good clean. This prevents the buildup of dried polish, which can lead to a messy application next time.
- Additionally, secure the lid tightly after every use to minimize the exposure to air, which can cause thickening of the polish over a long time. I know this is a simple step, but it’s easy to forget when you’re in a hurry.
Creative Reuse of Nail Polish Bottles
Whether you’re formulating your own nail polish or using the bottles for DIY projects, there are exciting ways to repurpose these small glass containers. We touched on a few earlier, but it’s worth diving into a few more ideas below.
Creating Custom Nail Polish
You can create your own nail polish by using empty nail polish bottles as containers for your unique blends.
- Start by using a small funnel to carefully mix your desired glitter or color pigments with a clear nail polish base.
- This allows you to experiment and design a signature color that is exclusive to you.
DIY Projects
Empty nail polish bottles offer diverse creative ways to tackle DIY projects.
- Transform them into mini vases for tiny flowers, which can add a delicate touch to your workspace.
- Alternatively, the bottles are perfect for storing small amounts of craft materials like beads or sequins, keeping your crafting area organized and efficient.
Home Decor
Repurposing nail polish bottles can also enhance your home decor.
- You create an attractive display piece by filling them with multicolored sand layers.
- Glue beads or other decorative materials onto the outside of the bottles to make creative Christmas decorations.
- If you’re into DIY lighting, string lights can be held in place with the weight of sand-filled nail polish bottles, combining form and function beautifully.
Tips and Tricks
Ensuring your nail polish bottles are clean will make application easier and help you maintain the true color and performance of the polish.
Effective Methods for Stubborn Bottles
- To handle stubborn nail polish bottles with lids that absolutely will not come off, wrapping a small rubber band around the cap can provide the extra grip you need to open it them. This is one of the easiest ways to improve your grip, especially when dealing with stuck lids.
- Once opened, if you find the residual polish hard to remove, use the cleaning method we mentioned earlier to clean as normal.
Alternative Cleaning Solutions
If you’re looking for easy ways to clean bottles without resorting to harsh chemicals, consider the below milder options.
- A simple mixture of warm water and mild dish soap can clean the bottle effectively for non-stubborn residues. Soak the bottle in this solution and use a small amount of elbow grease to clean it up.
- Mixing equal parts of vinegar and lemon juice can be used as an effective alternative to acetone.
- Pure white vinegar will also break down nail polish remnants in nail polish bottles.
- As mentioned earlier, mineral oil is an effective way to clean out nail polish bottles.
Remember, proper disposal of any hazardous waste—like leftover nail polish—is important; never pour it down the drain. Pouring down the drain could also lead to clogs, so that’s another great reason. Toss it in the trash instead.
Regardless of the reason why you’d like to clean out your old polish bottles, this cleaning guide is all you need to get them looking like new again. And remember, you do not need to use acetone; any of the other common household items will work just fine.
How to Clean Nail Polish Bottles FAQs
What is the best method to clean out a nail polish bottle without using acetone?
You could use any of the below three options. Mineral oil can work quite well, and it’s our preferred DIY method. Just be sure to clean the oil out of the bottle post-cleaning.
- You can use a bit of mineral oil (baby oil), bamboo skewers, and a few Q-tips.
- Use a mixture of warm water and mild dish soap.
- Pure white vinegar or a mixture of lemon and vinegar will also work.
Allowing any of the above solutions to soak in the bottle for 5-10 minutes will make the cleaning process even easier. See the video posted earlier in this post for more details about the mineral oil method.
How can I effectively clean the rim of a nail polish bottle?
To clean the rim of a nail polish bottle, dip a cotton swab in nail polish remover and gently wipe around the edge. This helps prevent the cap from sticking and ensures better sealing.
What are the steps to empty a nail polish bottle completely?
To empty a nail polish bottle completely, first, pour out any excess polish.
Then, add nail polish remover, shake the bottle well, and pour out the contents. Repeat until the bottle is clean, or use any of the cleaning methods we discussed earlier.
What are some tips for reusing an empty nail polish bottle?
For reusing your empty bottles of nail polish, ensure it is completely clean and dry.
You can then use it for mixing custom nail polish colors, as a travel-sized container for nail polish remover, or even for home decor. For example, you can make some pretty stylish Christmas ornaments out of old nail polish bottles.
How can you revive and refresh old or dry nail polish in a bottle?
Add a few drops of nail polish thinner to the bottle and roll it between your hands to mix. Avoid shaking, as this can create air bubbles.
How can I make my nail polish last longer?
Proper storage is key to extending the lifespan of your nail polish.
- Store bottles in a cool, dry place away from direct sunlight.
- Make sure the cap is tightly sealed to prevent the polish from drying out.