How to Remove Gel Nail Polish from Natural Nails with Sugar
Wave goodbye to gel polish with a surprisingly sweet twist: the sugar method. This clever DIY trick sidesteps the need for harsh chemicals, using just a sprinkle of sugar from your kitchen to gently exfoliate and remove nail polish. It’s a quick, eco-friendly, and nourishing alternative that keeps your nails healthy and happy.
- All About Gel Nails
- Preparation for Removal
- 7-Step Sugar Method for Gel Polish Removal
- Alternative Non-Acetone Methods
- Aftercare and Nail Health
- Gel Polish Removal: Quick Recap
- Removing Gel Nail Polish with Sugar FAQs
- What is the best method to take off gel polish without using acetone?
- Can you use regular nail polish remover for removing gel nail polish, and if so, how?
- What steps should be followed to remove gel nail polish at home safely?
- What is the most efficient way to remove gel nail polish from toes at home?
Traditional gel removal methods almost always involve the use of harsh or harmful chemicals or a visit to the nail salon.
As you seek gentler alternatives, you might be intrigued to learn about the sugar method—a straightforward DIY approach using this common household item, which also happens to be way cheaper than a nail salon visit.
All About Gel Nails
When you choose a gel manicure, you’re opting for a durable and glossy finish that regular polish simply cannot match. We get that; the result is amazing. Let’s explore the specifics that set gel nails apart.
Difference Between Gel and Regular Polish
Gel polish is distinct from regular nail polish. It’s obviously a gel-based polish that requires curing under UV light to harden, unlike regular polish, which air dries.
Gel polish is not merely a different formula but a completely different system. Regular polish dries through evaporation of solvents and can chip within days, while gel polish stays chip-free and pristine for a long time, often up to two weeks or more.
Benefits of Gel Manicure
A gel manicure offers benefits beyond the nail color’s longevity. Gel nails are known for their high-shine finish that resists fading. The UV curing process creates not only a longer-lasting finish but also a stronger protective layer over your natural nails, helping to prevent breakage.
Additionally, having gel nails reduces the chances of your manicure smudging, giving you peace of mind right after your appointment.
Preparation for Removal
Before attempting to remove gel nail polish with sugar, it’s important to highlight a few considerations. Mind you, the process of actually removing the gel polish is super simple. But you love your nails and want to ensure they aren’t damaged.
With that in mind, let’s consider the following.
Assessing Nail Health
Examine your nails closely for any signs of damage or weakness.
Healthy nails are a must before proceeding. If you have cracked nails or a damaged nail bed, trim or file what you can. Nail glue can also work, depending on the situation. Removing gel polish will require some buffing, which is why it’s difficult if you already have nail damage.
Ensure your nail plate is free of cuts, nail splits, cracks, etc. If you notice any of these issues, it’s best to address them or cause existing splits and cracks to become worse.
Gathering Required Materials
Next, compile the necessary items:
- Cotton balls or pads: Essential for the application of the sugar mixture.
- Nail file: This is used to gently buff the shiny top layer off your nails, which allows the sugar mixture to penetrate.
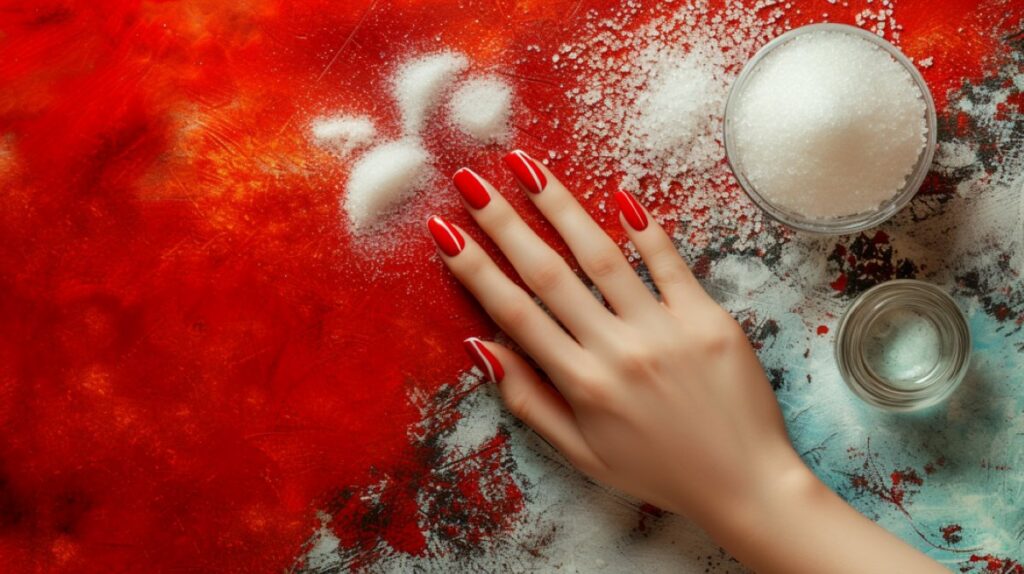
- Sugar: The key ingredient for the removal mixture. The sugar crystals remove polish through their abrasive properties.
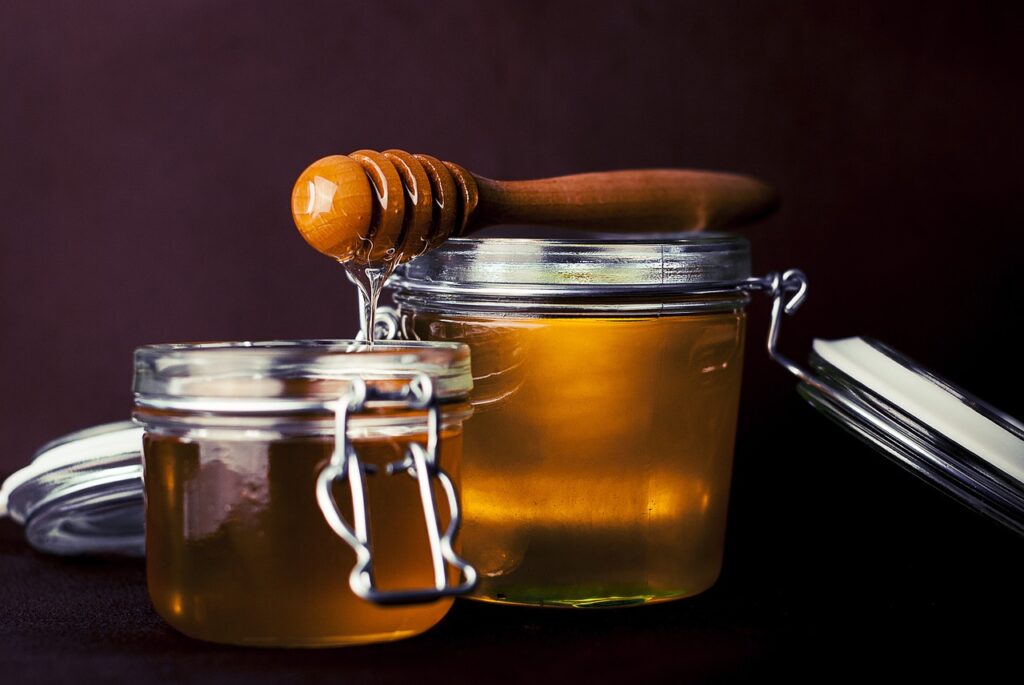
- Oil: This moisturizes and will mix with sugar to create an oil-abrasive paste. Feel free to use cuticle oil, fractionated coconut oil, olive oil, jojoba, or any other natural oils you have. Water can also be used, but we prefer oil for moisturization benefits.
Remember, our natural DIY method with the above materials and tools will avoid the use of harsh chemicals like acetone and preserves the natural oils in your nails. No acetone is needed.
7-Step Sugar Method for Gel Polish Removal
Now, onto the process of removing the gel polish. You’ll have the process down in no time.
1.) Soak Your Nails
Get a small bowl of water and soak your nails for just 3-5 minutes. The idea here is to saturate each nail a bit, making it easier to remove the top layer of gel polish with a file in the next step.
2.) Remove the Topcoat Gel Polish Layer
This step is pretty simple, but don’t overdo it.
Now that your nails are saturated from the previous step, get a nail file and gently file the top layer of polish. The idea here is to remove the topcoat protective layer so it’s easier to remove the additional layers in later steps with the sugar solution. A gentle buff is fine.
Do not try to remove all of the polish in this step.
3.) Mix the Oil and Sugar
To create your sugar solution, you will need two tablespoons of sugar and roughly the same amount of oil. Mix these two ingredients in a small bowl until you get a wet paste-like consistency. If it’s a bit more fluid than paste, that’s fine.
If you use more oil than needed, you can still use the mixture. It will just work a bit more slowly since there will be a lower concentration of sugar crystals in the solution.
Sugar is cheap, and two tablespoons along with the oil should be plenty of mix to remove the polish. The idea is to mix enough, so you won’t need to mix more again, being that your hands will be a bit messy. As briefly mentioned above, you can also use water if desired, but we prefer using oil for the added moisturization.
The sugar solution should feel slightly grainy.
4.) Application Process
Begin by soaking a cotton ball or pad in the sugar solution. Once thoroughly soaked, apply the solution to each nail on the hand you’re starting with.
We prefer coating all of the nails before buffing, allowing the solution to penetrate into the buffed nail polish on each nail while we’re working to remove polish on other nails.
5.) Removing the Gel Polish
Buff each nail, one by one, with a circular motion. Use adequate pressure to work the sugar and oil (or water) solution into the polish. You’ll begin to see the polish buffing away, primarily from the abrasive quality of the sugar crystals.
If you added too much oil, feel free to add a bit more sugar to your mixture. Keep in mind, though, that even if a lot of the sugar has dissolved, it will still remove the polish. You can’t see the sugar crystals, but they are there. Starting with a grainier texture will make the process take less time overall.
The sugar particles act as a scrub, helping to loosen and lift the stubborn gel nail polish from your nails. You can repeat the application process if needed, but be gentle to avoid damage to the natural nail and nail bed. You can use nail tools (like an orange stick) to push away lifting polish, but please be gentle if you do to avoid scratching the surface of the nail.
As soon as you can see the nail, don’t buff that area anymore; just focus on the polish. Keep in mind, too, that all gel nail polishes are different. Some may be easier to remove than others. Patience with the above simple steps is key.
6.) Inspection and Rinse
Once you visibly can’t see any more nail polish, you’re all set. At this point, you can rinse your nails.
If you see polish remaining after your rinse, lightly buff those areas a bit more, then rinse again.
7.) Final Inspection and Moisturization
While this step isn’t necessary, especially if you used oil for your sugar solution, it locks in even more moisture. Think about it: your nails have been through a lot of buffing, right?
After rinsing, you can add a bit of oil to your nails again to keep them moisturized. We’re talking about 1-2 drops (just a dab) on a cotton ball, then wiping that on each nail, as well as the surrounding skin.
Super Easy, No Chemicals Needed
Following the above five steps to remove gel polish with sugar is so simple and prevents unnecessary visits to the nail salon. More importantly, it means you won’t need to use harsh chemicals on your nails or, even worse, soak them in an acetone bath.
In the unlikely event you don’t have sugar or oil (kidding), we’ll explore some alternative methods to remove gel nail polish in the next section.
Alternative Non-Acetone Methods
Removing gel nail polish without using acetone can be done safely and effectively with common household items or natural oils. If you want to try something different than the easy way with the sugar and oil method above, check out what else you can use below.
Using Household Products
Lemon juice and dish soap are two ingredients you can use. The acidic nature of lemon juice, combined with the degreasing properties of dish soap, creates a mixture that can help break down gel polish.
Remove the top layer of your nail polish, just as detailed in step 2 of the sugar method (above section), then you’ll soak your nails. More below.
Steps with Lemon Juice and Dish Soap:
- File through the topcoat of your gel nail polish.
- Mix equal parts of lemon juice and dish soap in a bowl.
- Soak your nails in the solution for approximately 10-15 minutes.
- Use a wooden or plastic nail stick to gently push off the polish.
Another household product you can consider is hydrogen peroxide. It is gentler than acetone but requires a bit more patience to remove all of the polish.
Instructions Using Hydrogen Peroxide:
- File through the topcoat of your gel nail polish.
- Soak a cotton ball in a mix of hydrogen peroxide and warm water. Use two parts peroxide and one part water (2:1 ratio).
- Rub the solution onto your nails and periodically dipping your nails in the solution from your bowl. The peroxide will begin to break down the polish, making it easier to remove.
- After about 10 minutes, you should be able to remove most of the nail polish with an orange stick or other nail tool. Be careful not to scratch the nail surface.
Be sure to be gentle throughout this process to avoid nail damage. While these natural options work, we prefer the sugar and oil method discussed earlier. It’s more efficient at removing polish since there’s an abrasive aspect to the removal.
Aftercare and Nail Health
Proper aftercare is crucial in maintaining the health and strength of your natural nails following gel polish removal. Prioritizing hydration and protection will help to restore your nail beds and prevent unnecessary damage.
Moisturizing the Nail Bed
If you used the sugar and oil method in our list of seven steps earlier, you’ll notice that we mentioned rubbing a thin layer of oil onto your nails afterward to ensure they’re well moisturized.
Moisturization is key to recovering your natural nail beds after the gel polish removal process. Apply a natural oil like sweet almond oil or a natural cuticle oil generously to the nail bed and surrounding skin to replenish essential moisture and nutrients.
Avoiding Nail Damage
To prevent damage to your newly exposed natural nails, it’s important to avoid harsh chemicals and physical stress.
Treat your nails with care by wearing gloves when doing tasks such as cleaning, and minimize the use of nail hardeners or acrylics, as these can sometimes do more harm than good with frequent use.
Remember, gentle care of your nails will contribute to their overall health and strength.
Gel Polish Removal: Quick Recap
Removing gel nail polish at home can be a delicate process, but using sugar provides a gentle and effective solution. This method supports the overall health of your nails while allowing you to continue enjoying the creative expression of nail art.
Recap of Safe Removal Practices
Soak First:
To safely remove gel nail polish with sugar (or any method), you should start by softening the polish with a quick soak in a bowl of warm water. Hot water isn’t needed, just warm to the touch.
Topcoat Removal:
Use a file to remove the topcoat. Don’t file down to the nail; buff through the top layer of the polish only. Read more on this in our step-by-step guide earlier in the post.
Sugar and Oil Buff:
Apply a sugar-based oil mixture to your nails, employing a gentle, circular rubbing motion to exfoliate the polish away without harsh chemicals. Remember to moisturize your nails afterward to maintain their strength and beauty.
Final Thoughts on Natural Nail Care
Opting for a natural DIY method to remove gel polish underscores a good choice in natural nail care. Natural beauty is all about reducing your exposure to chemicals and pollutants while also giving you options to tailor your solutions to your own needs.
Removing Gel Nail Polish with Sugar FAQs
What is the best method to take off gel polish without using acetone?
The best way to remove gel polish without acetone involves using household sugar. This alternative method is gentle on your nails and avoids harsh chemicals. You can learn more about this process by reading about removing gel nail polish with sugar.
Can you use regular nail polish remover for removing gel nail polish, and if so, how?
Of course! Regular nail polish remover can be used for gel polish, but it’s less effective unless it contains acetone. Non-acetone removers may require more time and effort. We prefer natural methods anyway. Check out our 7-step guide earlier in this post to avoid a trip to the nail salon.
What steps should be followed to remove gel nail polish at home safely?
To remove gel nail polish at home safely, be patient, buff the nails to break the topcoat layer, and use your preferred method to remove the nail polish. We prefer the sugar and oil method, described in detail earlier.
What is the most efficient way to remove gel nail polish from toes at home?
Use the same methods as for fingernails, working toe by toe. Keep in mind that gel nail paint or polish will take longer to remove than regular nail polishes.