How to Make Homemade Nail and Cuticle Oil in 5 Easy Steps
Have you ever considered that store-bought nail and cuticle oils might be loaded with unnecessary chemicals? It’s pretty satisfying making your own, tailored perfectly to your needs.
- Why Make Your Own Nail and Cuticle Oil?
- Common Chemicals in Store-Bought Cuticle and Nail Oils
- Essential Ingredients for Homemade Nail and Cuticle Oil
- Step-by-Step Guide to Making Your Own Nail and Cuticle Oil
- Additional Tips and Tricks for Healthy Nails and Cuticles
- Wrap-up: No Chemicals, Natural Nail Care
- FAQs: Homemade Nail and Cuticle Oil
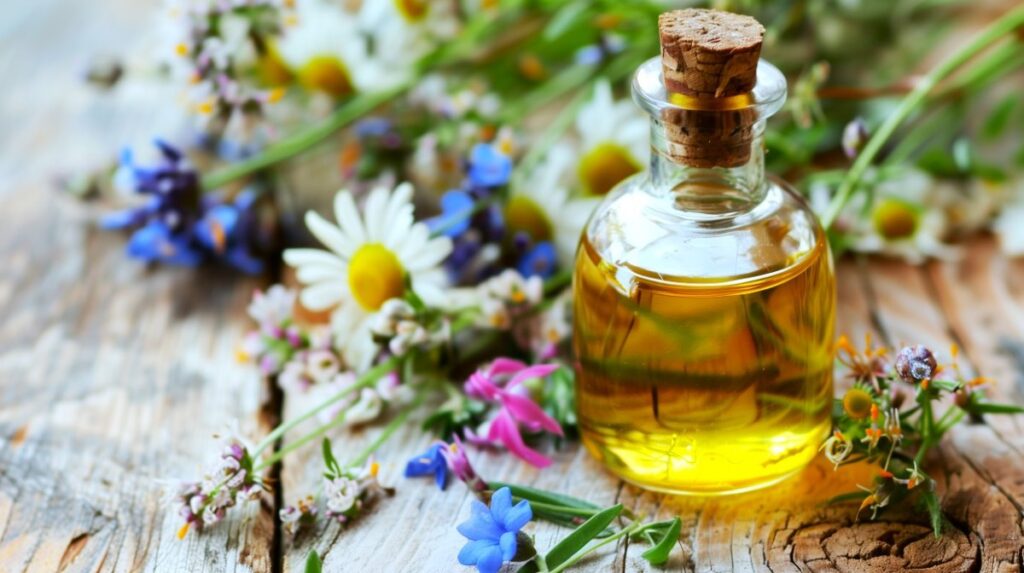
Imagine a gentle blend of natural oils that nourishes your nails and is free from harsh additives and chemicals.
Creating your own nail and cuticle oil is incredibly simple and allows you to customize it with your favorite essential oils. It’s a quick, fun, and fantastic way to improve your nail care routine while feeling connected to what you’re putting on your body.
Let’s walk through this easy and rewarding process together!
Why Make Your Own Nail and Cuticle Oil?
Making your own nail and cuticle oil is a wise choice for several reasons. Not only is it cost-effective, but it also allows you to choose natural ingredients and customize your blend to meet your specific needs.
Cost-Effectiveness
For what they are, commercial nail and cuticle oils often have hefty price tags.
When you break down the ingredients and compare them to homemade alternatives, you’ll find that making your own is much cheaper in the long run. A small bottle of store-bought cuticle oil can set you back anywhere from $10 to $20, whereas you can purchase the raw ingredients for multiple batches of homemade oil for a fraction of that cost.
Additionally, these ingredients often have multiple uses around the home.
Natural Ingredients
When you make your own nail and cuticle oil, you have full control over what goes into it.
Many commercial products contain harmful chemicals and preservatives that can be harsh on your skin and nails. For example, some products might include parabens or phthalates, which have been linked to a number of troubling concerns over the years.
On the other hand, using natural ingredients like jojoba oil, sweet almond oil, or vitamin E can nourish and strengthen your nails without any harmful effects. Natural oils are packed with vitamins and antioxidants that are beneficial for your skin and cuticles.
Customization
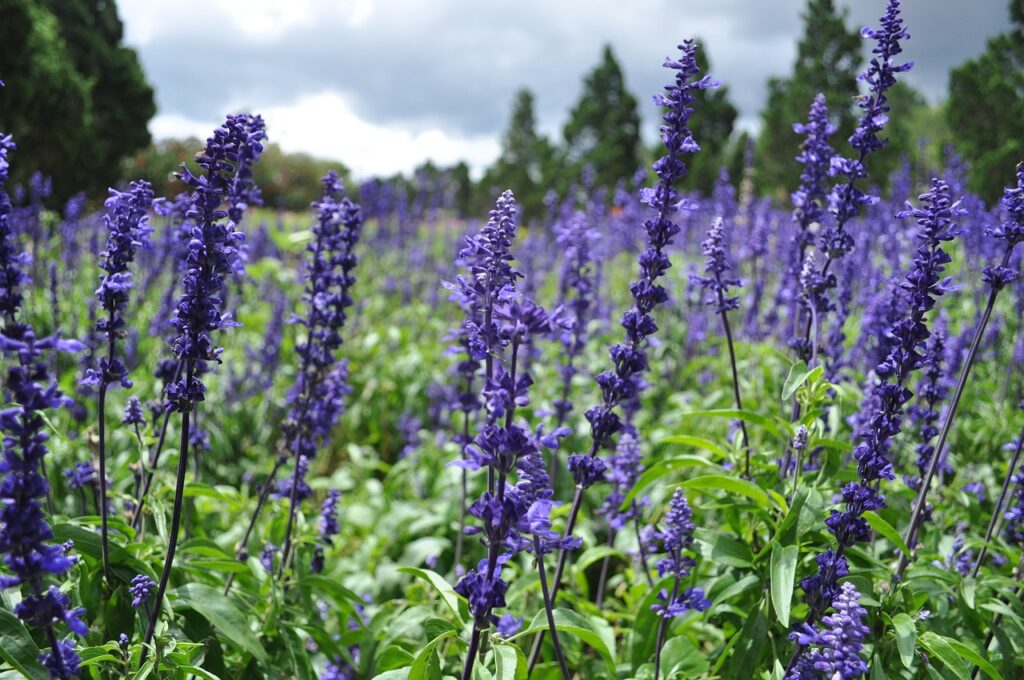
One of the best parts about making your own nail and cuticle oil is the ability to customize it to your liking. Do you love the calming scent of lavender? Add a few drops of lavender essential oil for a soothing blend. Or maybe you’re looking for something a bit more crisp and refreshing; in that case, a few drops of peppermint oil can do wonders.
Personally, I like the idea of mixing sweet almond oil with a few drops of tea tree oil and vitamin E. Not only does it smell fantastic, but it’s also great for keeping cuticles soft and preventing any hangnails.
Easy Steps for a Healthier Routine
Making your own nail and cuticle oil is not just about saving money or avoiding harmful chemicals; it’s about taking a step towards a healthier and more natural self-care routine. Imagine knowing exactly what you’re applying to your body and being excited about each time because you’ve crafted it yourself.
Creating an oil blend tailored to your needs can make all the difference in your nail care.
Now, let’s take a look at a few common ingredients for natural DIY cuticle oil.
Common Chemicals in Store-Bought Cuticle and Nail Oils
Choosing natural nail care isn’t just about what you put on your nails, but also about what you avoid. Here are some common chemicals found in store-bought cuticle and nail oils that you might want to skip:
- Parabens
- Purpose: Used as preservatives to prevent microbial growth.
- Concerns: Linked to potential hormonal disruptions and allergic reactions.
- Phthalates
- Purpose: Often used to make fragrances last longer.
- Concerns: Associated with potential reproductive and developmental issues.
- Synthetic Fragrances
- Purpose: Added for scent.
- Concerns: Can cause allergic reactions and skin sensitivities; their exact composition is often undisclosed, masking potentially harmful chemicals.
- Mineral Oil
- Purpose: Used as a cheap moisturizing agent.
- Concerns: Derived from petroleum, it can clog pores and is less effective than natural oils.
- Silicones (e.g., Dimethicone)
- Purpose: Provides a smooth, silky feel and forms a protective barrier on the skin.
- Concerns: Can trap dirt and oil, leading to skin issues.
- Formaldehyde Releasers
- Purpose: Used as preservatives.
- Concerns: Formaldehyde is a known carcinogen, and these compounds can release small amounts over time.
- Artificial Colors
- Purpose: Added for aesthetic appeal.
- Concerns: Some synthetic dyes can cause skin irritation and have been linked to other health issues.
By crafting your own nail and cuticle oil, you can avoid these potentially harmful ingredients and take control of your nail care routine.
Essential Ingredients for Homemade Nail and Cuticle Oil
Creating your own nail and cuticle oil at home is a fantastic way to ensure you’re using only the highest quality ingredients on your nails. Understanding which ingredients to use and why they are essential will help you create a blend that promotes smooth, healthy nails.
Carrier Oils
Carrier oils are the backbone of any good nail and cuticle oil. They serve as the primary moisturizing component and help dilute essential oils to ensure safe application.
- Jojoba Oil: It is an excellent base known for its moisturization properties. It mimics the skin’s natural sebum, making it easily absorbed and highly effective in promoting healthy, hydrated cuticles.
- Sweet Almond Oil: This oil is rich in vitamins E, A, and B, making it superb for nail health. It nourishes and conditions the skin, leaving your cuticles soft and replenished.
- Vitamin E Oil: As a powerful antioxidant, vitamin E oil helps repair and regenerate skin cells. It’s particularly beneficial for protecting your nails from damage and promoting overall nail health.
Using a combination of these carrier oils ensures that your homemade blend is packed with nutrients necessary for strong and beautiful nails.
Essential Oils
Essential oils work wonders for aromatherapy. In cuticle oil, they also offer a number of therapeutic benefits.
- Lavender Oil: Known for its soothing and calming properties, lavender oil can help relieve stress around your nails and cuticles, promoting a healthy environment for nail growth.
- Tea Tree Oil: This oil is famous for its antifungal and antimicrobial properties, making it ideal for keeping your nails clean and free from infections. Adding just a few drops can significantly bolster your nail’s defenses.
- Eucalyptus Oil: With its refreshing scent and anti-inflammatory properties, eucalyptus oil can help soothe irritated skin around the nails and cuticles.
If you’re unsure about how or where to buy quality essential oils, be sure to read our post about that here.
Additional Ingredients
While carrier and essential oils are the main components, adding a few extra ingredients can enhance the effectiveness of your nail and cuticle oil.
- Biotin: Also known as Vitamin B7, biotin strengthens the nails, making them less likely to break or crack. Look for biotin-enriched oils or supplements that can be directly added to your blend.
- Keratin: This protein significantly reduces brittleness and increases the resilience of your nails. You can find high-quality keratin serums or oils to incorporate into your DIY oil.
Finding high-quality ingredients:
- Purchase cold-pressed and organic oils to ensure the highest purity and effectiveness.
- Use resources like Mountain Rose Herbs or reputable health stores to source your materials.
Next, we’ll take a look at the step-by-step guide to making your own nail and cuticle oil.
Step-by-Step Guide to Making Your Own Nail and Cuticle Oil
You don’t need to spend a fortune on store-bought products to meet your nail care needs. Crafting your own nail and cuticle oil is a budget-friendly and easy-to-make alternative.
Step 1: Gather Your Ingredients and Tools
Before you start mixing, let’s gather everything you’ll need to create your nail and cuticle oil. Here’s a checklist of the essentials:
- Carrier Oils:
- Jojoba Oil: Easily absorbed and fantastic for moisturizing.
- Sweet Almond Oil: Rich in vitamins, ideal for conditioning.
- Vitamin E Oil: Acts as a powerful antioxidant.
- Essential Oils:
- Lavender Oil: Soothing and promotes relaxation.
- Tea Tree Oil: Antifungal and antimicrobial properties.
- Eucalyptus Oil: Refreshing and anti-inflammatory.
- Tools:
- Measuring spoons
- Dropper or small funnel
- Mixing bowl
- Whisk or mixing utensil
- Small glass bottles or containers for storage
Substitutes: If you can’t find jojoba oil, grapeseed oil is a great alternative. Similarly, for the essential oils, feel free to substitute based on your preferences or need. For example, lemon oil can replace eucalyptus oil for a zesty aroma.
Step 2: Measure and Combine the Oils
Now that you have your ingredients ready, let’s get to mixing!
- Measure Your Carrier Oils:
- 1 tbsp of Jojoba oil
- 1 tbsp of Sweet Almond oil
- 1 tsp of Vitamin E oil
- Combine in Bowl:
- Using a clean mixing bowl, pour in all the carrier oils.
- Mix Thoroughly:
- Whisk them gently until well-blended.
Precaution Tips: To avoid contamination, make sure your mixing tools are clean and dry. Also, always use high-quality ingredients.
Step 3: Add Essential Oils
Now, we’ll add essential oils to elevate the effectiveness and aroma of your mixture.
- Select Your Oils:
- 10 drops of Lavender oil
- 5 drops of Tea Tree oil
- 5 drops of Eucalyptus oil
- Mix with Carrier Oils:
- Slowly add each drop of essential oil to the mixed carrier oils, stirring continuously.
- Blend Thoroughly:
- Ensure even distribution by mixing thoroughly. Consider the combination of scents and benefits you want to achieve.
Want to create blends for different benefits? Consider adding chamomile oil for a calming effect. Peppermint oil is an excellent choice for an invigorating lift.
Step 4: Store Your Nail and Cuticle Oil
Proper storage will keep your blend fresh and potent.
- Use Suitable Containers:
- Transfer your oil blend into small glass bottles with droppers.
- Amber or cobalt blue bottles are preferred as they protect the oils from light, extending shelf life.
- Label Your Blends:
- Clearly mark each bottle with the contents and the date of manufacture.
- Keep It Cool:
- Store in a cool, dark place like a cabinet or drawer. Avoid direct sunlight and heat which can degrade the oil quality.
Step 5: Application Tips
Your oil is ready to use! Here are some tips for the best application experience:
- When to Apply:
- Apply the oil to your nails and cuticles twice daily, morning and night.
- How to Apply:
- Add a few drops to each nail and gently massage into the cuticles and nails.
- For extra hydration, you could soak your nails in warm water for a few minutes beforehand.
- Additional Tips:
- Always wash and dry your hands before application to keep everything clean.
- Regular trims and file any rough edges to maintain healthy nails.
By following these steps, you’ll not only nourish your nails but also indulge in a calming and rewarding self-care routine. Creating your own nail and cuticle oil allows for personalized care, perfect scent choices, and a natural approach to nail health.
Additional Tips and Tricks for Healthy Nails and Cuticles
Taking care of your nails and cuticles goes beyond just using a nourishing oil blend. By incorporating a few key habits into your daily routine, you can maintain strong and beautiful nails. Here are several tips and tricks to help you achieve optimal nail health.
Keep Your Cuticles Moisturized
A critical aspect of healthy cuticles is keeping them well-hydrated. Dry cuticles are prone to cracking and infection, which can affect nail growth. Here’s how you can keep them moisturized:
- Use Cuticle Oil: Apply your homemade nail and cuticle oil daily. This keeps the skin around your nails soft and nourished.
- Hand Lotion: When you use hand lotion, be sure to rub a small amount into your cuticles as well. According to Mayo Clinic, this simple step goes a long way towards keeping your cuticles healthy.
- Avoid Overly Hot Water: Hot water can strip natural oils from your skin, including your cuticles. Opt for lukewarm water whenever possible.
Mind Your Diet
What you eat impacts the health of your nails. A balanced diet rich in essential nutrients can improve nail strength and growth. Incorporate these food groups:
- Proteins: Keratin, the main protein that makes up your nails, benefits from a diet high in protein. Include lean meats, beans, and eggs in your meals.
- Biotin-Rich Foods: Incorporating foods like nuts, seeds, and sweet potatoes that are high in biotin can promote nail strength.
- Vitamins and Minerals: Vitamins A, C, and E are essential, along with zinc and iron. These nutrients can be found in fruits, vegetables, and whole grains.
Stay Hydrated
Hydration is crucial for healthy nails and cuticles. Dehydration can cause brittle nails and cuticles that are more prone to cracking. Ensure you drink plenty of water daily to keep your nails and skin hydrated.
Avoid Harmful Habits
Certain habits can damage your nails and cuticles. By being mindful of these, you can significantly improve your nail health:
- Don’t Cut Your Cuticles: Cutting your cuticles can lead to infections and damage. Instead, gently push them back using an orange stick.
- Limit Manicure Intensity: Avoid harsh manicures that can cause trauma to your nails and cuticles. Opt for gentle methods, and always ensure tools are sterile.
- Skip Harsh Chemicals: Avoid nail polish removers containing acetone, which can be extremely drying. Look for gentler alternatives that are free from harmful chemicals.
Regular Grooming
Keeping your nails clean and neatly trimmed is a fundamental part of nail care. Proper grooming prevents breakages and infections. Regularly:
- Trim your nails straight across and round the tips in a gentle curve.
- Clean under your nails to remove dirt and reduce the risk of infections.
- File any rough edges to smooth out the nail’s surface.
Keeping Your Nails Protected
Taking preventive steps can also protect your nails and cuticles. By minimizing exposure to damaging elements, you maintain healthier nails:
- Wear Gloves: Use protective gloves when cleaning or doing dishes to avoid exposure to harsh chemicals. Also, definitely opt for gloves when gardening or working with your hands in general.
- Use Protective Nail Coatings: Applying a nail hardener can provide an extra layer of defense against splitting and peeling.
Taking time to implement these additional tips into your routine will enhance your nail care regimen, allowing you to enjoy healthier, beautiful nails all year round.
Wrap-up: No Chemicals, Natural Nail Care
Crafting your own nail and cuticle oil is a wonderful way to personalize your nail care routine while embracing natural living. The benefits range from the satisfaction of knowing exactly what ingredients are nourishing your nails to the cost savings compared to store-bought products.
Choosing natural nail care is yet another easy way to reduce your daily exposure to chemicals, learn something new, and have fun in the process.
FAQs: Homemade Nail and Cuticle Oil
People have many questions when they think about making their own nail and cuticle oil. Below, we’ll tackle some of the most frequently asked questions to help you get started with confidence.
Is it Safe to Use Essential Oils in Nail and Cuticle Oil?
Yes, it is safe to use essential oils in your homemade nail and cuticle oil when used properly. Essential oils like lavender, tea tree, and eucalyptus offer various benefits, such as soothing inflammation, providing antifungal properties, and imparting a pleasant scent.
It’s essential to always dilute essential oils with a carrier oil to ensure they are safe for skin application.
What Are the Best Carrier Oils to Use?
Some of the best carrier oils for nail and cuticle oil include jojoba oil, sweet almond oil, and vitamin E oil. Jojoba oil resembles the skin’s natural sebum, making it highly effective for hydration.
Sweet almond oil is packed with vitamins, which are excellent for nourishing your nails, while vitamin E oil works as a powerful antioxidant.
How Often Should I Apply Homemade Nail and Cuticle Oil?
For the best results, you should apply your homemade nail and cuticle oil regularly, ideally once or twice a day. Daily use helps to keep your cuticles soft and your nails hydrated, promoting healthier nail growth.
Regular application, especially after washing hands or whenever your hands feel dry, can make a significant difference.
Can I Use Homemade Nail and Cuticle Oil on Fingers and Toenails?
Absolutely! Homemade nail and cuticle oil is suitable for fingers and toenails.
The nurturing effects of the oil spares no nail type, leaving your toenails just as nourished and strong as your fingernails. Simply adapt your routine to ensure consistent care for both sets of nails.
How Should I Store My Homemade Nail and Cuticle Oil?
For optimal freshness and to maintain the efficacy of the oils, store your homemade nail and cuticle oil in small glass bottles, preferably those shaded in amber or cobalt blue to shield from light.
Keep the bottles in a cool, dark place to prevent oxidation. Proper storage will extend the shelf-life and preserve the beneficial properties of your oil blend.