3 Easy DIY Coconut Oil Lip Balm Recipes + Variations
Soft, moisturized lips in under 15 minutes using ingredients you already have in the pantry. This homemade coconut oil lip balm is simple, family-friendly, and adaptable for any season. You can keep it completely unscented for kids and pregnancy, or add a gentle scent using safe essential oils for a personal touch.
- Why Make Your Own Lip Balm
- Why Coconut Oil Works for Lip Balm
- 1.) Coconut Oil Lip Balm Recipe (Base Formula)
- 2.) Unscented Coconut Lip Balm (Kid-Friendly and Pregnancy-Safe)
- 3.) Lightly Scented Lavender-Spearmint Lip Balm
- How to Create Your Own Lip Balm Variations
- Lip Balm With Sun Protection
- Quick FAQs
- The Best Lip Balm is the One You Make
Jump to the recipes
Homemade lip balm saves money, avoids unnecessary additives, and gives you total control over what touches your skin. With just three main ingredients, you can make a clean, long-lasting balm that hydrates deeply without feeling greasy. Let’s walk through the steps, ingredient options, and creative variations so you can make your own perfect blend today.
Why Make Your Own Lip Balm
Commercial lip balms often contain mineral oils, synthetic waxes, and fragrance additives that can dry lips over time. Making your own is not only more natural, it’s also surprisingly easy. You melt, pour, and let cool. No special equipment or complex chemistry is needed.
The benefits are simple:
- You control every ingredient.
- You can make it unscented or scented.
- You avoid artificial flavors and colors.
- You can reuse and refill containers to reduce waste.
Coconut oil is the hero ingredient here. It gives the balm its smooth glide, subtle shine, and long-lasting moisture. When combined with wax for structure and butter for creaminess, you get a texture that feels luxurious without being sticky.
Why Coconut Oil Works for Lip Balm
Coconut oil contains natural fatty acids that help soften, protect, and restore moisture. It melts at skin temperature and absorbs quickly, which makes it an ideal base oil for balms.
Benefits of Coconut Oil for Lips
- Softens and smooths flaky, cracked lips
- Adds natural shine without heaviness
- Helps seal in hydration and prevent moisture loss
Refined vs. Unrefined
Unrefined coconut oil keeps its light coconut scent and most of its nutrients. Refined coconut oil is neutral in scent and slightly more stable in warm weather. Both work well for lip balm, so choose based on whether you prefer scent-free or naturally fragrant.
Waxes and Butters
Wax gives the balm structure and staying power. Butter adds creaminess. The type and ratio you choose determine how firm or glossy your balm feels.
Common options include:
- Beeswax: Classic choice for structure and protection.
- Candelilla or Carnauba Wax: Vegan options; slightly glossier and firmer than beeswax.
- Shea Butter: Adds softness and hydration.
- Cocoa Butter: Adds firmness and a light chocolate scent.
Essential Oils and Flavor Oils
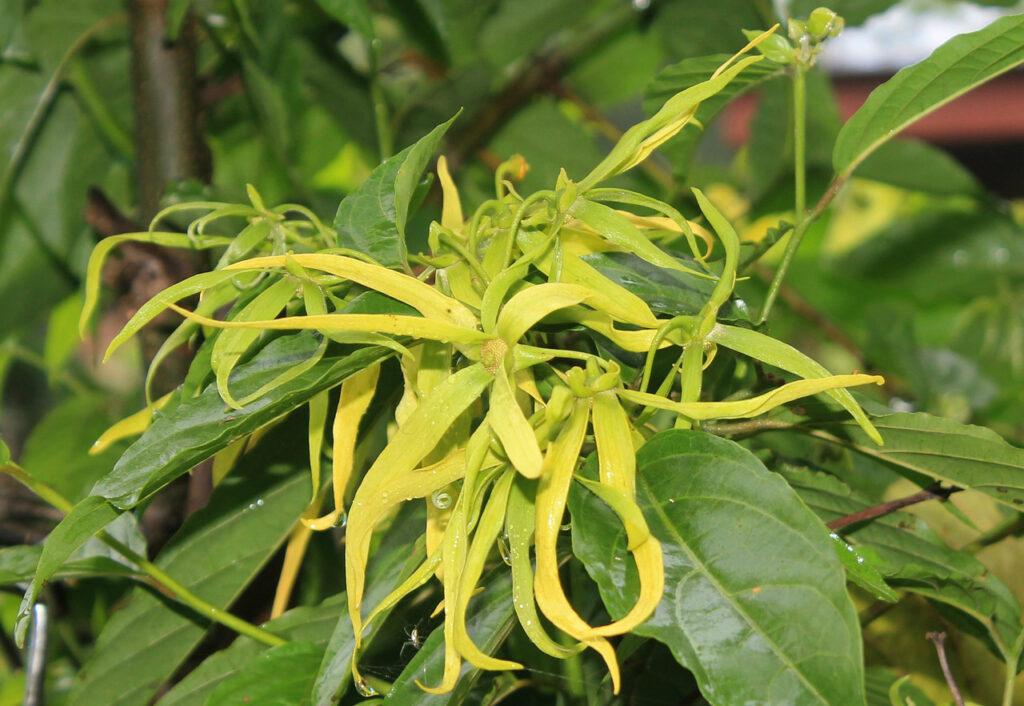
Essential oils are completely optional. For kids, pregnancy, or sensitive lips, skip them entirely. If you want a light scent, use only 0.25% to 0.5% total (about one to two drops per 10 grams of balm). Lavender, spearmint, or vanilla-like flavor oils are mild and pleasant. Avoid strong oils such as peppermint for children, and skip cinnamon, clove, or citrus, which can irritate lips.
Key Takeaway: Coconut oil moisturizes, wax gives structure, and butter adds softness. You control the scent, texture, and purity.
1.) Coconut Oil Lip Balm Recipe (Base Formula)
This base recipe fills about 8 to 10 standard lip balm tubes (0.15 oz or 5 g each) and takes around 15 minutes from start to finish. It’s balanced for smooth glide, lasting hydration, and an easy pour.
Ingredients
- 2 tablespoons coconut oil (25 g)
- 1 tablespoon beeswax pellets (12 g)
- OR 2 teaspoons candelilla wax for a vegan option (8 g)
- 1 tablespoon shea butter (13 g)
- Optional: ⅛ teaspoon vitamin E oil (0.5%)
- Optional: ¼ to ½ teaspoon total essential oil or flavor oil (about 1–2 drops per 10 g balm)
Tools
- Heat-safe glass measuring cup
- Small pot for a double boiler setup
- Stir stick or spoon
- Pipette or syringe for clean pouring
- 8–10 empty lip balm tubes or small tins
- Labels for dating and scent notes
Directions
1. Melt the Base
Add the coconut oil, wax, and shea butter to the heat-safe measuring cup.
Place the cup in a pot with a few inches of gently simmering water to make a double boiler.
Stir occasionally until the mixture melts completely and looks clear.
2. Add Optional Ingredients
Remove from heat and let the mixture cool for 1–2 minutes so it’s warm but not hot.
Stir in vitamin E and any essential or flavor oils if you’re using them.
3. Pour Into Containers
Use a pipette or small syringe to fill each tube or tin carefully.
Let the balms sit flat and untouched for about 30 minutes until solid.
4. Finish and Label
Cap, label, and store in a cool, dry place away from sunlight.
Key Takeaway: Melt, stir, pour, and cool. That’s all it takes for soft, smooth, naturally hydrated lips.
2.) Unscented Coconut Lip Balm (Kid-Friendly and Pregnancy-Safe)
This version skips all essential oils and uses unrefined coconut oil for a soft, natural scent. It’s gentle enough for children and pregnancy while still rich and nourishing.
Ingredients
- 2 tablespoons unrefined coconut oil (25 g)
- 1 tablespoon beeswax pellets (12 g)
- OR 2 teaspoons candelilla wax for vegan (8 g)
- 1 tablespoon shea butter (13 g)
- Optional: ⅛ teaspoon vitamin E oil (0.5%)
Instructions
Follow the same melting and pouring directions as the base recipe.
Once cooled, the balm will have a faint coconut aroma and a creamy, quick-melting texture.
Optional Twist: Swap shea butter for cocoa butter if you prefer a light chocolate scent.
Key Takeaway: Unrefined coconut oil adds natural fragrance and softness without needing any essential oils.
3.) Lightly Scented Lavender-Spearmint Lip Balm
For those who enjoy a soft, refreshing scent, this version combines lavender and spearmint essential oils for a soothing, cooling finish that’s balanced enough for daily use.
Ingredients
- 2 tablespoons coconut oil (25 g)
- 1 tablespoon beeswax pellets (12 g)
- OR 2 teaspoons candelilla wax for vegan (8 g)
- 1 tablespoon shea butter (13 g)
- 1 drop lavender essential oil
- 1 drop spearmint essential oil
- Optional: ⅛ teaspoon vitamin E oil (0.5%)
Instructions
Melt the coconut oil, wax, and shea butter using the same method as the base recipe.
Remove from heat and let cool slightly for about a minute.
Stir in the essential oils and vitamin E.
Pour into tubes or tins, allow to set for 30 minutes, then cap.
Key Takeaway: A gentle, refreshing scent that soothes and softens lips naturally.
Love This Simple Swap?
This 10-minute lip balm is just the beginning. The Natural Living Handbook is your next step.
Get 60+ proven, easy recipes for non-toxic skincare, haircare, laundry, natural cleaners, and more.

How to Create Your Own Lip Balm Variations
Once you make the base recipe, you can start customizing it to fit the season, your texture preference, or even color tone. Small changes in the wax or butter ratio make big differences.
Adjusting Firmness
- For a softer balm: Reduce wax by 10–15% or add more coconut oil.
- For a firmer balm: Increase wax slightly, especially if you live in a hot climate.
- For a creamier balm: Add a bit more butter (shea or cocoa).
Test texture by dipping a cold spoon into the melted mixture before pouring. This lets you see how the balm will set.
Adding Natural Color
You can add a hint of tint without synthetic dyes.
- Mica Powder: Choose lip-safe mica for shimmer or color. Start with a tiny pinch per batch.
- Cocoa Powder: Adds a warm nude tone and subtle scent. Use sparingly to avoid grit.
- Beetroot Powder: Adds soft pink color, though it may fade faster than mica.
Avoid water-based colorants or food coloring. They won’t mix with oils.
Adding Subtle Flavors
- Use lip-safe flavor oils such as vanilla, coconut, or chocolate.
- Always follow label usage rates. A few drops per batch are enough.
- Do not use alcohol-based extracts like vanilla extract from the pantry; they can separate or cause uneven texture.
Fixing Common Problems
Grainy Texture: Melt all ingredients fully, cool quickly, and store in a cool spot. If graininess appears later, remelt and cool rapidly.
Sinkholes or Cracks: Pour slowly, then top off lightly before the balm sets.
Too Soft or Too Hard: Remelt, adjust the wax or oil, and re-pour.
Storage and Shelf Life
Keep lip balms in a cool, dark place away from direct sunlight. Properly stored, they last 6 to 12 months.
Add vitamin E to extend shelf life and prevent the oils from going rancid.
Key Takeaway: Experiment with ratios and gentle natural add-ins. Once you learn how each ingredient behaves, you can craft the exact texture, scent, and color you like.
Lip Balm With Sun Protection
Can I add SPF ingredients to my homemade lip balm?
Yes, you can add gentle, naturally protective ingredients to homemade lip balm, but it is important to do it safely and with realistic expectations. When used correctly, non-nano, cosmetic-grade zinc oxide is considered safe for lip care and other natural skincare products. It is the same mineral used in many natural sunscreens and diaper creams.
Zinc oxide does not absorb into the skin or lips. Instead, it forms a thin, protective layer on the surface that reflects some UV rays and helps seal in moisture. This creates mild sun protection and can also calm dryness or irritation, making it a beneficial ingredient for outdoor or summer lip balms.
How to Use Zinc Oxide Safely
- Choose the right type: Only use non-nano, uncoated zinc oxide that is clearly labeled for cosmetic or skincare use.
- Handle carefully: Avoid breathing in the powder. Mix slowly or wear a simple mask when adding it to your recipe.
- Mix thoroughly: Stir the zinc oxide into your melted oils and waxes while they are still warm to create a smooth, even texture.
- Mind your ratios: Use about 10 to 20 percent zinc oxide by weight of your total mixture. Using too much can make the balm appear chalky or leave a visible film.
- Store properly: Keep your finished balm in a cool, dry place away from heat and sunlight.
What to Avoid
- Inhaling the powder while measuring or mixing.
- Using industrial or technical-grade zinc oxide that is not purified for skincare.
- Adding nano or micronized zinc oxide particles, which are unnecessary for lip care, and are easier to inhale.
Key Takeaway
Cosmetic-grade, non-nano zinc oxide can be a safe and helpful addition to homemade lip balm when handled correctly. It provides mild natural protection and a soothing barrier for dry or sun-exposed lips. However, because homemade products are not lab-tested, they should not be marketed or relied on as SPF-rated sunscreen. Use it as a nourishing and protective balm for everyday comfort.
Quick FAQs
Can I make lip balm without beeswax?
Yes. Use candelilla or carnauba wax instead. Start with about 60% of the beeswax amount, then adjust the texture after cooling.
How much essential oil is safe?
Use 0.25% to 0.5% maximum. That’s about one drop per 10 grams of balm. Always confirm the oil is lip-safe.
Will the balm melt in summer?
It can soften in high heat. Add slightly more wax for warm weather. Avoid leaving it in cars or direct sunlight.
How do I clean and reuse old lip balm tubes?
Scoop out residue, wash with hot soapy water, rinse well, sanitize with rubbing alcohol, and let dry fully before refilling.
Can I use another oil instead of coconut oil?
Yes. Jojoba, sweet almond, or olive oil can replace coconut oil. The texture will be slightly different but still hydrating.
Key Takeaway: Keep essential oils minimal, tweak wax for heat resistance, and reuse tubes safely to keep your DIY sustainable.
The Best Lip Balm is the One You Make
A simple homemade balm can outperform many store-bought versions. It’s quick, customizable, and cost-effective. Once you find your favorite ratio and scent level, you can whip up a batch any time your lips need extra care.
With this easy coconut oil lip balm recipe, you can skip the additives and keep your family’s skincare clean, simple, and natural. Once you make your first batch, you’ll realize just how easy and rewarding it is to create something that feels this good—made by you, for you.