Liquid Black Soap Recipes: 3 DIY Blends and In-Depth Guide
African black soap, traditionally crafted from plant-based ingredients, is a revered natural remedy for skin and hair care that has been passed down through many generations. Its popularity lies in its mild cleansing abilities and the nourishing benefits derived from its underlying ingredients.
- Tradition Usage and Ingredients
- Benefits of Liquid Black Soap
- Essential Components of Liquid Black Soap
- Soapmaking 101 Basics
- 3 Nourishing DIY Liquid Black Soap Recipes
- Enhancing Liquid Black Soap
- Usage and Storage Tips
- Wrap-up
- Liquid Black Soap FAQs
- What are the essential ingredients for a basic liquid black soap recipe?
- How can I incorporate shea butter into a liquid black soap mixture?
- Are there techniques to preserve liquid black soap for a longer shelf life?
- What is the expected shelf life of homemade liquid black soap?
- Can I use liquid black soap on my hair and face?
- Can I use liquid black soap if I have sensitive skin?
When liquefied, African black soap retains its cherished qualities and becomes even more convenient to use. This versatile soap can be further enriched with natural additives like aloe vera or essential oils, boosting its innate hydrating and calming benefits.
By making your own liquid African black soap, you gain the ability to customize it to meet your unique skin and hair care needs. Starting with a base of pure, raw soap, you can incorporate a variety of natural ingredients to enhance the soap’s restorative properties.
Crafting your soap at home also allows you to avoid the synthetic and potentially harsh chemicals found in many commercial skincare products, paving the way for a more intentional and wholesome approach to beauty.
Tradition Usage and Ingredients
When you explore the origins and components of liquid African black soap, you uncover a unique, rich tapestry rooted in West African traditional practices, utilizing locally sourced raw materials such as cocoa pods and plantain skins.
Cultural Roots
In West Africa, especially in regions like Ghana, traditional African black soap, known as ‘Alata Samina,’ has been handcrafted for centuries. Artisans employ methods passed down through generations to create a natural cleanser for both skin and hair.
It’s not simply a cleaning agent but an integral part of daily skincare rituals boasting a centuries-old history.
Raw Ingredients
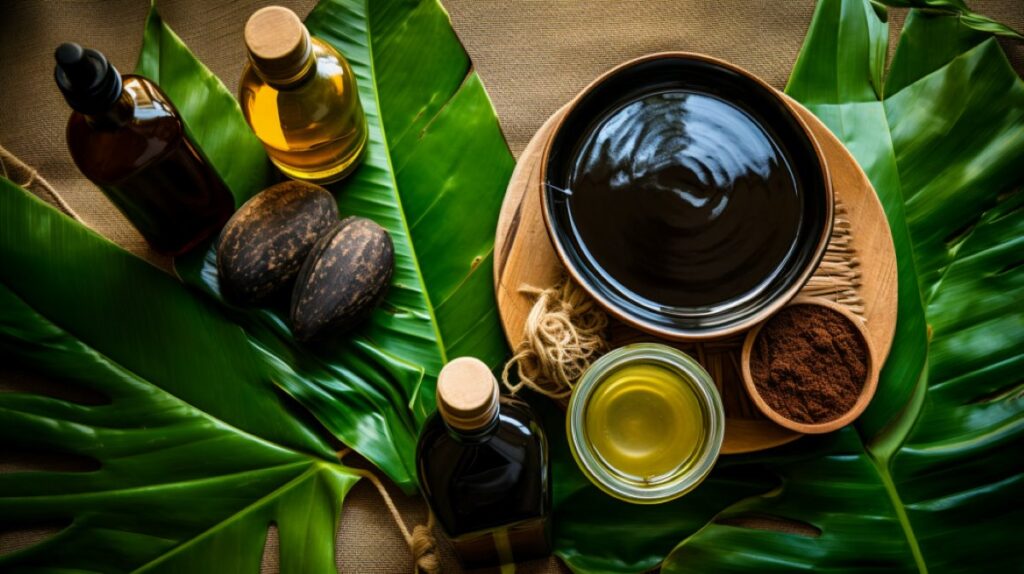
The beauty of African black soap lies in its natural ingredients. Key components include:
- Cocoa Pods: High in antioxidants, they are sun-dried and then roasted to create ash, the base of the soap.
- Plantain Skins: Similarly to cocoa pods, plantain skins are dried and roasted, contributing to the soap’s Vitamin A and E content.
- Cocoa Butter: A nourishing moisturizer, it contributes to the soap’s soothing qualities.
- Palm Leaves: Another source of ash, providing the soap with its distinctive color and cleansing properties.
These ingredients purify and nourish your skin, leaving it refreshed and balanced. Depending on the soap brand or if you’re going to make your own (we’ll discuss that in a section below), other ingredients are also sometimes used, like natural oils or shea tree bark.
Benefits of Liquid Black Soap
Liquid black soap comes from the process of mixing solid African black soap base with water. We’ll take a closer look at that process in a bit, but first, let’s dive deeper into some of the skincare benefits of this soap.
Skin Care Advantages
For All Skin Types: Liquid African black soap is typically safe for all skin types, including dry and sensitive skin. Its gentle formulation helps to cleanse without stripping the skin of its natural oils.
- Moisturizing: If you have dry skin, the shea butter and coconut oil found in many African black soap recipes provide deep hydration.
- Improves Skin Tone: Regular use may even out your skin tone, gradually fading dark spots and soothing skin discoloration.
- Reduces Fine Lines: Its natural ingredients may help to diminish the appearance of fine lines, promoting a more youthful complexion.
- Antioxidant Properties: The soap contains antioxidants that may protect the skin from damage caused by free radicals.
- Soothing: It’s known for its soothing effect on skin irritation, making it a go-to for those with reactive skin.
NOTE: Always patch test a new skincare product before full application to ensure that it is suitable for your specific skin type. That said, African black soap is often used especially for those with sensitive skin. Our family has many sensitive skin issues, so we know what it’s like to be careful with new skincare ingredients and products.
Hair Nourishment
- Scalp Health: The soap can be used to cleanse the scalp, removing build-up without stripping natural oils and promoting a healthy hair follicle environment that can encourage hair growth.
- Natural Cleanser: As a chemical-free alternative to synthetic shampoo, liquid black soap can thoroughly clean the hair and scalp. If you are making your own, the options are many.
It may take some time to see the full range of benefits, as natural products tend to work more gradually compared to their chemical counterparts.
Essential Components of Liquid Black Soap
Creating black soap from scratch that you can later make into liquid black soap requires a careful selection of ingredients that contribute to its cleaning efficacy and skin benefits. Each component has a distinct role and must be measured accurately to achieve a balanced and effective product.
If you don’t want to make the actual soap base from scratch and would prefer to use a store-bought solid African black soap base and turn that into liquid black soap, as is the most common and easiest way to make it into a liquid, skip to the 3 DIY recipes in a later section below.
Base Oils
Your liquid black soap will need a mix of base oils that are essential for the soap’s moisturizing properties. Here are a few options:
- Coconut oil: Known for its lathering and cleansing abilities.
- Olive oil: Provides a gentle touch suitable for sensitive skin.
- Castor oil: Enhances lather and acts as a humectant, drawing moisture to the skin.
These oils are foundational in creating a rich soap base that not only cleans but also nourishes your skin.
Lye Solution
A lye solution is critical in saponification, the soapmaking process. You’ll need two main ingredients for this:
- Sodium hydroxide: This is used to make solid black soap. We recommend making solid soap first if you want to do everything from scratch. You’ll have the option to use it as a solid or make it into a liquid later just by mixing it with water. Plus, it lasts so much longer. Be sure not to use potassium hydroxide, as that’s used for liquid soaps.
- Distilled water: Used to dissolve the sodium hydroxide to create your lye solution, distilled water ensures impurities do not hinder the soapmaking process. Purified water is fine, too, but again, distilled is best.
Remember to always add sodium hydroxide to water, never the other way around, to maintain safety.
Additives and Supplements
After forming your soap base, you’ll introduce additives and supplements to customize your soap:
- Aloe vera juice: Can be added to soothe and condition the skin, also helping to adjust the pH balance.
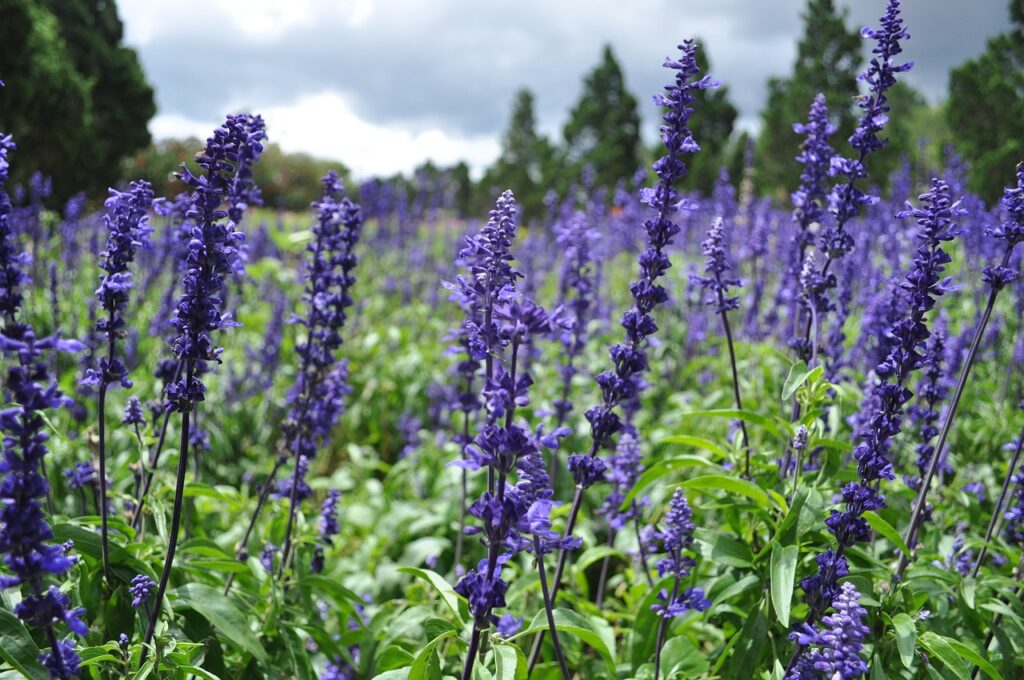
- Essential oils: Such as lavender or tea tree oil, provide fragrance and can have additional skin benefits like antibacterial properties.
- Exfoliants: These are optional but can be added to enhance the soap’s exfoliation and texture properties if desired.
- Manuka Honey: A fantastic skincare ingredient with anti-inflammatory properties.
By combining these components, you can create a customized liquid black soap that caters to your skin care needs. Remember to introduce additives with care and in appropriate amounts to maintain the integrity of your soap.
Soapmaking 101 Basics
When venturing into soapmaking for personal use or as a small business, if that’s your goal, understanding the core methods, safety, and chemical processes involved is essential. Ensuring you have the right equipment and knowledge will set the foundation for successful soapmaking.
Note: Making your own solid African black soap base is not required to make liquid black soap. Instead, you can simply dissolve premade or store-bought black soap with water to make liquid black soap, which is what we’ll detail in the recipe section later in this post.
This section is specifically for those who want to make their own solid black soap base.
Hot vs. Cold Process Soapmaking Methods
Hot-process soapmaking involves cooking the soap, which speeds up the saponification process and allows you to use the soap sooner. This is because the heat facilitates the chemical reaction between fats and lye.
Cold-process soapmaking involves blending oils with a lye and water solution, just like in the hot-process method. When the soap mixture is thick enough to leave an imprint when drizzled on itself, trace has been reached. The mixture can then be poured into a soap mold to harden and saponify over a few weeks. No heat is used for curing, hence the “cold process” terminology.
To learn more about both of these soapmaking methods, read our in-depth soapmaking guide here, which includes a recipe and all the necessary steps to make your own soap from scratch. We’ll also quickly summarize some basic steps below as a brief overview.
Equipment and Safety
Before starting, gather all necessary equipment, including a glass bowl, stick blender, molds, and a reliable scale. Safety is paramount in soapmaking due to the use of lye (sodium hydroxide), which is a caustic substance.
Always wear gloves and eye protection, and work in a well-ventilated area. Use utensils that are either glass or stainless steel to avoid unwanted chemical reactions with the lye.
Creating Your Own Lye Solution
With Sodium Hydroxide and Water:
When making your own lye solution, it’s essential to understand the correct proportions of water and sodium hydroxide. In our simple soapmaking recipe that we include in the above-referenced soapmaking guide, we recommend using 3 ounces of lye (sodium hydroxide) and 10 ounces of water.
Start by slowly adding sodium hydroxide (lye) to the water in your glass bowl, never the other way around, to prevent a volatile reaction. Let the mixture cool down before using it for saponification.
With ashes (optional):
You can also roast your own plantain skins to create an ash that will then be cooked and used to make a lye solution from scratch. That method is more advanced, and it may take some trial and error before you come up with the perfect soap base. But again, you can use sodium hydroxide mixed with water in the above quantities from our basic soapmaking recipe instead.
Mixing Process
To create soap, carefully mix your oils with the lye solution. Use a stick blender to combine them until you achieve a consistent, pudding-like texture known as trace. This process can take some time, so patience is key.
As the soap reaches trace, a chemical reaction between the oils and lye begins, eventually resulting in soap. Again, this process is called saponification.
Once trace has been reached, you will either heat the soap to make the remaining saponification process happen more quickly (hot process method), or you can put the soap mixture into your molds and allow it to saponify and cure over a period of a few weeks (cold process).
If using the hot process method, you can put the soap into the molds as soon as the saponification process is finished. Then, you can use your bars as soon as they’ve hardened. Give it at least 24 hours, or even a week if possible. For the cold process method, let’s move to the next step below.
Curing and pH Adjustment
Once you’ve poured the soap into molds, the curing process begins. This step is crucial for cold-process soap and can take as long as 4–6 weeks. During this time, water evaporates, and the soap hardens.
Check the pH level of your soap to ensure it is skin-friendly and no longer caustic – typically between 8 and 10. If the pH is too high, it may be harsh on the skin.
3 Nourishing DIY Liquid Black Soap Recipes
Creating your own liquid black soap can provide a gentle cleansing option for your skin, combining the natural benefits of African black soap with your preferred scents and additives.
These easy recipes offer versatility, allowing them to be used as body wash, face wash, or even as a base for handmade shampoo bars.
*Start Here* Basic Liquid Black Soap Base
This is the basic liquid soap base you’ll use in each of the three recipes below.
Necessary base ingredients:
- One 4-5 oz bar of African black soap (115-140 grams)
- 4-5 cups of distilled water. One cup per ounce of soap to keep things simple (4 cups for a 4 oz. bar of soap). If you want a thinner consistency, use more water.
Common Optional Ingredients:
- Natural oils like jojoba, coconut, shea butter, olive oil, etc.
- Essential oils
- Manuka honey
- Dried flowers, spices, or other gentle exfoliants
- Natural coloring agents
- Additional ingredients like vitamin E to enhance shelf life
To keep things simple with the below recipes, we didn’t include many additional ingredients. But you could add natural oil, honey, or any of the other ingredients we listed above in varying quantities, according to your preference. Added oils and other natural ingredients will make the soap even more nourishing.
Instructions:
- Cut or grate the black soap bar into small pieces and place them in a bowl.
- Boil the distilled water and pour it over the soap pieces.
- Let it sit for 24 hours, stirring occasionally until the soap fully dissolves and becomes liquid.
- Once the soap has become a liquid, add any additional optional ingredients as desired. More on that in the recipes below.
Below, we start with a basic traditional recipe, then a sandalwood and myrrh recipe (we love those scents together), then wrap it up with a floral and citrus-scented recipe. Vitamin E or rosemary essential oil can be used as preservatives in all recipes.
1.) Traditional Liquid Black Soap Recipe
You’ll Need:
- 1 Cup liquid black soap base (from the above process)
- 2 tablespoons of vegetable glycerin
- 1 teaspoon of vitamin E oil for skin nourishment and to extend shelf life (you can add this to any liquid soap for these benefits)
Instructions:
- Take 1 cup of your premade liquid base and pour it into a bottle.
- Add the vegetable glycerin to enhance moisturization.
- Mix in the vitamin E oil for its skin-nourishing properties.
2.) Sandalwood and Myrrh Liquid Black Soap Recipe
You’ll Need:
- 1 Cup liquid black soap base
- 1 tablespoon of jojoba oil
- 10 drops of sandalwood essential oil
- 5 drops of myrrh essential oil
- 1 teaspoon of vitamin E
Instructions:
- Start with your traditional liquid black soap.
- Stir in the sandalwood essential oil for a soothing scent.
- Gently stir in the additional ingredients.
3.) Floral and Citrus Scented Liquid Black Soap Recipe
You’ll Need:
- 1 Cup liquid black soap base
- 5 drops of lavender essential oil
- 5 drops of orange essential oil
- 1 tablespoon of manuka honey
- 1 teaspoon of vitamin E
Instructions:
- Use your liquid black soap base as a starting point.
- Add the lavender essential oil for a calming floral aroma.
- Add orange essential oil for a refreshing citrus twist.
- Finish by stirring in the manuka honey as well as all other ingredients.
Customized Variations
Considerations:
- Skin Type: Choose oils and additives suitable for your skin.
- Scent Preferences: Use different essential oil combinations to create your signature scent.
- Texture: Adjust the thickness by adding more or less distilled water for your liquid black soap base. Also, be sure to factor in if you’ll be adding other liquids like oils or honey. If you are, you can use less water for the soap base.
Reminder: Always conduct a patch test with new ingredients to ensure your skin’s compatibility.
Enhancing Liquid Black Soap
Creating a more luxurious liquid black soap involves incorporating high-quality, natural ingredients that boost its beneficial properties. Tailoring your soap with unique scents and therapeutic additives can significantly elevate the cleansing experience.
Additional Natural Ingredients and Blends
If you’re looking to enrich your liquid black soap, consider adding unrefined shea butter. With its high concentration of vitamins and fatty acids, shea butter enhances the soap’s moisturizing capabilities. Combining it with unrefined palm kernel oil, sourced from the Elaeis guineensis palm tree predominantly found in East African regions, can increase the soap’s antioxidant properties.
For a nourishing touch, incorporate blends from various shea body butter recipes. These blends usually contain beneficial oils that complement the soap’s natural essence.
More on Essential Oils, Scents, and Blends
Scents can transform the character of soap. Using lavender not only imbues your soap with a calming fragrance but also adds to the soap’s relaxing properties. For the best scent distribution, ensure your essential oils are well-diluted and evenly mixed.
What about some of the benefits of essential oils?
We’d be amiss if we didn’t mention at least a few of them.
- Want the cooling sensation of peppermint that can soothe, calm, and reduce itching? Great, add peppermint essential oil to your liquid black soap recipe.
- What about dandruff? A notable study demonstrated that lemongrass essential oil could cut dandruff by 50% after seven days. That’s encouraging for such a simple, widely available skincare ingredient.
- How about acne and skin oil levels? Palmarosa EO was demonstrated to significantly lower skin oil levels and improve acne after an 8-week period. In the study, they also tested tea tree oil, which had beneficial results.
- Rosemary essential oil: This ingredient is a natural preservative that can easily increase the shelf life of your liquid black soap. Additionally, multiple studies have demonstrated that it encourages hair growth.
We love customizing when possible since there are so many ingredients that can be used to varying degrees, each boasting very specific skincare benefits.
Quick tip: Remember to break down the soap into smaller pieces, fully dissolve it, and let it sit for 24 hours. Do this before mixing with other ingredients, as this facilitates a smoother blend with additives like essential oils. This also helps when adding ingredients like cellulose gum, which can help adjust the soap’s thickness to your preference.
The precise and careful selection of scents and essential oils not only personalizes your soap but will impact and contribute to its therapeutic qualities for your skin type or that of your family.
Usage and Storage Tips
When making liquid African Black Soap (ABS) for body soap or personal use, storing it properly will make it last even longer. We included vitamin E in our recipes to extend shelf life, but how you store it matters, too. More on that below.
Maximizing Shelf Life
Extend the longevity of your liquid ABS with proper storage:
- Store in a cool, dry place away from direct sunlight, which could degrade the soap’s natural ingredients.
- Use sanitized containers to prevent contamination. Any added bacteria can spoil the soap.
- Making small batches ensures that your soap stays fresh and reduces the likelihood of spoilage before use.
- Adding a natural preservative may extend the shelf life (like vitamin E or rosemary essential oil). If you don’t use any natural preservatives, keep a close eye on the color, smell, and texture for signs it may be time to make a new batch.
- If you’ve prepared your soap using pieces of solid soap, ensure they are dissolved properly in the oz of water you’re using. Incomplete dissolution may lead to spoilage.
How to Use Liquid Black Soap
To use your liquid African Black Soap effectively, start by gently shaking the bottle to ensure that the ingredients are well mixed.
- Apply a small amount to a washcloth or directly onto your skin.
- For best results, use warm water to create a nice lather and gently cleanse your skin.
- Use a foaming bottle for an extra-rich lather.
Wrap-up
Creating your own liquid African black soap is a rewarding and customizable experience that allows you to harness the natural benefits of traditional African black soap while tailoring it to your personal skincare needs.
Whether you opt for the basic recipe or indulge in the aromatic blends of sandalwood and myrrh or the refreshing floral and citrus scents, you can craft a gentle yet effective cleanser for your face, body, or hair. Even better, you can add any number of nourishing natural ingredients for an even more luxurious liquid soap.
By following these simple recipes and considering the optional ingredients based on your skin type and preferences, you’ll have a homemade product that not only cleanses but also nourishes and delights the senses.
Liquid Black Soap FAQs
In this section, you’ll find detailed answers to some of the most common questions about making and using homemade liquid black soap.
What are the essential ingredients for a basic liquid black soap recipe?
Your basic liquid black soap recipe will generally require African Black Soap as a base ingredient, water for dilution, and, optionally, essential oils for fragrance. Making solid soap into a liquid is super simple; look at the recipe section above.
If you want to make it entirely from scratch, you’ll have to create the black soap base first. To do that, you’d need to use ashes from roasted plantain skins or cocoa pods to create a lye solution. Or, you can use sodium hydroxide to make a lye solution without needing to use ashes.
Again, we cover all the ingredients and methods to make liquid black soap in the post above.
How can I incorporate shea butter into a liquid black soap mixture?
To include shea butter in your liquid black soap, melt it in a double boiler and mix it in thoroughly with your soap base. To make mixing easier, you can incorporate it with other oils like olive or coconut oil before combining it with the soap base to ensure an even distribution throughout the mixture.
Are there techniques to preserve liquid black soap for a longer shelf life?
Yes, you can extend the shelf life of your liquid black soap by adding natural preservatives, such as vitamin E or grapefruit seed extract, ensuring it’s stored in a cool, dark place. Rosemary essential oil is another great natural preservative.
What is the expected shelf life of homemade liquid black soap?
That all depends on the ingredients you use, as well as how you’re storing them. Generally speaking, you should try to use it all within a few months (2-3 months). Natural preservatives can extend the shelf life as well. Store it in a cool, dark location.
Can I use liquid black soap on my hair and face?
Absolutely, liquid black soap is versatile and can be used on hair and face, thanks to its gentle cleansing properties that are beneficial for all skin and hair types.
Can I use liquid black soap if I have sensitive skin?
Yes, liquid black soap is known for being gentle and beneficial, especially for sensitive skin. That said, everyone’s sensitive skin is different. Ingredients that are completely benign to one person may irritate you, and vice versa. Therefore, always patch-test any new product before applying it to your entire face or body.