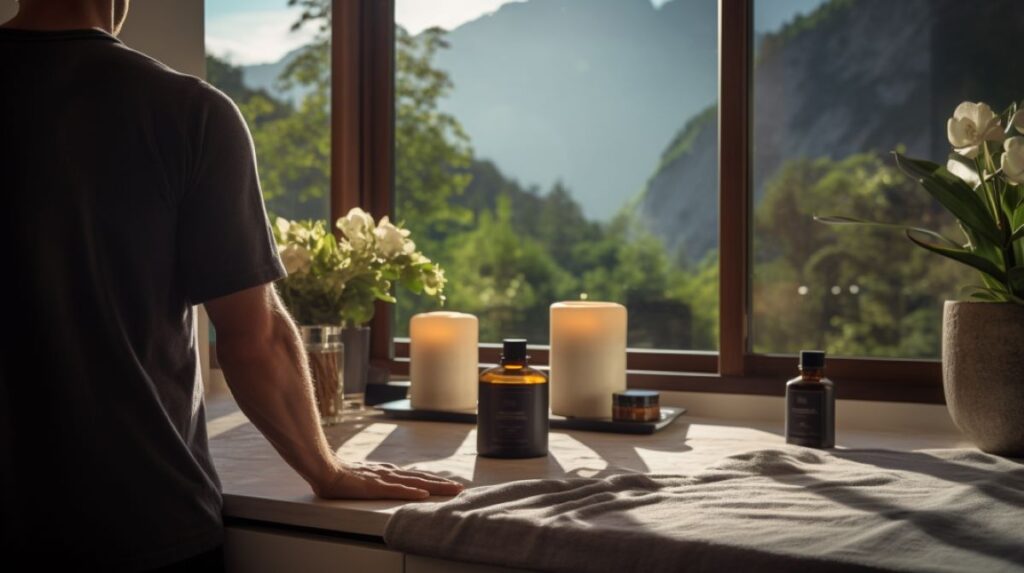
Category: Beauty

Packed with natural antibacterial properties, tea tree oil is a champion for those seeking a clear, glowing complexion without harsh chemicals. In this post, we’ll explore easy-to-follow recipes tailored for different skin types, using simple, natural ingredients readily available in your kitchen or local health store.

Join us as we dive into the world of natural skincare and DIYs where you control exactly what you put on your skin.

Benefits of Using DIY Tea Tree Oil Face Wash

Tea tree oil is a natural ingredient that can work wonders for your skin, especially when used in a DIY face wash. Let’s delve into why incorporating a DIY tea tree oil face wash into your skincare routine can be so beneficial.

Antibacterial and Antimicrobial Properties

Tea tree oil is well-known for its antibacterial and antimicrobial properties, making it a potent ingredient to combat acne and promote clear skin naturally. When applied topically, it can help reduce bacteria on the skin that can lead to breakouts. This natural remedy can be a game-changer for those seeking a gentle yet effective solution for acne-prone skin.

One particular study concluded that “…the use of the tea tree oil products significantly improved mild to moderate acne and that the products were well tolerated.” In a different study, tea tree oil was paired against benzoyl peroxide and was shown to be significantly effective but with fewer side effects.

Natural Ingredients for Radiant Skin

Using natural ingredients like tea tree oil in your skincare routine can contribute to a healthier complexion. Unlike harsh chemicals often found in commercial products, natural ingredients are gentle on the skin when used correctly.

By opting for DIY face wash recipes that include tea tree oil along with other natural components like honey or aloe vera, you are providing your skin with the nourishment it craves.

You can achieve radiant and clear skin without the use of harsh chemicals. From our own experience, many chemicals found in facewashes, especially popular acne washes, are far too harsh and leave your skin in a worse condition than if you hadn’t used them at all.

For further reading on the benefits of tea tree oil in skincare and published studies, you can check out Healthline or Pubmed.

3 DIY Tea Tree Oil Face Wash Recipes

Here are a few simple and effective recipes for DIY tea tree oil face wash that you can easily make at home.

1.) Homemade Tea Tree Oil Facial Cleanser

A gentle and hydrating cleanser perfect for daily use and suitable for most skin types.

Ingredients:

Instructions:

  1. In a clean bottle, combine all the ingredients.
  2. Shake well to ensure the mixture is thoroughly blended.
  3. To use, apply a small amount to damp skin.
  4. Massage gently in circular motions.
  5. Rinse with warm water and pat dry.

Benefits: This cleanser is suitable for most skin types, offering cleansing properties without stripping natural oils, enhanced by honey’s soothing effects and optional jojoba oil for hydration.

2.) Three-Ingredient Soothing Tea Tree Oil Face Wash

Ideal for sensitive or irritated skin, this face wash calms while it cleanses.

Ingredients:

Instructions:

  1. In a mixing bowl, stir together the aloe vera gel, tea tree oil, and sweet almond oil.
  2. If using, add vitamin E oil for an extra boost of antioxidants.
  3. Transfer the mixture to a pump bottle for easy use.
  4. To cleanse, massage a small amount onto a damp face, then rinse thoroughly with lukewarm water.

Benefits: Aloe vera soothes skin irritations, while almond oil provides essential nutrients, making it excellent for delicate skin profiles.

3.) Exfoliating Tea Tree Oil Face Wash

This recipe not only cleanses but also removes dead skin cells, promoting a vibrant skin texture.

Ingredients:

Instructions:

  1. Combine the coconut oil, sugar, and tea tree oil in a bowl.
  2. Add honey and mix thoroughly to create a uniform paste.
  3. Apply to dampened skin, massaging in circular motions to exfoliate.
  4. Rinse off with warm water for smooth, radiant skin.

Benefits: The natural sugar granules aid in exfoliation, coconut oil moisturizes, and honey boosts the antibacterial power of tea tree oil, making this perfect for enhancing skin’s natural glow.

Skin Types and Tea Tree Oil Face Wash

Oily Skin:

Tea tree oil can help regulate oil production and unclog pores, making it ideal for oily skin prone to breakouts.

Dry Skin:

While tea tree oil can be drying, diluting it properly and moisturizing afterward can still benefit dry skin by targeting specific blemishes without overstripping moisture.

Sensitive Skin:

Sensitive skin types should patch-test tea tree oil face wash to ensure it doesn’t cause irritation. Using a minimal amount or opting for a milder formulation can still provide benefits without triggering sensitivity.

Remember, natural ingredients like tea tree oil can offer effective solutions for your skincare needs, but we would still highly recommend patch testing if you haven’t used it before, as with any new skincare product. More safety guidelines are below.

Safety Precautions When Using Tea Tree Oil

To ensure a positive and safe experience, it’s important to follow a few safety guidelines when incorporating tea tree oil into your homemade face wash varieties.

Dilution Guidelines

Patch Testing

Wrap-up

From combating acne to soothing irritation, this natural ingredient has become a beloved ingredient in dermatology and skincare routines in general.

Embrace experimentation, enjoy the therapeutic scents of essential oils, and get busy experiencing the nourishing goodness of handmade skincare products firsthand.

Tea Tree Oil Face Wash: FAQs

Is Tea Tree Oil Face Wash Suitable for All Skin Types?

Tea tree oil face wash can be suitable for many skin types, but individuals with sensitive skin should perform a patch test before regular use. It is known for its ability to help with acne-prone skin due to its antibacterial properties.

If using in face wash, be sure to follow up cleansing with a natural and gentle moisturizer.

Are There Different Recipes for Tea Tree Oil Face Wash?

Yes, there are various recipes available to cater to different skin types and preferences. For example, you can customize your face wash recipe by adding ingredients like honey for extra moisture or aloe vera for soothing effects.

This essentially means that you can tailor your homemade facewash to whatever skin type you have. If you’re allergic to specific ingredients, you can swap in other ingredients that you tolerate well. That’s the beauty of DIY and homemade skincare.

Can Tea Tree Oil Face Wash Help with Acne?

Tea tree oil is a popular ingredient in skincare products targeting acne due to its antimicrobial properties. When used in a face wash, it may help in managing acne-prone skin by reducing inflammation and fighting acne-causing bacteria.

Studies have demonstrated it can be quite effective for mild to moderate acne. See the links we referenced earlier in this article for more information.

Where Can I Find Studies on Tea Tree Oil for Skincare?

For more in-depth information on the benefits of tea tree oil for skincare, you can explore studies on platforms like PubMed or reputable government sites. These studies provide valuable insights into the efficacy of tea tree oil in skincare routines.

Healthline or WebMD are also good resources most of the time.

  • How to Make Manuka Honey Skin Cream: 4 Easy DIY Recipes

    How to Make Manuka Honey Skin Cream: 4 Easy DIY Recipes

    How to Make Manuka Honey Skin Cream: 4 Easy DIY Recipes

    Are you looking to enhance your skincare routine with natural ingredients? Making your own Manuka honey skin cream is easy and well worth the effort, as this ingredient is known for its skin-nourishing qualities.

    Manuka honey is known for its potent antibacterial and healing properties, making it a perfect choice for soothing and nourishing skin. We wrote our first post on Manuka honey years ago and we’re still excited about it as an ideal ingredient in skincare.

    • Creating your own Manuka honey cream allows you to customize the formula to suit your skin’s specific needs while avoiding harmful chemicals often found in commercial products.
    • By using Manuka honey along with other quality ingredients like shea butter and essential oils, you can craft a luxurious cream suitable for most skin types.
    • Whether you are targeting dryness or blemishes or simply aiming to achieve moisture retention, DIY Manuka skin cream offers a natural solution tailored to your skincare preferences.

    We love DIYs and natural skincare. Natural skincare is best in every way, and when you make your own products at home, you have full control over scents, ingredient quality, and desired effects.

    Benefits of Manuka Honey in Skincare

    Manuka honey boasts a plethora of skincare benefits that make it a powerhouse ingredient in natural skincare products.

    Dry Skin

    Manuka honey is renowned for its moisturizing qualities. It acts as a humectant, drawing moisture into the skin and locking it in for a hydrated and supple complexion. Say goodbye to dry, flaky skin, as manuka honey works to keep your skin soft and nourished.

    Acne, Eczema, or Sensitive Skin

    For those struggling with acne, eczema, or sensitive skin, manuka honey can be a game-changer. Its anti-inflammatory properties help calm irritated skin, reduce redness, and promote healing.

    Acne-prone skin benefits from manuka honey’s antibacterial properties, which can aid in preventing and treating breakouts. Eczema sufferers find relief in the soothing effects of manuka honey, which eases itching and promotes skin repair.

    Basic Manuka Honey Skin Cream Recipe

    The below recipe is a simple and basic template for making your own Manuka Honey skin cream. We’ve also included three additional recipes in the next section for more varied applications. However, you can easily use the recipe below as a starter template and modify it to suit your desired skincare outcomes.

    Ingredients:

    • 2 tablespoons of Manuka honey
    • 1/4 cup of coconut oil
    • 1/4 cup of shea butter
    • 1 teaspoon of beeswax
    • 3-4 drops of your favorite essential oil for a pleasant scent

    Directions:

    1. Preparing the Mixture: In a double boiler, melt the coconut oil, shea butter, and beeswax together until fully combined.
    2. Adding Manuka Honey: Once melted, remove the mixture from heat and carefully stir in the Manuka honey. Ensure it is evenly distributed throughout the mixture.
    3. Incorporating Essential Oil: Drop in your chosen essential oil and mix well to infuse the cream with a delightful scent.
    4. Cooling and Setting: Allow the mixture to cool slightly before pouring it into a clean, airtight container for storage. Let it set at room temperature until firm.

    7 Essential Oils for DIY Manuka Skin Creams

    Lavender Oil

    Known for its calming and soothing properties, lavender oil can help reduce skin inflammation and promote relaxation, making it ideal for nighttime creams.

    Tea Tree Oil

    With strong antibacterial and antifungal properties, tea tree oil is excellent for acne-prone skin and can help clear up blemishes while using Manuka honey cream.

    Frankincense Oil

    Helps to promote the regeneration of healthy skin cells, making the skin appear smoother and firmer. It’s also beneficial for reducing the appearance of scars, wrinkles, and fine lines.

    Rosehip Oil

    Rich in vitamins and antioxidants, rosehip oil is highly effective for hydrating dry, itchy skin and reducing signs of aging.

    Chamomile Oil

    Known for its anti-inflammatory properties, chamomile oil can soothe irritated skin, making it a great addition to creams used for sensitive or inflamed skin.

    Geranium Oil

    Helps regulate oil production, tighten the skin, and improve skin elasticity, reducing the appearance of wrinkles. Geranium oil also has a balancing effect on the skin’s natural oils.

    Ylang Ylang Oil

    Known for its balancing effect on sebum levels in the skin, Ylang Ylang is beneficial for both dry and oily skin types. It also has a soothing fragrance that enhances the sensory experience of your DIY cream.

    These essential oils not only add fragrance to your Manuka honey cream but also enhance the cream’s therapeutic properties to suit various skin types and conditions.

    3 Simple Manuka Honey Skincare Recipes

    Manuka honey can easily be blended with other luxurious ingredients to create creams, balms, or lotions for a variety of skincare outcomes. Let’s dive into three easy recipes below.

    1.) Moisturizing Manuka Honey Body Butter Recipe

    Ingredients:

    • 1/2 cup coconut oil
    • 1/2 cup shea butter
    • 1/4 cup coconut butter
    • 2 tablespoons Manuka honey
    • Optional: 10-15 drops of essential oil (like lavender or rose for fragrance)

    Instructions:

    1. Combine coconut oil, shea butter, and coconut butter in a double boiler over low heat. Stir until completely melted and combined.
    2. Remove from heat and let cool slightly. Stir in Manuka honey until well incorporated.
    3. If using, add essential oils and mix thoroughly.
    4. Pour the mixture into a clean jar and allow it to cool at room temperature. As it cools, it will solidify into a creamy body butter.
    5. Store in a cool, dry place. Use within 1-2 months for optimal freshness.

    2.) Anti-Wrinkle Manuka Honey Cream Recipe

    Ingredients:

    • 1/4 cup almond oil (infused with Manuka oil)
    • 1 tablespoon coconut oil
    • 1 egg yolk
    • 2 tablespoons Manuka honey
    • Optional: Vitamin E oil for an extra antioxidant boost

    Instructions:

    1. In a double boiler, gently melt the coconut oil and almond oil together.
    2. Remove from heat and allow to cool slightly before adding the egg yolk. Whisk vigorously to ensure the mixture is well combined and smooth.
    3. Stir in the Manuka honey (and Vitamin E oil if using).
    4. Once fully combined, pour the cream into an airtight container and let it set in the refrigerator.
    5. Use nightly after cleansing. Apply a thin layer to the face and neck, avoiding direct contact with the eyes.

    3.) DIY Moisturizing Eye Cream with Manuka Honey

    Ingredients:

    • 1/4 cup avocado oil
    • 1/4 cup jojoba oil
    • 1 tablespoon beeswax
    • 1 tablespoon Manuka honey
    • Optional: 5 drops of chamomile essential oil for extra soothing properties

    Instructions:

    1. In a double boiler, melt the beeswax slowly. Once it begins to melt, add the avocado oil and jojoba oil, stirring constantly until well combined and fully melted.
    2. Remove from heat and allow the mixture to cool to a lukewarm temperature. At this point, carefully stir in the Manuka honey and chamomile oil if using.
    3. Pour the mixture into a small, clean jar with a lid. Allow it to cool and set at room temperature.
    4. Apply gently around the eyes at night, using your ring finger for minimal pressure to avoid tugging at delicate skin.

    These tailored recipes provide specific benefits for different skin needs, leveraging the natural properties of Manuka honey to enhance skin health and appearance.

    Wrap-Up: Manuka Honey Cream

    Creating your own Manuka honey cream with natural ingredients is a simple yet effective way to enhance your skincare routine.

    Conclusion: Elevate Your Skincare with Manuka Honey Cream

    Natural, Effective, Personalized
    Introducing Manuka honey into your skincare through DIY creams offers a natural, effective way to enhance your skin. These recipes allow you to customize products to your specific skin needs, embracing a personalized approach to beauty.

    Eco-Friendly Beauty
    Creating your own skincare products also supports sustainable beauty practices by reducing packaging waste and avoiding harsh chemicals. Ditch the synthetic skincare products and reduce your daily exposure to chemicals with natural ingredients.

    Start Your DIY Journey
    Try these Manuka honey cream recipes for yourself and see the difference in your skin’s texture and overall glow. Embrace this simple step towards a healthier, more radiant complexion.

    FAQ: Manuka Honey Cream

    1. Why Manuka, and why is it good for the skin?

    Manuka honey is a unique type of honey native to New Zealand, produced by bees that pollinate the Manuka bush.

    It is renowned for its superior antibacterial and anti-inflammatory properties, which make it particularly beneficial for skin care. It helps to heal blemishes, soothe irritated skin, and improve skin hydration.

    2. Can I use Manuka honey cream on sensitive skin?

    Yes, Manuka honey cream is generally safe for sensitive skin due to its natural anti-inflammatory properties. However, if you have allergies or extremely sensitive skin, it’s advisable to perform a patch test first or consult with a dermatologist before regular use.

    3. How often should I use Manuka honey cream?

    Manuka honey cream can be used daily as part of your skincare routine. For best results, consider using it twice a day, in the morning and evening, to maintain hydrated and nourished skin. When possible, we suggest using moisturizers immediately after showering or bathing.

    4. How long does homemade Manuka honey cream last?

    Homemade Manuka honey cream can last for up to a month if stored properly in an airtight container and kept in a cool, dry place. Refrigeration can extend its shelf life, but check the consistency and smell before use to ensure it’s still good to use.

    Some preserving essential oils like rosemary can make it last longer.

    5. Can I add other natural ingredients to my Manuka honey cream?

    Absolutely! You can customize your Manuka honey cream by adding other natural ingredients like aloe vera for extra soothing properties, vitamin E for enhanced skin repair, or other essential oils suited for your skin type to boost the cream’s benefits.

    The recipes we mentioned are a good starting point. Feel free to customize and tweak them according to your needs.

    6. Where can I buy quality Manuka honey?

    Quality Manuka honey can be purchased from health food stores, some supermarkets, or online retailers that specialize in natural products. Look for UMF (Unique Manuka Factor) certification to ensure you are getting genuine and potent Manuka honey. Generally speaking, the higher the UMF, the better.

    7. Is there a vegan alternative to beeswax in the recipes?

    Yes, for those seeking a vegan option, candelilla wax or soy wax can be used as an alternative to beeswax. These plant-based waxes will help achieve a similar texture in your Manuka honey cream.

    8. Can Manuka honey cream help with acne?

    Yes, thanks to its antibacterial properties, Manuka honey can help in treating acne. It helps reduce acne bacteria and soothe inflammation, promoting clearer skin. However, it’s best to use it as part of a comprehensive skincare regimen tailored to acne-prone skin.

    Also, remember that other lifestyle choices like diet, exercise, and stress management have effects on acne. Natural skincare is but one part of the holistic approach to mitigating acne.

    9. How do I store my DIY Manuka honey cream correctly?

    Store your DIY Manuka honey cream in a clean, airtight container to prevent contamination and oxidation. Keep it in a cool, dark place, such as a cupboard. If your home is warm or humid, you might consider storing it in the refrigerator to maintain its freshness for a longer period.

    10. Can children use Manuka honey cream?

    While Manuka honey is natural and gentle, it’s advisable to consult with a pediatrician before applying Manuka honey cream on children, especially if they have sensitive skin or allergies. We also always suggest patch testing when using any new skincare products, including ones you purchase from the store.

  • Easy Essential Oil Perfume Blends: Guide + 7 Delightful Recipes

    Easy Essential Oil Perfume Blends: Guide + 7 Delightful Recipes

    Easy Essential Oil Perfume Blends: Guide + 7 Delightful Recipes

    What could be better than an all-natural perfume, right? How about an all-natural perfume that you have full control over in terms of fragrances and ingredients? That’s exactly what we’re going to explore today.

    Table Of Contents
    1. Primer on Aromatherapy and Essential Oils
    2. Creating Essential Oil Perfume Blends
    3. Season, Theme, and Mood Considerations for Perfume Blends
    4. 7 Easy Recipes for Essential Oil Perfume
    5. Making Sprayable Essential Oil Perfumes
    6. Benefits of Using Essential Oil Perfumes
    7. How to Apply Essential Oil Perfumes
    8. Storing Essential Oil Perfumes
    9. DIY Essential Oil Perfume Wrap-up
    10. FAQ: Essential Oil Perfumes

    If you are a woman who cherishes natural living and seeks to infuse everyday life with the power of aromatherapy, you’re in the right place. Essential oils have been around for a long time, and our family uses them for all kinds of applications. Perfume-making is yet another fun way to use essential oils.

    • In this guide, we will delve into the art of creating your own signature scents with recipes for essential oil perfume.
    • Crafting your perfume allows you to embrace natural fragrances and grants you the freedom to tailor scents that resonate with your unique preferences.
    • Essential oil perfumes offer a natural and exquisite alternative to commercial fragrances, allowing you to connect with the purity of nature while indulging in luxurious aromas.
    • By blending essential oils, you can create personalized scents that also carry therapeutic benefits.

    Whether you seek to uplift your mood, enhance focus, or bask in your own creative scents, the below guide and recipes will inspire creativity. Our goal is to help you think through the basics of aromatherapy, how to combine scents that complement each other, and guide you to be creative when crafting homemade perfumes.

    Primer on Aromatherapy and Essential Oils

    The power of scent is often underestimated, yet it has a profound impact on our moods and emotions.

    Have you ever caught a whiff of a familiar fragrance and felt a rush of memories flood back? That’s the science of aromatherapy at play, tapping into our sense of smell to evoke deep emotions and memories.

    Understanding EOs and Aromatherapy

    Aromatherapy involves the use of essential oils extracted from plants to improve overall well-being.

    • These potent oils are often used in perfumery for their aromatic qualities, but their benefits extend far beyond just pleasant scents.
    • By inhaling or applying essential oils, we can stimulate areas of the brain that are responsible for our emotions, influencing mood and reducing stress levels.
    • As alluded to earlier, the connection between scent and memory is a powerful tool that aromatherapists use to create blends that promote relaxation, focus, or even energy.

    Essential Oils 101

    When it comes to creating essential oil perfumes, there are a few key players that every DIY enthusiast should have in their collection.

    • Floral oils like lavender, jasmine, gardenia, or rose are very common staples in perfumery, perfect for creating soothing blends. There are many more floral oils to choose from, so we recommend having a nice, varied collection of these.
    • Citrus oils like sweet orange or bergamot bring a burst of freshness to any blend.
    • Woodsy and earthy oils can drastically increase the complexity of blends that were otherwise somewhat sharp or overly sweet from a fragrance perspective.

    The extraction methods of essential oils vary, with popular techniques including steam distillation and cold pressing. It’s crucial to understand how these oils are extracted to ensure their purity and potency in your perfume creations.

    Lastly, while essential oils offer numerous benefits, using them safely is essential. Always dilute essential oils before applying them to the skin and perform a patch test to check for any sensitivities.

    In the world of essential oil perfumery, knowledge of aromatherapy principles and essential oil basics sets the foundation for crafting unique and personalized scents that smell fantastic.

    Creating Essential Oil Perfume Blends

    Imagine unlocking the endless possibilities of fragrance creation by blending essential oils to craft your own unique perfume. Dive into the art of mixology, where the right combination of oils can evoke memories, emotions, and sensations.

    Let’s explore the key components that make up a well-balanced perfume blend.

    Fragrance Notes in Perfumery

    In the symphony of scent creation, fragrance notes play a pivotal role in shaping the overall perfume composition.

    • Just like a musical composition, perfumes have top, middle, and base notes that harmonize to create a captivating olfactory experience.
    • Top notes are the initial burst of fragrance, middle notes form the heart of the scent, and base notes linger as the lasting impression.

    For instance, zesty citrus oils like bergamot or lemon make refreshing top notes, while floral oils such as lavender or rose serve as delicate middle notes. Deep and earthy scents like sandalwood or patchouli anchor the perfume as base notes, providing depth and richness.

    Mixing Essential Oils for Balance

    Crafting a successful perfume blend is akin to conducting a delicate dance where each essential oil contributes its unique aroma to the ensemble.

    • Balancing different oils is crucial to ensure the final scent is harmonious and well-rounded.
    • Experiment with various combinations, keeping in mind the intensity, longevity, and evaporation rate of each oil.
    • Start with a dominant base note, add complimentary middle notes, and finish with a splash of vibrant top notes to create a multi-dimensional fragrance.
    • Personalize your blend by adjusting the ratios until you achieve the perfect balance that resonates with your senses.

    Season, Theme, and Mood Considerations for Perfume Blends

    When creating essential oil perfumes, it’s essential to consider seasonal changes, the theme you want to convey, and the mood you aim to evoke. These elements will guide you in crafting unique blends that suit various occasions and personal preferences.

    Seasonal Blends

    Adapting your perfume blends to the seasons can enhance your overall fragrance experience. Embrace the changing seasons by concocting light and fresh citrus blends for summer or warm and spicy notes for winter.

    • Set the mood with calming lavender and chamomile for relaxation or invigorating peppermint and eucalyptus for a burst of energy.
    • In contrast, warm and spicy notes such as cinnamon and clove work well for fall and winter, creating a cozy and comforting aura.

    Theme Inspiration

    Choosing a theme for your perfume blend can add depth and character to your creation.

    Whether you’re drawn to exotic destinations, nostalgic memories, or natural elements, let your theme guide your selection of essential oils. For example, a tropical theme might include coconut, pineapple, and vanilla for a beachy vibe.

    Mood Enhancement

    Essential oils have the power to influence emotions and moods.

    • When blending perfumes, consider the feelings you want to evoke.
    • For a calming effect, incorporate lavender and chamomile.
    • To boost energy and confidence, try blends with peppermint and rosemary. Tailoring your perfume to reflect your desired mood can enhance the overall impact.

    Incorporating seasonal, thematic, and mood considerations into your perfume blends allows you to create personalized fragrances that resonate with your unique style and preferences.

    By understanding the interplay of these elements, you can craft signature scents that evolve with the changing seasons, reflect your desired theme, and effortlessly uplift your mood. Consider your family’s preferences in these areas as well!

    7 EO Perfume Blend Examples:

    1. Calming Lavender Dream: Lavender, Chamomile, Vanilla
    2. Zesty Citrus Splash: Bergamot, Lemon, Grapefruit
    3. Woodsy Wilderness Escape: Cedarwood, Pine, Vetiver
    4. Fresh Floral Bouquet: Rose, Jasmine, Ylang-Ylang
    5. Spiced Vanilla Delight: Cinnamon, Clove, Vanilla
    6. Tropical Coconut Bliss: Coconut, Lime, Orange, and optional Ylang-Ylang for added variety
    7. Warm and Cozy Comfort: Sandalwood, Patchouli, Frankincense

    The above list is just to give you an idea of scents that can blend well together to help with brainstorming. We’re including recipes for other blends in a later section.

    How to Think of Fragrances in General

    When considering fragrance combinations, think about your favorite scents and how they make you feel.

    Are you drawn to floral, fruity, woody, or spicy aromas? Reflect on memories associated with specific scents to guide your blending journey.

    A Guide on How to Know Which to Blend

    Selecting oils to blend can be overwhelming, but trust your instincts and intuition.

    Experiment with oils that resonate with you and evoke positive emotions. Start with simple combinations and gradually expand your palette as you gain confidence in your blending skills.

    Fragrance Profiles

    Each essential oil boasts a unique aroma profile, ranging from sweet and floral to earthy and spicy.

    Understanding the characteristics of different oils helps in creating well-balanced perfume blends that captivate the senses. We found pretty early in our essential oil journey that a collection with more variety makes it far easier to create unique scents.

    7 Easy Recipes for Essential Oil Perfume

    Let’s explore some delightful recipes for essential oil perfumes that cater to various preferences and occasions.

    Recipe 1: Calming Lavender Blend

    Ingredients:

    • 10 drops Lavender essential oil
    • 5 drops Chamomile essential oil
    • 3 drops Vanilla essential oil
    • 30 ml Jojoba oil or Sweet Almond oil (as a carrier oil)

    Instructions:

    1. In a small glass bottle, combine lavender, chamomile, and vanilla essential oils.
    2. Add the carrier oil to dilute the essential oils and ensure safe application on the skin.
    3. Cap the bottle and shake well to blend the oils thoroughly.
    4. Let the mixture sit for 24 hours before using to let the scents meld.
    5. Apply to pulse points like wrists and neck for a soothing and relaxing aroma. Essential oil rollers are very convenient for application.

    Recipe 2: Floral Citrus Delight

    Ingredients:

    • 6 drops Lemon essential oil
    • 4 drops Rose essential oil
    • 4 drops Bergamot essential oil
    • 30 ml Fractionated Coconut Oil (as a carrier oil)

    Instructions:

    1. Mix lemon, rose, and bergamot essential oils in a small glass perfume bottle.
    2. Pour in the fractionated coconut oil to dilute the essential oils.
    3. Secure the lid and shake the bottle to integrate all the ingredients.
    4. Allow the perfume to integrate for at least 48 hours.
    5. Dab lightly on pulse points to enjoy an energizing and uplifting scent.

    Recipe 3: Woodsy Eucalyptus Elegance

    Ingredients:

    • 8 drops Eucalyptus essential oil
    • 5 drops Cedarwood essential oil
    • 2 drops Sandalwood essential oil
    • 30 ml Jojoba oil (as a carrier oil)

    Instructions:

    1. In a clean perfume bottle, combine eucalyptus, cedarwood, and sandalwood essential oils.
    2. Add jojoba oil to the mixture for dilution.
    3. Shake well to ensure all oils are well mixed.
    4. Let the blend rest for a couple of days to enhance the woodsy aroma.
    5. Apply sparingly on pulse points for a sophisticated, refreshing fragrance.

    Recipe 4: Spicy Vanilla Charm

    Ingredients:

    • 5 drops Vanilla essential oil
    • 3 drops Cinnamon essential oil
    • 2 drops Clove essential oil
    • 30 ml Sweet Almond oil (as a carrier oil)

    Instructions:

    1. Blend vanilla, cinnamon, and clove essential oils in a small glass bottle.
    2. Add sweet almond oil to the essential oils to dilute them.
    3. Tighten the cap and shake the bottle to mix the oils completely.
    4. Allow the perfume to settle for 24 hours to fully develop the scent.
    5. Apply to your wrists and neck to carry a warm, inviting aroma with you.

    Recipe 5: Fresh Mint Fusion

    Ingredients:

    • 8 drops Peppermint essential oil
    • 4 drops Spearmint essential oil
    • 3 drops Lemon essential oil
    • 30 ml Grapeseed oil (as a carrier oil)

    Instructions:

    1. Combine peppermint, spearmint, and lemon essential oils in a glass perfume vial.
    2. Pour in grapeseed oil to dilute the mixture.
    3. Secure the lid and shake vigorously to blend the oils.
    4. Allow the perfume to mature for a day or two.
    5. Use on pulse points for a crisp, refreshing minty fragrance.

    Recipe 6: Exotic Patchouli Passion

    Ingredients:

    • 6 drops Patchouli essential oil
    • 4 drops Ylang Ylang essential oil
    • 3 drops Bergamot essential oil
    • 30 ml Fractionated Coconut Oil (as a carrier oil)

    Instructions:

    1. Add patchouli, ylang-ylang, and bergamot oils to a small amber bottle.
    2. Fill the remaining space with fractionated coconut oil.
    3. Shake the container to ensure the oils mix well.
    4. Let the blend sit to enhance the complexity of the scent.
    5. Apply to selected areas for a deep, mesmerizing perfume.

    Recipe 7: Citrus Spice Symphony

    Ingredients:

    • 5 drops Orange essential oil
    • 4 drops Ginger essential oil
    • 3 drops Cinnamon essential oil
    • 30 ml Jojoba oil (as a carrier oil)

    Instructions:

    1. Place orange, ginger, and cinnamon essential oils into a glass bottle.
    2. Add jojoba oil to dilute the potent essential oils.
    3. Shake the bottle to mix the ingredients thoroughly.
    4. Allow it to rest for several days for optimal fragrance development.
    5. Use sparingly on your pulse points for a lively citrus-spice scent that lasts.

    These refined recipes provide clear directions and appropriate quantities to help you successfully create your own delightful essential oil perfumes. Enjoy crafting these natural, personalized scents!

    Making Sprayable Essential Oil Perfumes

    Creating sprayable essential oil perfumes introduces an elegant and convenient way to enjoy your custom fragrances. Spray perfumes are typically lighter than oil-based rollers, allowing for a more diffused scent that can be sprayed on clothing or in the air.

    Here are the steps and best practices for formulating your own sprayable essential oil perfumes:

    Ingredients Needed:

    • Essential oils of your choice (see above blends, but just leave out the carrier oils)
    • High-proof alcohol (such as ethanol or pure grain alcohol) or witch hazel
    • Distilled water
    • Emulsifier (optional, such as polysorbate 20, to help oil and water mix)
    • A small funnel
    • A glass spray bottle, preferably dark-colored to protect the oils from light

    Instructions:

    1. Select Your Essential Oils: Begin by choosing the essential oils that match the scent profile and therapeutic properties you desire according to the recipes or your personal preferences.
    2. Prepare the Base:
      • If using alcohol: Use a ratio of 70-80% alcohol to 20-30% distilled water. Alcohol helps to preserve the perfume, dissolve the oils, and promote a quicker dry-down, which allows the top notes to come through cleanly.
      • If using witch hazel: Mix with distilled water in a 50:50 ratio as an alternative to alcohol, especially for sensitive skin.
    3. Mix Essential Oils: In a separate container, start with your base notes, then add middle notes, and finish with top notes. For a 30 ml bottle, a total of 20-30 drops of essential oils should be sufficient.
    4. Add Emulsifier (if using): To ensure that the oils and water mix well and stay mixed, add a few drops of an emulsifier like polysorbate 20 proportional to the amount of essential oil used.
    5. Combine with Alcohol or Witch Hazel: Using the funnel, pour your essential oils (and emulsifier mixture, if applicable) into your spray bottle. Next, add the alcohol or witch hazel solution.
    6. Top Off with Distilled Water: Fill the remaining space in the spray bottle with distilled water, leaving a small air gap to allow for mixing.
    7. Shake Well: Secure the top of your spray bottle and shake vigorously to ensure all components are thoroughly mixed. The perfume should be shaken before each use as natural separation can occur.
    8. Let It Mature: Allow your perfume to sit in a cool, dark place for at least 48 hours. This maturation period helps the scents meld together and strengthens the fragrance.

    Best Practices for Sprayable Essential Oil Perfumes:

    • Test for Irritation: Always do a patch test with the spray on your inner wrist before applying more broadly, especially if you’ve included new or numerous essential oils.
    • Use Quality Ingredients: Opt for high-quality, therapeutic-grade essential oils and pure alcohol to avoid skin irritation and ensure the longevity and clarity of the perfume’s scent.
    • Store Properly: Keep your spray perfume away from direct sunlight, heat, and humidity to maintain its integrity.
    • Adjust Ratios as Needed: Depending on the strength of the scent you desire, adjust the ratios of alcohol, water, and essential oils. More alcohol will yield a stronger, longer-lasting perfume.
    • Refresh Periodically: Natural perfumes do not have the chemical stabilizers found in commercial perfumes, so consider refreshing your supply every 6-12 months.

    By following these steps and best practices, you can create elegant, effective, and personalized sprayable essential oil perfumes that offer a delightful aromatic experience with each spritz.

    Benefits of Using Essential Oil Perfumes

    Using essential oil perfumes not only leaves you smelling fantastic but also offers several benefits for your well-being. Let’s explore why incorporating essential oil perfumes into your routine can be a game-changer for your overall wellness.

    Enhance Mood and Emotions

    Essential oil perfumes have the power to influence your mood and emotions positively. The fragrances of essential oils like lavender, citrus, and rose can uplift your spirits, reduce stress, and promote relaxation.

    By choosing the right scents, you can create a personalized perfume that caters to your emotional needs. We’ve found that diffusing essential oils on our homeschooling days also helps the kids focus better.

    Chemical-Free Fragrance Option

    Commercial perfumes often contain synthetic chemicals that can be harmful to your health.

    Essential oil perfumes provide a natural, chemical-free alternative that allows you to enjoy beautiful scents without exposing yourself to potentially toxic substances. This is especially beneficial for individuals with sensitivities to artificial fragrances.

    Homemade natural perfumes are yet another way to reduce your daily exposure to chemicals.

    Long-Lasting Scent

    Essential oil perfumes tend to have a longer-lasting scent compared to conventional perfumes. The natural oils interact with your body chemistry, creating a unique fragrance that evolves throughout the day.

    This means you can enjoy your signature scent from morning until night without needing to reapply constantly.

    Environmental-Friendly Choice

    Opting for essential oil perfumes promotes environmentally friendly practices.

    • Processing methods for essential oils don’t result in harmful chemical byproducts.
    • Essential oils can be manufactured in a sustainable manner.
    • Essential oils aren’t harmful to the environment when they wash down the drain.

    By using natural oils sourced from plants, you are choosing a sustainable option that minimizes environmental impact. This eco-conscious decision aligns with a natural living lifestyle, contributing to a cleaner planet.

    How to Apply Essential Oil Perfumes

    When it comes to applying essential oil perfumes, there are a few key things to keep in mind to ensure you make the most of these delightful fragrances.

    Let’s delve into some essential tips on how to apply essential oil perfumes effectively.

    Finding the Right Spot to Apply

    Choosing the right spot to apply your essential oil perfume is crucial. Areas with good circulation can enhance the scent and make it last longer. Consider pulse points like the wrists, neck, behind the ears, and inside of elbows.

    Dilution and Blending

    Before applying essential oils directly to your skin, always dilute them with a carrier oil or another ingredient (like witch-hazel for sprayable EO perfumes).

    This not only helps prevent skin irritation but also ensures the scent is not overpowering. Experiment with different blends to create a personalized fragrance that suits your preferences.

    Less is More

    When applying essential oil perfumes, remember that less is more.

    Start with a small amount and gradually build up the intensity until you achieve your desired level of fragrance. Dab or roll the perfume onto your skin rather than rubbing it in, as this can alter the scent.

    Layering Scents

    For a more complex and long-lasting fragrance, consider layering different essential oil perfumes. Start with a base note, followed by a middle note, and finish with a top note.

    This layering technique can create a unique and harmonious scent profile. Also, blending them in this way, as opposed to creating a premixed blend, allows you to customize a perfume scent every time you apply your single-scent essential oil perfume varieties.

    Avoiding Sun Exposure

    Some essential oils can cause photosensitivity, making your skin more prone to sun damage. Be mindful of the ingredients in your perfume, and avoid applying citrus-based oils before sun exposure.

    If you opt to use citrus oils on a sunny day, be sure to keep your skin covered.

    Remember, the key to applying essential oil perfumes lies in finding the right balance between the scents, personalizing your fragrance, and enjoying the therapeutic benefits these natural oils offer.

    Storing Essential Oil Perfumes

    When it comes to storing your precious creations of essential oil perfumes, proper care is essential to maintain their quality and potency. Improper storage can lead to the deterioration of the oils and diminish the fragrance over time.

    Here’s a guide on how to store your essential oil perfumes correctly:

    Keep Them Away From Light

    Direct sunlight and exposure to UV rays can degrade essential oils. Store your perfume blends in dark-colored glass bottles or amber containers to protect them from light. It’s also advisable to store them in a cool, dark place like a cabinet or drawer.

    Avoid Exposure to Air

    Oxygen can cause oxidation, which can alter the scent of your perfumes. Make sure to cap the bottles tightly after each use to minimize air exposure.

    Consider transferring your blends to smaller containers as you use them up to reduce the air space within the bottle once mixed.

    Maintain Consistent Temperature

    Extreme temperatures can affect the quality of essential oils. It’s best to store your perfume blends in a place where the temperature remains stable.

    Fluctuating temperatures can cause the oils to expand and contract, potentially leading to leakage or evaporation.

    Store Them Upright

    To prevent any accidental spills or leaks, store your essential oil perfumes in an upright position. This also helps in maintaining the integrity of the bottle droppers and caps.

    Keeping them upright reduces the risk of oils coming into contact with the bottle’s cap, which can cause deterioration. Keep this in mind, especially for thicker, more sappy oils like myrrh.

    Consider a Storage Box or Case

    If you have a variety of essential oil perfumes, a storage box or case can help keep them organized and protected.

    Look for a box with compartments to store each blend separately. This not only prevents bottles from bumping into each other but also makes it easier to find the perfume you’re looking for.

    Check for Signs of Spoilage

    Regularly inspect your essential oil perfumes for any changes in color, consistency, or scent.

    If you notice any unusual changes, such as cloudiness, a rancid smell, or separation, it’s best to discard the blend. Proper storage can prolong the shelf life of your perfumes, but it’s essential to monitor their condition periodically.

    Keep Out of Reach of Children and Pets

    Lastly, be sure to store your essential oil perfumes in a secure location, away from children and pets. Essential oils are potent and should be handled with care. Ingesting or spilling essential oils can be harmful, so it’s crucial to store them safely.

    Taking the time to store your essential oil perfumes properly can ensure that they retain their fragrance and therapeutic properties for an extended period.

    By following these storage tips, you can enjoy your custom blends of essential oil perfumes to the fullest.

    DIY Essential Oil Perfume Wrap-up

    In the world of natural living and wellness, creating your own essential oil perfumes is a delightful journey of self-expression and artistry. By blending different scents, you can craft unique fragrances that resonate with your personality and preferences.

    Let’s recap the key points of our exploration into the realm of essential oil perfumes:

    • Embrace creativity by experimenting with various essential oil combinations.
    • Discover the power of personalization by crafting your signature scent.
    • Explore the diverse aroma profiles to find fragrances that speak to you.
    • Unleash your imagination and mix scents to create bespoke perfumes.

    As we conclude our aromatic adventure, remember that essential oil perfumery is not just about crafting scents; it’s about curating experiences that uplift the spirit and evoke emotions.

    So, let your creativity flow, blend with passion, and immerse yourself in the captivating world of essential oils. Start your perfumery journey today and let your unique essence shine through every drop of your custom-made fragrance.

    FAQ: Essential Oil Perfumes

    What are essential oil perfumes?

    Essential oil perfumes are fragrances crafted from purely natural ingredients, primarily using essential oils extracted from plants. These perfumes offer a natural alternative to synthetic fragrances, providing both aromatic and therapeutic benefits.

    Why should I use essential oil perfumes instead of commercial perfumes?

    Essential oil perfumes are free from synthetic chemicals and alcohol, making them a healthier choice for people with sensitive skin or allergies. They also provide aromatherapeutic benefits, helping to enhance mood, reduce stress, or invigorate the senses depending on the oils used.

    How do I make my own essential oil perfume?

    To make your own essential oil perfume, choose your preferred essential oils, blend them with a carrier oil (like jojoba or sweet almond oil), and store them in a glass bottle. You can customize the strength and scent profile based on your personal preferences.

    What are the best essential oils to start with for perfume-making?

    Some popular essential oils for beginners include lavender (calming), lemon (refreshing), rose (floral), and sandalwood (woody). These oils are versatile and blend well with many other scents.

    How can I make a sprayable essential oil perfume?

    To make a sprayable version, mix essential oils with high-proof alcohol or witch hazel and distilled water. Use an emulsifier like polysorbate 20 to help the oil and water mix well. Store in a dark glass spray bottle and allow to mature for at least 48 hours before use.

    Are essential oil perfumes long-lasting?

    While essential oil perfumes generally do not last as long as synthetic fragrances due to the absence of fixatives, you can enhance their longevity by using more base notes, which evaporate slowly, and applying the perfume to clothing or hair.

    Can essential oil perfumes go bad?

    Yes, they can degrade over time, especially if exposed to heat, light, or air. Most homemade essential oil perfumes maintain their best quality for about 6-12 months. Using alcohol as a base can extend their shelf life.

    How should I store my essential oil perfumes?

    Store them in a cool, dark place away from direct sunlight. Dark-colored glass bottles are ideal as they protect the oils from UV light. Ensure the cap is tightly sealed to prevent oxidation.

    What are the best carrier oils for diluting essential oils in perfumes?

    Jojoba oil and fractionated coconut oil are popular choices because they are odorless and have a longer shelf life. Sweet almond oil is also a good option, but it has a slight scent and may not be suitable for all fragrance blends.

    Can I use water instead of carrier oils to make my essential oil perfume?

    Water can be used in sprayable perfume formulations mixed with alcohol or witch hazel but not for oil-based perfumes. Oil-based perfumes require a carrier oil to dilute the essential oils and safely apply them to the skin.

    Is it necessary to let my essential oil perfume mature before using it?

    Yes, allowing your perfume to mature for at least 48 hours before use helps the scents of the different oils blend together more cohesively, resulting in a more balanced and effective fragrance.

  • Easy Step-by-Step Guide: How to Use Silicon Mix on Natural Hair

    Easy Step-by-Step Guide: How to Use Silicon Mix on Natural Hair

    Easy Step-by-Step Guide: How to Use Silicon Mix on Natural Hair

    Using Silicon Mix on natural hair can be a game-changer, especially for restoring silky-smooth texture and manageability.

    Silicon Mix offers a unique blend that can help revive and nourish your natural hair, providing essential nutrients and moisture for a noticeable difference.

    In this post, we’ll walk you through the step-by-step process of using Silicon Mix on your natural hair, sharing expert tips and insights to help you if you haven’t used it before. We’ll also give you a natural DIY alternative if you’re on the fence about using Silicon Mix.

    As a quick summary, here are some simple and basic steps for applying Silicon Mix to Natural Hair:

    1. Read the Instructions: Really! Each mix and brand is a bit different, so we recommend reading the instructions as your very first step to ensure you’re using your mix properly.
    2. Wash Hair: Start by shampooing your hair to cleanse and prepare it for the treatment.
    3. Apply Silicon Mix: Squeeze out excess water from your hair and apply a generous amount of Silicon Mix from roots to ends.
    4. Detangle: Use a wide-tooth comb to distribute the product evenly and detangle your hair.
    5. Heat Activation: For deeper penetration, cover your hair with a shower cap and apply heat using a hairdryer or a steamer for 15-20 minutes. This step may vary a bit depending on the mix you’re using.
    6. Rinse Out: Thoroughly rinse out the Silicon Mix with lukewarm water until the water runs clear.
    7. Style as Desired: Follow up with your favorite styling products or allow your hair to air dry for beautifully treated natural hair.

    Read on for more details about how to apply the mix to your hair, precautions, and so on.

    Deep Dive: What is Silicon Mix?

    Silicon Mix is a popular hair treatment infused with silicones, ceramides, and keratin, known for its ability to nourish, strengthen, and revitalize natural hair. This deep conditioning treatment is ideal for women seeking to enhance the appearance of their natural hair without harsh chemicals.

    Key Ingredients of Silicon Mix

    Silicones form a protective layer around each hair strand, helping to reduce frizz, increase shine, and improve manageability.

    Ceramides play a vital role in strengthening the hair cuticle, preventing breakage and split ends.

    Keratin, a protein naturally found in hair, contributes to restoring elasticity and maintaining moisture balance.

    Benefits of Using Silicon Mix

    The treatment helps to repair damage caused by heat styling, environmental factors, and chemical treatments. Additionally, Silicon Mix provides intense hydration, leaving hair soft, supple, and more resilient.

    Incorporating Silicon Mix into your hair care regimen can transform your natural hair, providing it with the nourishment and strength it deserves.

    Benefits of Using Silicon Mix for Natural Hair

    Moisture Retention

    • Silicon Mix plays a pivotal role in locking moisture into natural hair, acting as a shield against dryness and brittleness. Sealing in moisture means your hair can maintain optimal hydration levels.
    • Maintaining moisture levels keeps your hair nourished and enhances its elasticity, reducing the risk of breakage and split ends.

    Improved Manageability

    One of the standout advantages of Silicon Mix is its ability to enhance the manageability of natural hair.

    • By using Silicon Mix, you can say goodbye to stubborn tangles and knots that often plague natural hair textures. Primarily, the formula smoothens the hair cuticle, making detangling easier and reducing the time spent on styling.
    • If you’re someone who enjoys experimenting with different hairstyles or prefers low-maintenance routines, Silicon Mix can be your go-to solution for achieving hassle-free styling and a more manageable mane.

    Enhanced Shine

    When it comes to natural hair, achieving shine and glossiness can sometimes be difficult, depending on many factors.

    • Silicon Mix excels in imparting a beautiful shine to natural hair, giving it a lustrous and vibrant appearance.
    • The special blend of silicones in Silicon Mix creates a protective barrier that reflects light, adding a brilliant sheen to each and every strand.

    With its moisture-retaining properties, enhanced manageability benefits, and ability to boost shine, Silicon Mix is a great option for those of you seeking to nourish your natural hair with an at-home approach.

    3 Easy Steps to Use Silicon Mix on Natural Hair

    Let’s walk through simple steps to using silicon mix on your natural hair.

    Step 1: Preparing the Hair

    Before applying silicon mix to your hair, wash it thoroughly and ensure your hair is detangled.

    • Begin by washing your hair with a gentle sulfate-free shampoo to remove any buildup or impurities.
    • Follow up with a moisturizing conditioner to ensure your hair is hydrated and ready for the silicon mix treatment.
    • Gently detangle your hair using a wide-tooth comb to prevent breakage and ensure even product distribution later on.

    Step 2: Applying Silicon Mix

    Once your hair is clean and detangled, it’s time to apply the silicon mix.

    • Start by sectioning your hair to make the application process easier.
    • Take a small amount of silicon mix and evenly distribute it from roots to ends, making sure each strand is coated with the product.
    • Massage the silicon mix into your hair gently, focusing on the areas that need extra care, such as the ends that are prone to dryness and damage.

    Step 3: Waiting Time and Rinse

    After applying the silicon mix, allow it to sit on your hair for the recommended amount of time.

    • This will allow the product to penetrate the hair shaft and provide maximum benefits.
    • The waiting time typically varies depending on the specific product instructions, so be sure to follow them carefully.
    • Once the waiting time is up, rinse the silicon mix out of your hair thoroughly with lukewarm water. Ensure all product residue is removed to prevent buildup and weigh down your hair.

    By following these simple steps, you can effectively use silicon mix on your natural hair to promote nourishment, hydration, and overall hair health.

    Tips for Maximizing the Benefits of Silicon Mix

    Using silicon mix on natural hair can work wonders, but to truly maximize its benefits, a few key practices need to be followed consistently.

    Consistent Use

    Consistency is key when it comes to reaping the full rewards of silicon mix on your natural hair. Regular application of silicon mix helps maintain hair health and ensures that your strands receive the nourishment they need to thrive.

    By incorporating silicon mix into your hair care routine on a regular basis, you’ll be able to enjoy prolonged benefits such as improved shine, strength, and manageability.

    Avoiding Product Build-Up

    One common concern when using silicon mix is the potential for product build-up, which can weigh down your hair and diminish its volume.

    To prevent this, it’s essential to cleanse your hair thoroughly before each application of silicon mix. Consider using a clarifying shampoo to remove any residue and buildup from previous hair products. Additionally, make sure to follow up with a deep conditioning treatment to keep your strands healthy and voluminous.

    When using silicon mix on natural hair, it’s crucial to balance consistent use and prevent product build-up.

    Precautions

    Here are a couple of key factors to consider, especially if you haven’t used silicon mix before.

    Mixing Silicon Mix with Incompatible Products or Treatments

    It’s essential to avoid mixing Silicon Mix with incompatible hair products or treatments. Some products may not interact well with Silicon Mix, leading to undesirable outcomes such as product buildup, hair dryness, or even breakage.

    Always read the labels of your hair products and treatments to ensure compatibility with Silicon Mix. If in doubt, it’s best to do a strand test to check for any adverse reactions before thoroughly applying the Silicon Mix.

    Skipping Heat Protectant When Using Silicon Mix Before Heat Styling

    When incorporating Silicon Mix into your hair care routine before heat styling, never skip using a heat protectant. Silicon Mix alone may not provide sufficient protection against the high temperatures of styling tools like flat irons or curling wands.

    Applying a heat protectant before heat styling will create a barrier between your hair and the heat, reducing the risk of heat damage and keeping your hair protected and healthy. Make sure to evenly distribute the heat protectant through your hair before using any heat styling tools.

    100% Natural DIY Recipe: Silicon Mix Alternative

    For those of you who would prefer to mix and create your own homemade hair-nourishing treatment rather than using silicon, we’re totally on board with that.

    While it may not provide the exact effects of a silicon-based product like Silicon Mix, there are many great reasons to use a natural DIY recipe instead. We prefer natural recipes versus store-bought products that contain synthetic ingredients whenever possible!

    Let’s delve into creating your own DIY natural hair conditioning mask that can help in deeply conditioning your hair, reducing frizz, and adding a natural shine without the potential buildup often associated with silicone-based products.

    Realistic Expectations

    When opting for a DIY silicon mix alternative, it’s important to have realistic expectations.

    While natural ingredients can work wonders for your hair, they may not replicate the immediate effects of silicon-based products. However, consistent use can lead to healthier hair in the long run, free from harmful chemicals and potential buildup. Shouldn’t that be the goal?

    Best Natural Ingredients for a Silicon Hair Mix Alternative

    When seeking the best natural ingredients for your DIY hair mask, look for options that are rich in vitamins, nutrients, and moisture-locking properties. Some top choices include avocado, honey, coconut oil, argan oil, and aloe vera gel.

    These ingredients are known for their hydrating, nourishing, and strengthening qualities, promoting overall hair health.

    Easy DIY Natural Hair Conditioning Mask

    Ingredients:

    • 1 ripe avocado: Rich in fats and oils, great for moisturizing and smoothing hair.
    • 2 tablespoons of honey: A natural humectant that draws moisture into the hair.
    • 2 tablespoons of coconut oil: Helps reduce protein loss in hair and adds shine.
    • 1 tablespoon of argan oil (optional): High in antioxidants, vitamin E, and essential fatty acids that soften and strengthen hair.
    • 1 tablespoon of aloe vera gel: Soothes the scalp, conditions hair, and reduces dandruff.

    Instructions:

    1. Prepare the Avocado:
      • Peel and pit the avocado. Mash it thoroughly in a bowl to get a smooth, lump-free paste.
    2. Mix Ingredients:
      • Add honey, coconut oil, argan oil (if using), and aloe vera gel to the mashed avocado.
      • Blend until you achieve a consistent, creamy texture.
    3. Application:
      • Wash your hair with shampoo and towel-dry until damp.
      • Apply the mask from roots to tips, ensuring even coverage.
      • Massage into the scalp for circulation.
    4. Waiting Time:
      • Leave the mask on for 30-60 minutes for deep conditioning.
    5. Rinsing Out:
      • Rinse thoroughly with lukewarm water.
    6. Frequency:
      • Use weekly for best results.

    Creating your own DIY natural hair conditioning mask allows you to tailor the ingredients to suit your hair’s specific needs while avoiding potentially harmful chemicals.

    This nourishing mask contains entirely natural ingredients that nourish your hair and scalp as well.

    Silicon Mix: Wrap-up

    The key points discussed highlight the importance of using natural products to maintain the integrity of your hair, and Silicon Mix is one of many solutions for improving the look and feel of your hair.

    Key Points:

    • For those of you who prefer totally natural beauty, there are plenty of options for you as well, like the DIY recipe above.
    • If using silicon mix, don’t mix it with other incompatible products.
    • Always wash and detangle your hair before using silicon mix. Be sure to use heat protection when heat is used for styling purposes.

    The main goal when it comes to your hair shouldn’t just be its appearance but the underlying conditions that lead to a silky-smooth appearance. Whether you use a natural DIY option or a silicon mix for your hair, keep the underlying factors like scalp and hair nourishment top-of-mind for your haircare regimen.

    Silicon Mix FAQs

    What is Silicon Mix and How Does It Work?

    Silicon Mix is a hair treatment product that contains silicones, ceramides, and keratin to help strengthen and hydrate the hair. – Silicones form a protective barrier around the hair shaft, locking in moisture and preventing breakage.

    Ceramides work to repair damaged hair cuticles, while keratin helps improve hair elasticity and shine.

    Is Silicon Mix Suitable for All Hair Types?

    Silicon Mix is designed for all hair types, including natural hair. It can benefit those with dry, damaged, or color-treated hair by providing intense hydration and repair.

    However, individuals with fine or thin hair may find Silicon Mix to be too heavy and may prefer lighter hair treatments.

    How to Use Silicon Mix on Natural Hair?

    To use Silicon Mix on natural hair, follow these simple steps:

    1. Start by shampooing your hair to remove any dirt and product buildup.
    2. Apply a generous amount of Silicon Mix to damp hair, focusing on the mid-lengths and ends.
    3. Gently massage the product into your hair and leave it on for the recommended time (details in the above post).
    4. Rinse thoroughly with warm water until the product is completely removed.
    5. Follow up with a conditioner if needed, and style your hair as usual.

    Can Silicon Mix Cause Buildup on Natural Hair?

    While Silicon Mix is a nourishing treatment, using it too frequently or not rinsing it out completely can lead to product buildup on natural hair.

    To prevent buildup, make sure to rinse the product thoroughly after each use and avoid applying it to the scalp, focusing mainly on the lengths and ends of your hair.

    Where Can I Purchase Silicon Mix for Natural Hair?

    Silicon Mix products are available for purchase online or at beauty supply stores. Before purchasing, do your research and find a product with a lot of good reviews and one that uses quality ingredients.

  • The 3 Best Lotions for Hard Water + DIY Recipe Guide

    The 3 Best Lotions for Hard Water + DIY Recipe Guide

    The 3 Best Lotions for Hard Water + DIY Recipe Guide

    Are you tired of dealing with the effects of hard water on your skin? Hard water can strip your skin of moisture, leaving it dry and irritated. But fear not. The solution might be simpler than you think.

    That’s right, it’s all about taking active steps to ensure your skin if moisturized and nourished, even with the hard water.

    • Choosing the right lotion is crucial when combating the challenges posed by hard water.
    • Whether you’re a mother, homemaker, or just someone trying to maintain healthy skin, hard water can be easily mitigated with a proactive skincare routine.
    • Regarding store-bought lotions, we recommend lotions from Dr. Bonners, Weleda Skin Food, and Earth Mama Organics.
    • Natural products offer a gentle yet powerful approach to skincare, especially for those who prefer DIY solutions. We always recommend natural DIY solutions when it comes to skincare!

    Let’s explore how the lotions we use can be tailored to combat the effects of hard water. We’ll also take a look at three DIY recipes that contain natural emollients to keep your skin moisturized throughout the day. When it comes to your skin, we recommend embracing natural ingredients and avoiding synthetic alternatives whenever possible.

    The Impact of Hard Water on Skin Health

    Hard water can significantly impact the health of our skin, causing various visible and sensory effects. Understanding these effects is crucial in maintaining healthy skin.

    Symptoms of Hard Water on Skin

    Hard water can lead to skin conditions such as itchiness, dullness, and scaling.

    • The minerals in hard water can strip the skin of its natural oils, leading to dryness and irritation. It is essential to recognize these symptoms and take steps to counter them with proper skincare routines.
    • Using moisturizers and lotions specifically designed for hard water can help alleviate these issues and restore skin health.

    Importance of pH Balance in Skincare Products

    Maintaining the skin’s pH balance is vital, especially when dealing with the harshness of hard water.

    • pH-balanced lotions help protect the skin barrier and prevent further damage caused by hard water minerals.
    • When choosing over-the-counter (OTC) skincare products for hard water, look for ingredients like ceramides, hyaluronic acid, and glycerin, which help replenish moisture and strengthen the skin’s natural defense mechanisms.

    Key Features of Effective Lotions for Hard Water

    Choosing the best lotion for hard water involves considering key features that can significantly improve skin health. Effective lotions for hard water should be rich in hydration to combat the drying effects of minerals in the water.

    They should also provide barrier protection to prevent moisture loss and contain ingredients that work as emollients. Look for non-comedogenic properties to avoid clogging pores, especially in hard water conditions where impurities can exacerbate skin issues.

    Avoid Synthetic Lotions and Harsh Ingredients

    Synthetic lotions often contain harsh chemicals that can strip the skin of its natural oils and lead to irritation, particularly in hard water environments.

    Opting for natural lotions not only offers gentler care but also reduces our exposure to potentially harmful substances. By choosing lotions free from synthetic ingredients, you prioritize the well-being of your skin and overall health.

    Ingredients to Avoid

    When searching for the best lotions for combating hard water effects, avoiding certain harsh synthetic ingredients that can exacerbate skin dryness and irritation is crucial. Here’s a list of common synthetic ingredients to steer clear of:

    • Parabens (Methyl, Butyl, Ethyl, Propyl): Used as preservatives, parabens can disrupt hormone function, which might affect the skin’s health and integrity.
    • Sulfates (Sodium Lauryl Sulfate, Sodium Laureth Sulfate): These are detergents that can strip the skin of its natural oils, leading to increased dryness and irritation.
    • Phthalates: Often used to increase the flexibility and strength of plastics, phthalates are also found in beauty products and can be endocrine disruptors.
    • Formaldehyde: This preservative can provoke an allergic reaction, and it’s linked to respiratory problems and skin irritation.
    • Synthetic fragrances: Fragrances can contain allergens and irritants, and they are among the top five allergens in the world.
    • Propylene glycol: Often used as a skin-conditioning agent, it can be irritating to the skin and might provoke allergies.
    • Mineral oil: While it can help retain moisture, mineral oil can clog pores and prevent the skin from breathing, potentially leading to acne and other skin issues.

    By avoiding these ingredients, you can ensure that the lotion you choose does not only prevent the negative effects of hard water but also supports the overall health and wellbeing of your skin without introducing potentially harmful chemicals.

    Natural Lotions Are Best

    Natural lotions are a superior choice for skincare in hard water areas due to their nourishing and soothing properties.

    • Ingredients like shea butter, coconut oil, and aloe vera serve as excellent emollients, keeping the skin moisturized and protected.
    • When selecting natural lotions, ensure they are truly organic and free from artificial additives to reap the maximum benefits of nature’s healing components.
    • Making the switch to natural lotions is a simple yet impactful decision in reducing chemical exposure and promoting skin health.

    3 Best Lotions for Hard Water: Natural Ingredients

    Navigating the challenges of hard water on the skin requires an effective moisturizing strategy. Natural lotions are often the best answer, delivering essential hydration and nourishment without the harsh chemicals found in synthetic products.

    Below are some exemplary natural lotions specifically beneficial for those dealing with hard water:

    1.) Dr. Bronner’s Organic Lotion

    Renowned for its commitment to pure, organic ingredients, Dr. Bronner’s lotion blends essential oils like jojoba, coconut, avocado, and hemp — each known for their intense moisturizing properties. This makes them especially effective against the drying effects of hard water minerals.

    Their formula is clean, avoiding any synthetic additives, ensuring that what you’re applying is wholesome and beneficial for maintaining the skin’s moisture balance.

    2.) Weleda Skin Food

    Since 1926, Weleda Skin Food has been revered for its rich, plant-based formula that deeply hydrates and repairs. The inclusion of gentle extracts like viola tricolor, calendula, and chamomile, combined with a rich oil and beeswax base, provides a potent restorative and moisturizing effect.

    This lotion works excellently to soothe and revitalize skin exposed to the harsh minerals of hard water, reinforcing the skin’s natural barrier.

    3.) Earth Mama Organics Lotion

    Earth Mama’s lotions are ideal for sensitive skin, using organic herbs and oils that effectively hydrate and soothe the skin without exposing it to harmful chemicals.

    Their lotions are particularly suited for those looking to alleviate the harsh drying effects of hard water, offering a gentle yet effective solution.

    Selecting the Right Ingredients

    • When choosing a lotion for hard water, it’s wise to look for ingredients that offer natural chelating properties, such as citric acid, which helps to neutralize the minerals in hard water.
    • Additionally, elements like glycerin, aloe vera, and natural butters (such as cocoa and shea) are crucial for their hydrating and soothing effects.
    • Always examine the lotion’s ingredient list to ensure it contains beneficial elements that address hard water issues while aligning with a natural skincare philosophy.

    Opting for trusted natural lotions like those from Dr. Bronner’s, Weleda, and Earth Mama Organics can significantly enhance your skincare routine, providing necessary relief and protection against hard water’s skin-drying effects.

    DIY Solutions for Hard Water: Nourishing Homemade Lotions

    When crafting lotions at home to counteract the drying effects of hard water, using the right natural ingredients can make a significant difference. Here are three carefully formulated DIY lotion recipes:

    1.) Nourishing Shea Butter Lotion

    Ingredients:

    • Shea Butter: 1/2 cup
    • Coconut Oil: 1/4 cup
    • Almond Oil: 1/4 cup
    • Essential Oils (optional for fragrance): 5-10 drops

    Instructions:

    1. Melt the shea butter and coconut oil together in a double boiler.
    2. Once melted, remove from heat and stir in the almond oil and essential oils.
    3. Allow the mixture to cool slightly. As it begins to solidify, whisk or blend to achieve a creamy, whipped texture.
    4. Store in a clean jar and apply as needed, especially after bathing, to lock in moisture.

    Benefits:

    • Shea butter is rich in fatty acids and vitamins, which help deeply moisturize the skin and enhance its elasticity.
    • This lotion forms a protective barrier on the skin, sealing in moisture and protecting against the harsh minerals in hard water.

    2.) Soothing Aloe Vera and Coconut Oil Lotion

    Ingredients:

    • Aloe Vera Gel: 1/2 cup
    • Coconut Oil: 1/2 cup
    • Vitamin E Oil (optional): 1 teaspoon
    • Essential Oils (optional for fragrance): 5-10 drops

    Instructions:

    1. Combine the aloe vera gel and coconut oil in a bowl. If the coconut oil is solid, gently melt it before mixing.
    2. Add vitamin E oil if desired, for extra nourishment.
    3. Mix thoroughly until the ingredients are fully blended. Store in an airtight container.
    4. Use daily to soothe and moisturize the skin, especially in areas affected by hard water.

    Benefits:

    • Aloe vera is renowned for its soothing and healing properties, making it great for irritated or sensitive skin.
    • Coconut oil deeply hydrates and repairs the skin barrier, reducing the impact of hard water dryness.

    3.) Refreshing Green Tea and Jojoba Oil Lotion

    Ingredients:

    • Green Tea (strongly brewed): 1/2 cup
    • Jojoba Oil: 1/2 cup
    • Beeswax: 1 tablespoon
    • Essential Oils (optional for fragrance): 5-10 drops

    Instructions:

    1. Brew a strong cup of green tea and allow it to cool.
    2. In a double boiler, melt the beeswax. Once liquefied, stir in the jojoba oil and then slowly mix in the cooled green tea.
    3. Continue stirring until the mixture is fully emulsified and begins to thicken.
    4. Pour into a clean container and allow it to set. Apply generously to refresh and protect the skin.

    Benefits:

    • Green tea is loaded with antioxidants, offering protective benefits against environmental damage.
    • Jojoba oil closely mimics the skin’s natural oils, providing lasting hydration without clogging pores.

    We listed essential oils as optional for all of the above recipes. However, we highly recommend using a few drops of your favorite essential oils. We especially like myrrh, palmarosa, frankincense, patchouli, sandalwood, lavender, and many others. Any of those or a blend of them will make your homemade lotion smell amazing.

    These DIY lotion recipes are not only cost-effective but also allow you to be fully in control of what you’re applying to your skin. With these natural and potent ingredients, you can significantly mitigate the effects of hard water on your skin, leaving it nourished, hydrated, and healthy.

    Expert Tips for Skincare in Hard Water Areas

    If you live in a hard water area and a water softener just isn’t practical, here are some additional tips for combating dryness and skin irritation.

    Skin Cleansing Routines for Hard Water

    When dealing with hard water, it’s crucial to opt for gentle cleansing routines that won’t strip your skin of its natural oils.

    • Look for sulfate-free cleansers that are gentle yet effective in removing impurities without causing dryness.
    • Consider using micellar water or cream cleansers, as they are less harsh on the skin.
    • When washing your face, avoid hot water, as it can further dehydrate your skin. Instead, opt for lukewarm water to prevent stripping away moisture.

    To combat the effects of hard water, you can also try double cleansing. This method involves using an oil-based cleanser first to break down makeup and sunscreen, followed by a water-based cleanser to remove any remaining impurities.

    Double cleansing helps ensure a thorough cleanse without compromising your skin’s hydration levels. If you choose this option, be sure to use a non-comedogenic oil like jojoba or argan oil.

    Moisturizing Strategies to Combat Hard Water Effects

    Moisturizing is key to protecting your skin from the drying effects of hard water. Opt for rich, hydrating moisturizers that create a protective barrier on your skin to lock in moisture. Ingredients like hyaluronic acid, glycerin, and ceramides are beneficial for replenishing and retaining moisture in the skin.

    • In hard water areas, it’s essential to moisturize immediately after cleansing to seal in hydration. Consider using a facial mist throughout the day to keep your skin refreshed and hydrated.
    • If applying lotion to dry skin, premix the lotion with a few drops of water for extra hydration. We do this, and it makes a massive difference in terms of how moisturized our skin feels. We definitely recommend this for more oily lotion varieties.
    • Remember to drink an adequate amount of water to hydrate your skin from within and enhance its resilience against external aggressors.

    By following these expert skincare tips in hard water areas, you can maintain a healthy and hydrated complexion despite challenging water conditions.

    Wrap-up: Moisturized Skin Equals Happy Skin

    In the quest for the best lotion for hard water, it’s essential to consider your skin’s specific needs and lifestyle.

    By exploring the diverse options available, from store-bought to DIY alternatives, you can find the perfect solution to combat the effects of hard water on your skin. Whether you opt for a commercially available product or decide to craft your own natural lotions, the key is to prioritize ingredients that nourish and hydrate your skin effectively.

    Embrace the DIY Spirit

    DIY lotions are a fantastic way to personalize your skincare routine and cater to your skin’s unique requirements. By crafting your own lotions, you have full control over the ingredients, ensuring that only the best and most natural elements come into contact with your skin.

    Sustainability and Affordability

    Creating your own lotions not only allows you to tailor the product to your skin’s needs but also promotes sustainability and environmental consciousness. By utilizing simple, natural ingredients found in your kitchen or local stores, you can reduce waste while saving a lot of money.

    Empowerment through Knowledge

    Experimenting with DIY lotion recipes empowers you to understand your skin better and take charge of your skincare journey. With a wealth of resources and information available online, you can explore different formulations, scents, and textures to curate lotions that not only combat hard water effects but also provide a luxurious and pampering experience.

    By delving into the world of DIY lotions, you not only care for your skin but also engage in a fulfilling and creative process that promotes self-care, natural living, and your own tailored skincare products.

    Lotions for Hard Water: FAQs

    Hard water can often cause dryness and irritation to the skin due to its high mineral content. Using the right lotion can help combat these effects and keep your skin moisturized and healthy. Here are some frequently asked questions about lotions for hard water:

    1. What are the best ingredients to look for in a lotion for hard water?

    When choosing a lotion for hard water, look for ingredients like shea butter, argan oil, jojoba oil, hyaluronic acid, glycerin, and ceramides. These ingredients are known for their moisturizing properties and can help replenish the skin’s moisture barrier, making them beneficial for combating the effects of hard water.

    2. How often should I apply lotion when dealing with hard water?

    Applying lotion at least twice a day when dealing with hard water is recommended.

    Applying lotion right after a shower or bath can help lock in moisture and prevent dryness caused by the minerals in hard water. Additionally, consider using a thicker body butter or cream for extra hydration.

    3. Can I make my own lotion to combat the effects of hard water?

    Yes, you can create your own DIY lotions using natural ingredients that are beneficial for combating the effects of hard water.

    Consider making lotions with ingredients like coconut oil, almond oil, shea butter, and essential oils. Below are three simple DIY lotion recipes you can try at home:

    • DIY Soothing Shea Butter Lotion
      • Mix 1/2 cup of shea butter, 2 tablespoons of almond oil, and a few drops of lavender essential oil.
      • Heat the shea butter until melted, then add almond oil and lavender oil.
      • Stir well and let it cool before transferring to a container. Use as needed.
    • DIY Nourishing Coconut Oil Body Lotion
      • Combine 1/2 cup of coconut oil, 1/4 cup of shea butter, and a few drops of your favorite essential oil.
      • Melt the coconut oil and shea butter together, then add the essential oil.
      • Mix thoroughly and let it solidify before use.
    • DIY Hydrating Almond Oil Moisturizer
      • Mix 1/2 cup of almond oil, 1/4 cup of beeswax pellets, and a few drops of chamomile essential oil.
      • Melt the almond oil and beeswax in a double boiler, then add the chamomile oil.
      • Stir until combined and pour into a container to set.

    Be sure to check out the easy recipes in the post above as well. Or, if you need a lotion for when you’re on-the-go, check out our post on homemade DIY lotion bars.

  • How to Keep Natural Blonde Hair Blonde and Luminous

    How to Keep Natural Blonde Hair Blonde and Luminous

    How to Keep Natural Blonde Hair Blonde and Luminous

    Are you struggling to maintain the vibrant allure of your natural blonde hair? I know how difficult it can be to keep blond hair luminous and striking, especially with environmental factors like sun exposure and heat damage.

    While blonde hair is stunning, it requires special care to retain its natural beauty. Ensuring that your natural blonde hair stays blonde involves a blend of proper maintenance and ensuring that we’re using the right haircare products and quality ingredients.

    • To preserve your bright blonde hues, you need to pay attention to factors such as moisture levels, sun protection, and the avoidance of harsh elements like chlorine.
    • To combat brassiness or darkening, be strategic by using purple shampoo to neutralize brassy tones and maintain the cool blonde shade you desire.
    • Leveraging natural remedies like lemon juice and sun exposure can help prevent darkening and keep your blonde hair looking fresh and vibrant.

    Now, it’s time to dive deeper as we uncover effective tips, tricks, and techniques for safeguarding the beauty of naturally blonde hair.

    Understanding Natural Blonde Hair

    Blonde hair is a naturally stunning and sought-after hair color that comes with unique characteristics and challenges. But what about the science behind blonde hair? That’s something to consider as we develop a proper haircare routine.

    The Science Behind Blonde Hair

    Natural blonde hair is predominantly determined by genetics.

    The presence of a specific gene variant can result in the production of lower levels of the pigment melanin in the hair follicles, leading to lighter hair colors.

    • Melanin is responsible for our hair, eyes, and skin color.
    • Blonde hair typically contains less eumelanin and more pheomelanin than darker hair shades.

    Exposure to sunlight can also impact the shade of blonde hair. Ultraviolet (UV) rays can break down melanin in the hair shaft, causing the hair to lighten or sometimes turn brassy.

    This is why it’s essential to protect blonde hair from sun damage to maintain its desired hue.

    Common Issues Faced by Natural Blondes

    1. Brassiness: One common issue that natural blondes face is brassiness, where the hair starts to develop yellow or orange tones. This can occur due to factors like exposure to chlorine in swimming pools, using harsh hair products, or natural oxidation over time.
    2. Dullness: Blonde hair can sometimes appear dull or lackluster, losing its natural shine. This can be caused by a buildup of styling products, hard water minerals, or environmental factors that strip the hair of its natural oils.
    3. Dryness: Blonde hair is often finer in texture, making it more prone to dryness and damage. The constant use of heat-styling tools, overwashing, or exposure to harsh weather conditions can lead to dry and brittle blonde strands.

    Understanding these common challenges will help natural blondes protect and enhance their hair’s beauty. Regular quality hair care routines and targeted treatments can help maintain the health and vibrancy of naturally blonde hair.

    5 Tips for Protecting Blonde Hair Color

    Blonde hair requires special care to maintain its vibrancy and shine. Here are key tips to help you keep your natural blonde hair looking its best:

    1.) Proper Shampooing and Conditioning

    Using sulfate-free shampoos and conditioners designed for blonde hair is crucial in preserving the color’s richness and preventing dryness.

    These products are formulated to be gentle on your hair while protecting its natural hue. Remember, gentle care goes a long way in maintaining your blonde locks.

    2.) Protecting Hair from UV Damage

    Shielding your blonde hair from harmful UV rays is essential to prevent color fading.

    Consider using UV-protectant hair products or wearing hats when spending time outdoors. This simple step can help retain the brilliance of your blonde shade despite sun exposure.

    3.) Avoiding Heat Damage

    To maintain the health of your blonde hair, limit heat styling and opt for lower temperature settings on your styling tools.

    Heat protectant usage before styling can also help prevent heat damage and keep your hair looking lustrous and healthy.

    4.) Minimizing Contact with Chlorine

    Chlorine in swimming pools can cause blonde hair to turn greenish or become dry. Rinse your hair with clean water before and after swimming to minimize the damaging effects of chlorine.

    5.) The Role of Minerals in Water (Hard Water)

    High mineral levels in hard water can affect the brightness of blonde hair. Consider using a clarifying shampoo occasionally to remove mineral buildup and keep your blonde color looking fresh. We recommend using apple cider vinegar (ACV) to clarify; it works excellently for that.

    Specialized Treatments for Natural Blondes

    Specialized treatments tailored for natural blondes can help preserve the color and health of each beautiful hair strand. Here are some effective treatments to consider:

    Purple Shampoos and Toners

    Purple shampoos and toners are essential for natural blondes to counteract brassiness and maintain a cool blonde tone.

    These products contain purple pigments that neutralize yellow and orange hues, leaving your hair looking fresh and bright. Use them once or twice a week to keep your blonde shade looking its best.

    Deep Conditioning Masks

    Deep conditioning masks are a must-have for natural blondes to keep their hair hydrated and nourished. Opt for masks that are rich in moisture, such as those infused with coconut oil or shea butter.

    These treatments can combat dryness, frizz, and damage, leaving your blonde hair soft, shiny, and more manageable. Apply a deep conditioning mask once a week for effective results.

    DIY Natural Lightening Techniques

    If you’re looking to lighten your blonde hair naturally, there are gentle DIY methods you can try at home. Lemon juice, chamomile tea, and honey are popular ingredients known for their lightening properties.

    Create a natural lightening spray by mixing these ingredients with water and spritzing it on your hair before sun exposure. Over time, these natural techniques can help subtly enhance your blonde color.

    Easy DIY Blonde Hair Shampoo Recipe

    We love DIYs and natural ingredients for anything we put on or into our bodies. With that in mind, check out the below shampoo recipe for gently promoting the blonde hue of naturally blonde hair.

    Ingredients:

    • 1 cup of sulfate-free shampoo OR liquid castile soap (as a natural shampoo base)
    • 2 tablespoons of baking soda (to cleanse and lift color; leave out if using castile soap)
    • 1/4 cup of freshly squeezed lemon juice (natural lightening agent)
    • 1/4 cup of chamomile tea (enhances blonde tones)

    Instructions:

    1. Prepare Chamomile Tea: Brew a strong cup of chamomile tea and allow it to cool.
    2. Mix Ingredients: In a bowl, blend the liquid castile soap, baking soda, lemon juice, and cooled chamomile tea thoroughly.
    3. Transfer to a Bottle: Pour the mixture into an empty shampoo bottle or a jar, which facilitates easy application.
    4. Usage: Use this shampoo once or twice a week, depending on your toning needs. Apply to your hair, massage into the scalp and hair, and allow it to sit for 3-5 minutes before rinsing out completely.
    5. Storage: Keep the shampoo in a cool, dry place, away from direct sunlight. Shake well before each use as natural ingredients may separate over time.

    Notes:

    • This natural recipe offers a gentler approach to reducing brassiness and enhancing blonde tones. However, the lightening effects are more subtle compared to commercial purple shampoos.
    • Since castile soap is quite alkaline, following up with an acidic rinse, such as diluted apple cider vinegar, can help balance the pH of your scalp and hair.
    • As always, conduct a patch test first to ensure compatibility with your skin and hair, especially when incorporating new ingredients into your care routine.

    Ingredients and Their Benefits:

    • Sulfate-Free Shampoo or Castile soap: Sulfate-free shampoos are gentler on the hair and scalp, reducing the risk of irritation and preserving natural oils. Castile soap is a natural, gentle alternative made primarily from vegetable oils, and it doesn’t contain synthetic ingredients, making it an excellent choice for a more DIY, eco-friendly shampoo base.
    • Baking Soda: It acts as a clarifying agent that helps remove buildup from hair products, which can make blonde hair look dull and contribute to brassiness. However, it’s important to use baking soda sparingly as it can also be drying if used too frequently. If you’re using castle soap, you can leave out the baking soda.
    • Lemon Juice: Lemon has natural bleaching properties that can help lighten hair and diminish yellow tones. It’s effective in small amounts and can add a subtle brightness to blonde hair.
    • Chamomile Tea: Chamomile is often used to naturally lighten hair and is particularly noted for enhancing golden tones in blonde hair.

    Usage Tips:

    • The combination of ingredients in this DIY shampoo offers a natural approach to managing slight brassiness and enhancing blonde tones. However, it’s important to note that results can vary based on hair type and existing hair condition.
    • Users should apply this shampoo once or twice a week and allow it to sit in the hair for 3-5 minutes to maximize the benefits of the ingredients.
    • Given the inclusion of lemon juice, which has drying properties, follow up with a hydrating conditioner, especially if you have dry or brittle hair.

    Safety and Storage:

    • This DIY shampoo should be stored in a cool, dry place and used within 1-2 weeks since it contains fresh ingredients without preservatives.
    • A patch test is recommended to ensure no adverse reactions, particularly due to the presence of lemon juice and baking soda, which can alter hair texture or scalp condition in sensitive individuals.

    This recipe offers a natural, gentle option for those looking to enhance their blonde hair using ingredients commonly found at home.

    While this mixture can help manage mild brassiness, it may not replace the effectiveness of commercially formulated purple shampoos designed specifically for neutralizing more pronounced brassy tones.

    Healthy Lifestyle Habits for Blonde Hair

    Maintaining healthy blonde hair goes beyond external care – it starts from within. Adopting a balanced lifestyle can significantly impact the vitality and radiance of your natural blonde locks.

    Balanced Diet for Hair Health

    • Eating a balanced diet rich in vitamins, minerals, and proteins is crucial for promoting strong and healthy blonde hair. Foods like avocados, nuts, seeds, and leafy greens can provide essential nutrients that nourish your hair follicles from the inside out.
    • Incorporating omega-3 fatty acids from fish or flaxseeds can also contribute to hair health by reducing dryness and increasing shine.

    Hydration and Hair Care Practices

    • Hydrating your body by drinking an adequate amount of water daily is fundamental for overall hair health.
    • Proper hydration not only benefits your hair but also supports a healthy scalp, preventing issues like dryness and itchiness. Regular scalp massages stimulate blood flow, encouraging hair growth and enhancing hair quality.
    • Additionally, engaging in activities like stretching or brisk walks promotes circulation, which can positively impact the condition of your blonde hair.

    Seasonal Care Tips for Blonde Hair

    As the seasons change, so do the needs of your blonde hair.

    • In the summer, protect your hair from UV damage by using hats or hair products with UV filters.
    • During winter, when the air is dry, consider using a humidifier to maintain moisture levels in your home. Also, use heavier conditioners during the winter season to avoid excessive dryness and moisture loss.

    Wrapping Up: Keeping Your Hair Blonde and Beautiful

    Maintaining your natural blonde hair’s vibrancy and shine requires dedication and the right care routine. By following the tips and tricks we reviewed above, you can keep your hair bright, vibrant, and nourished.

    Protect Your Hair from Environmental Factors

    It’s essential to shield your blonde hair from external elements that can cause damage. Protection is key. UV rays, pollution, and harsh weather conditions can all take a toll on your hair’s color and health.

    Choose the Right Styling Tools and Products

    Opt for styling tools that are gentle on your hair, such as ceramic straighteners and boar bristle brushes. Using heat protectant sprays before styling can help prevent heat damage and color fading. Additionally, select shampoos and conditioners are specifically formulated for blonde hair to maintain its brightness and prevent brassiness.

    Schedule Regular Trims and Treatments

    Regular trims are key to preventing split ends and maintaining the overall health of your blonde hair. Treat yourself to deep conditioning treatments or hair masks to keep your locks hydrated and nourished. These treatments can help restore moisture and shine, keeping your blonde hair looking its best.

    Embrace Natural Beauty

    While it’s essential to care for your blonde hair properly, embracing your natural beauty is equally important.

    We like to avoid products that contain synthetic chemicals in our household and even enjoy making our own DIY shampoos, conditioners, and so on. If you’re not into DIY, you’re really missing out on the opportunity it gives you to select your own ingredients tailored to your preferences.

    Stay Consistent with Your Hair Care Routine

    Consistency is key when it comes to maintaining blonde hair.

    Establish a hair care routine that works for you and stick to it. Whether it’s washing your hair with sulfate-free shampoos, applying toning treatments, or protecting your hair from heat styling, consistency will help keep your hair looking its best.

    Wrapping up and keeping your natural blonde hair blonde requires a combination of a regular nourishing haircare routine and protection from common environmental factors. Also, always opt for the best, preferably natural ingredients, and only for gently nourishing products.

    Blonde women with back turned surrounded by green plants in a field.
    Photo by Tim Mossholder

    Keeping Your Hair Blonde: FAQs

    Blonde hair can be stunning, but maintaining that gorgeous hue requires care and attention. Here are some frequently asked questions about how to keep your natural blonde hair looking vibrant and beautiful:

    1. How can I prevent my natural blonde hair from turning brassy?

    Consider using purple shampoo to prevent your blonde hair from developing brassy tones. Purple shampoo helps neutralize unwanted yellow or orange undertones, keeping your blonde hair looking fresh and bright.

    Additionally, scheduling regular toning treatments at the salon can help maintain your hair’s natural blonde shade.

    2. What is the best way to protect my blonde hair from sun damage?

    Sun exposure can cause blonde hair to become dry and brittle.

    To protect your hair from sun damage, consider wearing a hat or scarf when outdoors for extended periods. You can also use hair products with built-in UV protection to shield your strands from harmful sun rays.

    3. How often should I wash my blonde hair to maintain its color?

    Washing your hair too frequently can strip away natural oils and cause your blonde hair color to fade.

    To maintain the vibrancy of your blonde locks, consider washing your hair every other day or using dry shampoo between washes. To prevent premature color fading, opt for sulfate-free shampoos and conditioners. Even better, make your own DIY shampoos and conditioners.

    4. Are there any natural remedies to enhance and brighten blonde hair?

    If you’re looking for natural ways to enhance your blonde hair color, consider rinsing your hair with a mixture of lemon juice and water.

    Lemon juice acts as a natural highlighter, adding brightness to your blonde strands. You can also try chamomile tea rinses to achieve a sun-kissed effect on your hair.

  • Can You Use Neutralizing Shampoo on Natural Hair? Guide + 5 DIYs

    Can You Use Neutralizing Shampoo on Natural Hair? Guide + 5 DIYs

    Can You Use Neutralizing Shampoo on Natural Hair? Guide + 5 DIYs

    Understanding the purpose and effects of neutralizing shampoo on hair is crucial, especially for those who use strong chemical hair relaxers. We especially think understanding these shampoos and how they work is important for those navigating the benefits of natural hair care.

    Neutralizing shampoos are typically used after chemical treatments like relaxers or perms. They help restore the natural pH balance of your hair. These treatments can subject your hair’s cuticles to damage. A neutralizing shampoo helps alleviate this by adjusting the hair back to its optimal, slightly acidic pH level.

    When it comes to natural hair that hasn’t been altered by chemical treatments, you may be wondering if neutralizing shampoo has any benefit over normal shampoo. The answer is that it depends.

    • Your hair thrives when its pH is maintained between 4.5 and 5.5. Introducing a neutralizing shampoo into your routine could be too harsh if your hair hasn’t been chemically processed, potentially leading to dryness or damage over time.
    • If you’re inclined towards natural or DIY hair care solutions, it’s worth noting that there are gentle, natural alternatives to maintain your hair’s pH balance without resorting to conventional neutralizing shampoos.

    Ingredients like apple cider vinegar or aloe vera can be part of homemade concoctions that support the hair’s natural acidity. This promotes cuticle health and overall hair integrity. We’ll share more on that in our DIY section below.

    Neutralizing Shampoos: What They Are and How They Work

    Neutralizing shampoos are specialized hair products that balance your hair’s pH level, especially after chemical treatments. They play an essential role in maintaining the health of your hair, ensuring that it remains strong, shiny, and resilient. Their higher acidity levels help to neutralize alkalizing chemical treatments.

    How Do They Work?

    Neutralizing shampoos are formulated to counteract the alkalinity of certain hair products like hair relaxers.

    Since they contain acidic substances, they adjust your hair’s pH level back to a natural acidic state (4.5-5.5). This action aids in constricting the hair cuticles, which seal and protect the hair shaft, whereas alkaline treatments do the opposite.

    Their Role Following Chemical Treatments

    During chemical processes such as the relaxing process or after color treatments with hair dyes, the hair’s pH level becomes elevated. This can lead to scalp irritation and hair damage. Neutralizing shampoo serves as a final step in these treatments to restore the natural pH and minimize potential damage.

    If you regularly get your hair treated in the abovementioned ways, we highly recommend using a neutralizing shampoo or rinse to return it to its normal pH. Don’t have a neutralizing shampoo? No problem. We prefer natural DIY solutions like apple cider vinegar.

    Compared to Regular Shampoos

    While your standard type of shampoo, which may include clarifying shampoo, conditioning shampoo, or moisturizing shampoos, cleanses your hair, a neutralizing shampoo is calibrated for more than just cleaning.

    Unlike regular shampoo, neutralizing shampoo neutralizes any residual alkaline products left on your hair and scalp. It’s not typically used for daily maintenance but as a specific treatment after exposure to harsh chemicals.

    By comparison, neutralizing shampoos have a pH of around 4.5-5.5, while normal shampoos have a pH of around 6-7.

    The Benefits of Using Neutralizing Shampoo on Natural Hair

    Neutralizing shampoos can significantly enhance your hair care routine by promoting healthier natural hair when used appropriately. When it comes to hair, it’s really all about balance. They promote pH balance, prevent damage, and cleanse the scalp of chemical residues while maintaining essential natural oils.

    Restoring Natural pH Levels

    As mentioned earlier, your hair and scalp thrive best at a natural pH range of 4.5 to 5.5. After undergoing treatments with sodium hydroxide or other alkaline substances (often with a pH of 11 or higher), a neutralizing shampoo can help restore an optimum pH.

    Preventing Hair Breakage

    When your hair’s pH is too high, the cuticle layer swells, leading to hair breakage. By using a neutralizing shampoo, you work towards aligning your hair’s pH to a level that supports hair strength and resilience against breakage.

    To further protect your hair, you may opt for leave-in deep conditioners that reinforce the hair’s natural defense system, especially if you’re transitioning from chemically treated to natural hair.

    Removing Chemical Residue

    After chemical processing, traces of relaxer residue and chemical residues can linger in your hair. This can possibly lead to scalp irritation and hair damage.

    A neutralizing shampoo effectively removes (or neutralizes) these harmful toxins and any bad chemicals, reducing the chances of developing brittle hair. Perhaps the most simple step following a neutralizing rinse or wash is to ensure you’ve rinsed thoroughly, followed by a nourishing conditioner.

    How to Properly Use Neutralizing Shampoo

    When using neutralizing shampoo on natural hair, be sure to read and follow the instructions on the label to ensure you get the full neutralizing effect.

    Step-by-Step Application

    To ensure the health of your natural hair after a relaxer treatment, follow these steps:

    1. Apply the neutralizing shampoo: After rinsing out the relaxer with water, apply the neutralizing shampoo to your hair. Distribute it evenly to cover all strands thoroughly.
    2. Check for the final step: Some products offer a color-change mechanism indicating when the hair is free of relaxer residue. Lather and rinse until this final cue is observed.
    3. Rinse thoroughly: Rinse your hair with lukewarm water multiple times until the water runs clear, ensuring all residues are completely washed out.

    Frequency of Use

    • Neutralizing shampoo should be used immediately following a chemical relaxer treatment to restore the natural pH balance of your hair.
    • For maintaining hair health, using a neutralizing shampoo or rinse regularly is not advised, as it can be too harsh for frequent use. Integrate it into your hair care routine following chemical treatments.

    Choosing the Right Product

    • When selecting a neutralizing shampoo, look for the ones specifically formulated for your hair type and texture. Visit your local beauty supply store to see what’s available if you’re looking for a store-bought neutralizing shampoo.
    • You can also look for shampoos with a chelating agent to ensure effective removal of minerals, metals, dirt, and chemical residues. Avoid products with harsh ingredients that can strip your hair of its natural moisture.

    Creating Your Own: 5 Natural Neutralizing DIY Rinses

    If you’re exploring ways to balance your hair’s pH after a chemical process or to maintain its health, why not use a natural DIY method that avoids the use of shampoos that are full of chemicals?

    1.) Coffee Rinse:

    • Brew a strong pot of coffee and let it cool to room temperature.
    • Shampoo your hair as usual, then pour the cooled coffee over your hair and scalp.
    • Gently massage the coffee into your hair, making sure to cover all strands.
    • Let it sit for 5-10 minutes, then rinse thoroughly with cool water.

    Coffee contains antioxidants and caffeine that are beneficial for the scalp and hair. The acidic nature of coffee can also help to balance the hair’s pH after alkaline treatments, closing the hair cuticles and reducing frizz.

    2.) Apple Cider Vinegar Rinse:

    • Mix 2-4 tablespoons of raw, unfiltered apple cider vinegar with 1 cup of water.
    • After shampooing your hair, pour this solution over your scalp and hair.
    • Gently massage the mixture into your hair and scalp.
    • Leave it on for 3-5 minutes, then rinse thoroughly with cool water.

    Apple cider vinegar is acidic (pH of 2-3) and closer to the pH of hair when diluted with water. This makes it extremely effective as a neutralizer after alkaline treatments. If the smell is a bit too strong for you, add some sandalwood, lavender, or other essential oil to mask the scent.

    3.) Lemon Juice Cleanser:

    • Squeeze the juice of one lemon into 1-2 cups of water.
    • After shampooing your hair, pour the lemon water over your hair and scalp.
    • Gently massage the mixture into your hair, focusing on the roots and ends.
    • Let it sit for 2-3 minutes to break down any residue and balance pH.
    • Rinse well with cool water.

    Lemon juice has a low pH of around 2-3. It also contains citric acid, which can help to remove product buildup and restore shine to the hair.

    4.) Aloe Vera Rinse:

    • Blend 1/2 cup of fresh aloe vera gel with 1 cup of water until smooth.
    • Apply the mixture to your hair and scalp after shampooing.
    • Gently massage it into your hair, ensuring even coverage.
    • Leave it on for 5-7 minutes, then rinse thoroughly with cool water.

    Aloe vera has a pH level similar to that of healthy hair at around 4.5-5.5, making it an effective neutralizer. It also contains enzymes and vitamins that can help to soothe the scalp, reduce inflammation, and nourish the hair.

    Also, feel free to use a few drops of essential oil for added scent. We especially like using lemongrass with aloe due to its efficacy with dandruff.

    5.) Herbal Rinse (Rosemary, Thyme, or Lavender):

    • Steep 2-3 tablespoons of dried herbs in 2 cups of boiling water for 15-20 minutes.
    • Strain the herbs and let the infusion cool to room temperature.
    • After shampooing, pour the herbal rinse over your hair and scalp.
    • Gently massage it into your hair, focusing on the roots and ends.
    • Let it sit for 5-10 minutes, then rinse thoroughly with cool water.

    Herbal rinses are fantastic to use in the hair. Herbs like rosemary have been demonstrated to be highly beneficial for the hair and scalp. Since the properties of herbs vary widely, you could double-check the pH of the rinse with a pH test strip before using it.

    You’ll want the pH to be around 4-5.5 and definitely not over 6. Add a bit of vinegar to lower the pH as needed.

    As mentioned previously, neutralizing your hair is primarily done after a chemical treatment or as part of a normal clarifying haircare routine to get pH levels back in balance. That said, these strategies shouldn’t be done on a daily basis. We recommend using a neutralizing rinse once every week or two.

    These natural DIY methods are extremely effective and negate any need for store-bought alternatives. They are not only cost-effective but also a gentle alternative to traditional neutralizing shampoos. Of course, don’t forget to use natural conditioners and moisturizers to nourish your hair.

    Additional Considerations for Natural Hair

    We all have different hair and skin types, and that’s a factor when considering how to maintain the hair’s health and beauty. This is especially true if you do choose to use a store-bought clarifying shampoo and don’t opt for one of the DIY methods mentioned above.

    Understanding Hair Types and Textures

    Your natural hair’s texture significantly influences how hair care products affect your hair.

    Curly hair can be more prone to dryness, while straight hair might have a different reaction to products.

    Knowing your hair type, whether it’s 1A (straight) to 4C (tightly coiled), helps you choose the correct neutralizing shampoo that won’t disrupt your hair’s pH level or strip away natural oils.

    The Importance of Moisturization

    Natural hair thrives on moisture.

    After using a neutralizing shampoo, especially post-relaxer, to address high alkalinity, it’s imperative to reintroduce moisture. Products infused with acidic ingredients, like coconut oil, help to seal the hair cuticle and preserve moisture.

    Implementing deep conditioners in your hair care routine can combat the potential dryness associated with the deep cleansing action of neutralizing shampoos.

    Avoiding Over-Processing

    To stay safe, avoid overusing harsh chemicals like lye relaxers, which can damage your hair. We also generally recommend limiting the use of high-pH products to avoid lifting the hair cuticle, which makes it susceptible to breakage.

    Instead, opt for gentler methods or DIY solutions to reduce the risk.

    If you’re experiencing a dry scalp, consider homemade mixes that include natural, acidic components to balance the scalp’s pH. Then, follow that up with a hair conditioner or moisturizing regimen.

    Alternatives to Neutralizing Shampoos

    When exploring options beyond neutralizing shampoos, consider alternatives that maintain the natural pH balance of your hair while effectively removing product residues and impurities without harsh chemicals.

    Compared with Clarifying Shampoos

    Clarifying shampoos offer a deep cleansing experience by effectively removing buildup from product residues, such as hairspray and gels, as well as environmental pollutants.

    They differ from neutralizing shampoos in that they are not designed to correct the pH balance but rather to cleanse the hair thoroughly. However, their deep cleaning properties may cause them to strip natural oils if used too frequently.

    The Role of Chelating Shampoos

    Chelating shampoos are an excellent alternative for those dealing with hard water, which contains minerals that can cling to your hair.

    These shampoos contain chelating agents that bind with the minerals in the water, such as sodium chloride, and remove them from the hair.

    They are gentler than clarifying shampoos but more specific in targeting the problems caused by hard water without disturbing the natural pH levels of your hair.

    Low pH and Conditioning Shampoos

    Alternatives like low-pH and conditioning shampoos can also help maintain the hair’s pH.

    These shampoos are typically formulated with natural ingredients and are less likely to cause adverse reactions in your hair. Conditioning shampoos, in particular, can provide both cleaning and moisturizing benefits, aiding in managing the hair’s pH level while keeping it smooth and hydrated.

    Tips for Maintaining Healthy Natural Hair

    Incorporating a regular hair care routine, avoiding harsh chemicals, and using home remedies can be transformative. Here are ways to keep your hair looking and feeling its best.

    Regular Hair Care Routine

    Establishing a consistent hair care routine is crucial to keeping natural hair healthy. This includes gentle cleansing, timely moisturizing, and regular deep conditioning.

    Deep conditioning, specifically, helps maintain natural oils, which are necessary for hair strength and vitality.

    • Weekly Deep Conditioning: Use natural ingredients like coconut oil or honey for a DIY mask.
    • Daily Moisturizing: Hydrate with leave-in conditioners to prevent dryness.

    Avoiding Harsh Chemicals

    Healthy hair flourishes when you minimize the use of damaging substances. Limit exposure to harsh chemicals in some hair sprays and other styling products, which can lead to product buildup and strip your hair of its natural oils.

    • Select Hair Products Wisely: Look for products with nourishing natural ingredients.
    • Limit Use of Styling Agents: Restrict the regular use of heavy products to avoid buildup.
    • Opt for DIY Only: This is our favorite strategy for shifting to a natural, chemical-free hair routine. It’s a lifestyle change, but an important one.

    Home Remedies and Natural Treatments

    Harness the power of home remedies and natural treatments to boost hair health. These alternatives can be gentler and just as effective without exposing your hair to harmful toxins.

    • Oil Treatments: Warm oils like olive or coconut can be applied to your scalp and hair for moisture.
    • DIY Masks: Create masks using items like avocado, eggs, or banana to nourish and repair hair.

    Neutralizing Shampoo and Rinse FAQs

    Is neutralizing shampoo recommended for use on natural hair?

    Specifically, neutralizing shampoos are designed to correct the pH balance of hair and are often recommended post-chemical treatments.

    If your natural hair has not undergone chemical treatment, using a neutralizing shampoo is not typically necessary, as your pH balance should be naturally regulated.

    That said, we recommend the natural DIY methods that use apple cider vinegar, coffee, lemon juice, or the other options mentioned (aloe and herbal rinses) as part of a normal clarifying hair care routine.

    What are the effects of neutralizing shampoo on unprocessed hair?

    Using neutralizing shampoo on virgin or unprocessed hair may lead to over-drying if used frequently since the formulation adjusts pH levels that don’t need adjusting in untreated hair. It’s essential to condition well after use to maintain moisture.

    How often should neutralizing shampoo be used on natural hair?

    We don’t recommend using a naturalizing shampoo when better natural options are available, like apple cider vinegar (ACV).

    For general maintenance, occasional use of a neutralizing shampoo may be beneficial to remove buildup, but the same would be true of ACV, lemon juice, coffee, etc. So, why purchase shampoo when you can use it instead?

    What alternatives to neutralizing shampoo can be used on natural hair?

    For natural hair, gentle shampoos with natural ingredients or DIY cleansers can effectively cleanse the hair without altering pH levels. Clarifying shampoos or apple cider vinegar rinses are good alternatives for periodic deep cleansing.

    Can neutralizing shampoo be used on hair that has been dyed?

    Neutralizing shampoos can be used on dyed hair but with caution. Since dyed hair may already be vulnerable to dryness, it’s important to follow it with a deep conditioning treatment to restore moisture.

  • Aloe Vera Scrub Recipes: Guide + 3 DIY Recipes

    Aloe Vera Scrub Recipes: Guide + 3 DIY Recipes

    Aloe Vera Scrub Recipes: Guide + 3 Simple DIY Recipes

    Aloe vera is renowned for its soothing and healing properties, making it a prime ingredient for your skincare routine. Incorporating this versatile plant into a homemade scrub can provide you with a gentle yet effective exfoliating product.

    By creating your own aloe vera scrub recipe at home, you have the advantage of knowing exactly what you’re applying to your skin, ensuring the use of natural ingredients without the added chemicals often found in commercial beauty products.

    • Embracing DIY skincare allows you to personalize the experience according to your skin’s specific needs.
    • Crafting this scrub at home is straightforward and can be a rewarding addition to your beauty regimen.

    Whether you have sensitive skin or are simply seeking a more natural approach to beauty, an aloe vera scrub recipe might be the perfect solution to enhance your skin’s natural glow.

    Benefits of Aloe Vera for Skin

    Offering a blend of hydration and anti-inflammatory effects, aloe vera is a solid choice when it comes to skincare. Let’s dive into that a bit deeper.

    Hydrating Properties

    Your skin can greatly benefit from the hydrating qualities of aloe vera. This plant’s gel is rich in water, helping to moisturize and soothe the skin without leaving a greasy feel. Its gentle composition makes it suitable for nearly all skin types, promoting a supple and hydrated complexion.

    Anti-Inflammatory Effects

    If you’re dealing with inflammation or irritation, aloe vera can be a soothing balm. It possesses anti-inflammatory compounds such as acemannan, a polysaccharide that can help reduce redness and swelling, making it effective for skin nourishment.

    Phytochemicals

    Aloe vera is loaded with a number of phytochemicals and antioxidants.

    Choosing Ingredients

    When crafting a homemade aloe vera scrub, selecting quality ingredients is crucial for an effective and skin-nourishing exfoliant. It’s important to understand what each component brings to your scrub to tailor it to your skin’s needs.

    Base Components

    Your scrub’s foundation consists of a moisturizer and a gel to hold the exfoliants in place. Aloe vera serves as a perfect gel base due to its hydrating properties and is often used for its vitamin-rich profile.

    An oil like coconut oil or olive oil can be included to further enhance the moisturizing effect of your scrub.

    • Aloe Vera: Serves as the gel base and moisturizer. It also contains vitamins and minerals. We like using aloe vera since multiple family members either have sensitive skin, eczema, or both. Aloe is gentle, light, and hydrating all at the same time.
    • Oil (Coconut, Olive, Almond): Acts as a complementary moisturizer alongside aloe vera. You could also use jojoba, rosehip, grapeseed, or a wide variety of other oils.

    Exfoliants

    The exfoliating component is critical for removing dead skin cells.

    • Sugar is a popular choice as it’s gentle on the skin yet effective at exfoliating.
    • Colloidal oatmeal, finely ground sea salt, or even baking soda could also serve as exfoliants.
    • Additionally, enzymes like papin or bromelain can be included for their ability naturally dissolve and exfoliate dead skin cells.

    Additive Oils and Essences

    To further enhance your scrub, consider adding essential oils for their therapeutic properties and pleasing scents.

    Patchouli, lavender, palmarosa, tea tree, and many other essential oil varieties and blends will complement your DIY scrub recipe with refreshing fragrances, as well as the skin benefits of EOs.

    Remember: With essential oils a few drops go a long way. Less is more.

    The beauty of DIYs is that you’re able to customize your skincare mixtures precisely to your skin needs. That may mean using specific essential oils, exfoliants, carrier oils, and so on.

    Creating Your Aloe Vera Scrub

    The process to create a homemade aloe face scrub is super simple (in case you haven’t done it before). We’ll guide you through some initial considerations below before moving on to the recipes.

    Preparing the Aloe Vera

    To start, ensure you have fresh aloe vera gel, which is the foundation of your scrub. If you’re using a fresh aloe leaf, slice it lengthwise and scoop out the gel, removing any green remnants to avoid skin irritation.

    Feel free to purchase aloe vera gel from reputable online retailers as well. We prefer using 100% organic certified ingredients for skincare recipes whenever possible.

    Mixing Your Ingredients

    In a mixing bowl, combine two teaspoons of aloe vera gel with one teaspoon of granulated sugar.

    The granulated sugar acts as an abrasive, helping to scrub away any dead skin cells. For an extra gentle exfoliating experience, you could powder the sugar in a mortar and pestle to make a finer consistency.

    If you’re looking to create a larger batch, maintain this ratio to keep the consistency balanced.

    Consistency and Texture

    Once mixed, your paste should have a slightly gritty consistency overall, but perhaps a bit finer if you powdered the sugar as mentioned above.

    Tip: If it feels too thick, add more aloe vera gel or even some gentle carrier oil.

    Conversely, if it’s too runny, add granulated sugar in small increments until the desired consistency is reached. You could also use any of the other exfoliants we mentioned earlier. We especially like using colloidal oatmeal since it’s easy to make, gently exfoliates, and calms irritated or otherwise sensitive skin.

    The final product should be a homogenous mixture that glides smoothly over your skin, effectively removing dead cells to reveal underlying fresh skin while also providing moisture.

    When applying the aloe vera gel scrub, use gentle circular motions to avoid irritation – this is crucial to achieving proper exfoliation without damaging the skin. Always test a small patch of skin for sensitivity before applying to larger areas.

    3 DIY Aloe Scrub Recipes

    1. Gentle Aloe & Oatmeal Soothe Scrub (Sensitive Skin)

    This scrub is designed for sensitive skin, using gentle colloidal oatmeal as the exfoliant, manuka honey, and a light soothing carrier oil.

    Ingredients:

    • 2 tablespoons aloe vera gel
    • 1 tablespoon colloidal oatmeal (use more according to your preference)
    • 1 teaspoon jojoba oil or sweet almond oil (non-irritating oils for sensitive skin)
    • 1 teaspoon manuka honey (regular honey is okay if you don’t have manuka honey)
    • 2-3 drops of chamomile essential oil (optional for extra soothing properties)

    Instructions:

    • Mix the aloe vera gel with colloidal oatmeal in a bowl.
    • Add the jojoba or sweet almond oil to the mixture.
    • Optionally, include a few drops of chamomile essential oil for its calming effects.
    • Apply the scrub to your face in gentle, circular motions, being careful around the eyes.
    • Rinse with cool water and pat your face dry with a soft towel.

    2. Revitalizing Aloe & Coffee Kick Scrub

    This scrub uses coffee grounds to invigorate the skin, paired with nourishing oils for a rejuvenating experience.

    Ingredients:

    • 2 tablespoons aloe vera gel
    • 1 tablespoon finely ground coffee beans
    • 1 teaspoon coconut oil
    • 2-3 drops of peppermint essential oil (optional for a refreshing scent)

    Instructions:

    • Combine the aloe vera gel with finely ground coffee in a bowl.
    • Stir in the coconut oil until well-mixed.
    • Add the peppermint essential oil for an energizing fragrance if desired.
    • Gently massage the scrub onto your face, avoiding the eye area.
    • Rinse with lukewarm water and enjoy the fresh, revitalized feeling.

    3. Citrus Aloe & Sugar Glow Scrub

    This scrub pairs the exfoliating properties of sugar with the brightening effects of citrus, perfect for a radiant complexion.

    Ingredients:

    • 2 tablespoons aloe vera gel
    • 1 tablespoon granulated sugar
    • 1 teaspoon olive oil
    • 2-3 drops of orange or lemon essential oil

    Instructions:

    • Mix the aloe vera gel and granulated sugar in a small bowl to create the base of your scrub.
    • Add in the olive oil for additional moisture and to help bind the mixture.
    • Incorporate the orange or lemon essential oil for a natural citrus scent that can also help brighten the skin.
    • Using gentle circular motions, apply the scrub to your face, avoiding the delicate skin around your eyes.
    • Rinse off with warm water, making sure all sugar granules are washed away.
    • Pat your skin dry with a clean towel and follow up with your usual skincare routine.

    This Citrus Aloe & Sugar Glow Scrub is a delightful way to exfoliate and brighten your skin, leaving it feeling smooth and refreshed with a subtle, uplifting citrus aroma.

    Application Techniques

    Proper application techniques can maximize the benefits of your DIY aloe vera scrub for various skin types. Here’s how to streamline your approach for effective use on the face and body, adhering to skin type considerations and frequency of use.

    Suitability for Different Skin Types

    • Sensitive Skin: Use gentle, non-abrasive ingredients with your aloe vera and apply with care to avoid irritation.
    • Oily Skin: Include ingredients like baking soda, finely ground salt, or activated charcoal to help absorb excess oil. Apply in a moderate, circular motion without over-scrubbing, which could stimulate more oil production.
    • Dry Skin: Combine aloe vera with hydrating agents like almond oil. Ensure gentle application to nourish and exfoliate without stripping moisture.

    Frequency and Method of Use

    • Skincare Routine: Integrate the aloe vera scrub into your routine once a week or even once every two weeks. Replacing harsher exfoliants with this DIY method instead. Exfoliation isn’t actually something we need to do frequently. Over-exfoliation can be counterintuitive.
    • Method: We’ve mentioned this a few times, but it’s worth mentioning again in case you missed it. Apply your scrub in a soft, circular motion to lift dead skin cells. Do not press the mixture into your skin with a lot of pressure. Instead, lightly move the mixture over the surface of your skin.

    Optimal Application for Face and Body

    • Face Scrub: Use your fingertips to softly work the scrub into your skin, focusing on the T-zone and avoiding the delicate eye area.
    • Body Scrub: Extend the exfoliation to your body using broader strokes. Pay special attention to rough areas such as elbows and knees. If you’d like to exfoliate your feet, add additional exfoliants like salt or coffee.

    Aftercare and Skin Health

    After using an aloe vera scrub, following a proper aftercare routine that supports skin moisturization is crucial. Attention to moisturizing and protection against damage can help maintain the skin’s elasticity and youthful appearance.

    Moisturizing After Exfoliation

    Following exfoliation with an aloe vera scrub, apply a moisturizer that complements your skin type to hydrate and replenish any lost moisture.

    Moisturizing is pivotal in maintaining a glowing complexion and reinforcing the skin’s natural barrier. For optimal results, use a moisturizer that contains ingredients known for their hydrating properties, like hyaluronic acid or glycerin.

    Lukewarm water should be used when rinsing off any scrub to avoid stripping away essential oils, and moisturization should be done immediately afterward to lock in hydration.

    Protecting Skin From Damage

    Immediately after exfoliating, your skin may be more susceptible to damage. Hence, it’s essential to protect your skin from environmental stressors.

    • If you used any citrus ingredients or any EOs that could cause photosensitivity (grapefruit, lemon, orange, bergamot), be sure to avoid direct sunlight for at least 12 hours. If you know you’ll be in the sun sooner than that, simply do not use those EOs.
    • Use a heavier moisturizer when venturing outside in the cooler winter months to ensure your skin remains hydrated.
    • Do not over-exfoliate. Limit exfoliation to once weekly at most. Even once every two weeks works well for many, but it will depend on your skin type.

    Additional Tips and Considerations

    Storage and Shelf Life

    If you plan to make your scrub in bulk, be sure to store it well. Ideally, store your scrub in an airtight container and keep it in a cool, dry place away from direct sunlight.

    If using ingredients like brown sugar or sea salt, which are natural preservatives, your scrub can last up to three months. Always use a clean scoop to prevent introducing bacteria into the mixture.

    We prefer just making small batches of scrub, just enough for a few uses. Not only will you avoid spoilage with smaller batches, but it also allows for more variation whenever exfoliating.

    Aloe Vera Scrub FAQs

    How can you create a homemade facial scrub using aloe vera and sugar?

    To make a simple facial scrub, combine two teaspoons of aloe vera gel with one teaspoon of granulated sugar. That’s quite a simple aloe scrub recipe, but you can add a number of other ingredients for various skin benefits.

    See our recipes in the above post for more details.

    Can aloe vera be used in a scrub for moisturizing dry skin, and how?

    Yes, aloe vera can be combined with moisturizing ingredients like honey or coconut oil for a scrub suitable for dry skin. The aloe’s water content will aid in moisturization, while the oils will act as emollients to lock in that moisture.

    After exfoliating, you should also follow up with a light moisturizer that’s suitable for your skin type.

    How often should I use an aloe vera scrub on my face for the best results?

    At first, you may start by exfoliating with the aloe scrub 1-2 times per week, then decrease the frequency to about once per week, depending on your skin type. There’s no set rule for this other than you should avoid exfoliating too often.

    Are there any special considerations when making an aloe vera scrub for hair care?

    When making an aloe vera scrub for hair care, use gentle ingredients to avoid scalp irritation and focus on scrubbing the scalp rather than the hair to remove buildup effectively.

    Additionally, apple cider vinegar can be a useful ingredient for clarifying the hair and removing buildup.

  • Activated Charcoal Bath Bomb: Benefits + Easy DIY Recipe

    Activated Charcoal Bath Bomb: Benefits + Easy DIY Recipe

    Activated Charcoal Bath Bomb: Benefits + Easy DIY Recipe

    Activated charcoal is a fine, odorless, black powder often used in emergency rooms to treat overdoses due to its toxin-absorbing properties. This same quality has made activated charcoal a popular ingredient in skincare, particularly for detoxifying and deep-cleaning purposes.

    When incorporated into a bath bomb, activated charcoal can transform your regular bathing routine into a purifying experience that not only cleanses your skin but can also help to clear pores and remove impurities.

    Making your own activated charcoal bath bombs is a straightforward process that can match the spa-level experience at home.

    • As you soak, the activated charcoal works to draw out toxins and impurities.
    • Additional ingredients like coconut oil and essential oils leave your skin feeling nourished and refreshed.
    • Besides their practical benefits, these bath bombs offer an aesthetically appealing touch to your bath with their unique dark hue, making them as visually striking as they are functional.

    When considering skincare routines, activated charcoal stands out as a notable ingredient. Its porous nature gives it the ability to absorb toxins and chemicals, which is why it’s leveraged in various detox products.

    Bath Bombs: Simplicity and Function

    When you immerse a bath bomb in the water, it creates an effervescent experience that can transform your ordinary bath into an amazing sensory journey, especially if you leverage the aromatherapy benefits of essential oils (we highly recommend that).

    Brief History of Bath Bombs

    Bath bombs were invented in 1989 by Lush Cosmetics co-founder Mo Constantine, in her garden shed. The motivation was to create a product that merged the luxury of a bubble bath with the benefits of bath oils.

    Over time, bath bombs have evolved from their rudimentary beginnings into complex, multi-ingredient items adored globally for their aromatherapeutic properties. The varieties are endless; even better, they’re incredibly easy to make at home.

    The Science Behind Bath Fizzies

    The quintessential fizz of bath bombs, also known as bath fizzies, is the result of a chemical reaction between bicarbonate of soda (baking soda) and citric acid.

    When dry, these ingredients lie dormant, but once in contact with water, they react to create carbon dioxide bubbles. The fizz and foam that you witness is this gas escaping into the air, often releasing scents, colors, and skin conditioning agents into your bath.

    Ingredients for Activated Charcoal Bath Bombs

    Creating an activated charcoal bath bomb requires some precision, but the process is fairly simple. You need the right combination of ingredients to ensure the bomb fizzes, disperses soothing elements, and doesn’t leave a residue.

    Below, we’ll dive into some of the ingredients you’ll need to make activated charcoal bath bombs.

    Essential Oils and Their Benefits

    Essential oils are pivotal in bath bombs not only for their aroma but also for their therapeutic properties.

    • Lavender oil calms and relaxes, while eucalyptus oil can help clear breathing and boost energy.
    • When adding essential oils to your bath bomb, ensure they’re skin-safe and start with a few drops to assess strength.
    • Floral oils are fantastic, especially when mixed with spicier scents like frankincense, myrrh, or spikenard. We like mixing myrrh and frankincense, especially around the holidays.

    Beyond the aromatherapy benefits, there are a number of skin benefits unique to specific essential oils. For example, tea tree and palmarosa essential oils are both effective for acne sufferers.

    We also must mention how patchouli EO was shown to reduce the signs of aging and was the least irritating oil out of the others tested in one study.

    The options, blends, and skin benefits of essential oils are many. Definitely don’t leave these out as an ingredient when you’re making your own DIY skincare products.

    Role of Epsom Salt and Sea Salt

    Epsom salt is known for relief from muscle soreness, while sea salt can help cleanse and detoxify your skin.

    Both salts, when included in your bath bomb, infuse the water with minerals beneficial for skin health. A typical ratio is 1:1 with the baking soda and citric acid base.

    Polysorbate 80: Choosing the Right Emulsifiers

    Emulsifiers like polysorbate 80 ensure oils (including essential oils) distribute evenly in your bathwater, preventing an oily film.

    While polysorbate 80 isn’t specifically required to make activated charcoal bath bombs, it can help evenly distribute the activated charcoal and other ingredients.

    • We recommend using 1-3% of polysorbate 80 compared to the weight of the dry ingredients used in the recipe.
    • An easier way to calculate how much you should use is to consider the amount in relation to the amount of carrier oil you use. If you calculate it that way, we recommend a 1:2 ratio of polysorbate 80 to carrier oils. Thus, if using 2 tablespoons of coconut oil, use 1 tablespoon of polysorbate 80.
    • When calculating this ingredient, keep in mind that it’s a wetting ingredient, meaning you can use less water, alcohol, or witch hazel than the recipe calls for in order to wet the mixture.

    In the recipe below, we chose to leave out polysorbate 80 as a required ingredient for simplicity’s sake since most people won’t have that ingredient immediately available. Since the essential oils will not be incorporated into the water as well without polysorbate 80, we recommend not exceeding the EO amount we list in the recipe.

    Using polysorbate 80 will lead to longer fizzing, more consistent dispersal of the bath bomb ingredients in your bath water, and less likelihood of staining in your tub.

    Note: While Cornstarch or witch hazel can act as binders and enhance the fizzing duration, they aren’t useful for emulsifying. Polysorbate 80 or a wax emulsifier is best for that.

    Guide to Creating Your Bath Bomb

    Crafting your own bath bomb is a straightforward process but requires attention to detail. With the right recipe, molds, colorants, and drying techniques, you can create luxurious bath bombs at home.

    Recipe: DIY Eclipse Essence Charcoal Bath Bombs

    Dry Ingredients (excluding citric acid):

    • 1 cup baking soda
    • 1/2 cup cornstarch
    • 1/2 cup Epsom salts
    • 2 tbsp activated charcoal powder
    • 1/2 cup citric acid (mixed last, see instructions)

    Wet Ingredients:

    • 2 tbsp witch hazel
    • 2 tbsp almond oil (or any carrier oil of your choice)
    • 10-15 drops of lavender essential oil (or a preferred essential oil or blend)
    • Optional: 1 tablespoon of polysorbate 80 (for emulsification)

    Instructions:

    We recommend using gloves to make bath bombs since some ingredients, like citric acid, are very concentrated and will cause irritation.

    1. In a large bowl, whisk together the baking soda, cornstarch, Epsom salts, and activated charcoal powder until well blended and free of clumps.
    2. In a separate small bowl or container, combine the witch hazel, almond oil, and essential oil(s). Stir these wet ingredients until they are well mixed. You can also mix the polysorbate 80 in this step if you’re using it.
    3. Slowly add the wet ingredients to the dry mixture, a little bit at a time, while continuously stirring the mixture. The goal is to wet the dry ingredients gently.
    4. Once all the wet ingredients are incorporated and the mixture resembles wet sand and clumps together when squeezed, it’s time to add the citric acid. Sprinkle the citric acid into the bowl and mix it in as quickly and gently as possible. If more liquid is needed, you can add additional witch hazel or a spritz of rubbing alcohol. The ingredients should clump together quite nicely.
    5. Immediately after mixing, quickly press the mixture into your chosen bath bomb molds. Pack it in firmly to ensure the bath bomb will hold its shape.
    6. Leave the bath bombs in the molds to dry for at least 4-6 hours, or ideally overnight, in a cool, dry area to set completely.
    7. Once dry, carefully remove the bath bombs from the molds. Store them in an airtight container until you’re ready to use them for a luxurious, detoxifying bath experience.

    Note: The reason for adding citric acid last and mixing it in gently is to minimize any reaction between the citric acid and baking soda. This helps ensure that the bath bomb will fizz more vigorously when it’s eventually used in the bath rather than fizzing prematurely during the mixing process.

    If you need more liquid, spray a bit of rubbing alcohol into the mixture, but only enough to wet the bath bombs so that they’ll hold together in their molds.

    Enjoy these Eclipse Essence Charcoal Bath Bombs for a soothing and purifying soak that will leave your skin feeling soft and rejuvenated.

    Selecting Molds and Colorants

    Choosing bath bomb molds can be really fun. Just be sure to choose molds that will hold up well and won’t be too complicated to use, especially if you’re a beginner.

    • Plastic molds can be easier for beginners, while metal molds might create a smoother finish.
    • If you desire colorful bombs, opt for skin-safe colorants like gel food coloring; a little goes a long way without staining your tub.
    • To make things extra fun, purchase a set of assorted bath bomb molds with varying shapes and sizes.
    • We like the durability and sturdiness of metal molds.

    The Drying Process and Storing Tips

    After you’ve packed your mixture into molds, allow it to dry. Drying can take up to 24 hours, depending on humidity. Once dry, gently remove your bath bombs and store them in a cool, dry place. For best results, use airtight containers or wrap them in cling film to preserve the fizz and aroma.

    • Drying Time: 24 hours
    • Storage: Airtight container or cling film

    By following these steps and being mindful of the small details, you can craft the perfect activated charcoal bath bomb right at home.

    Skin Care and Bath Bombs

    Activated charcoal bath bombs are not just a trend; they offer real benefits for your skin. They can help manage your skin’s pH levels, cater to sensitive skin with natural ingredients, and balance both oily and dry skin types depending on your chosen formulation or recipe.

    Managing PH Levels for Skin Safety

    Your skin’s pH is vital for its barrier function and overall health.

    Bath bombs with activated charcoal often contain citric acid to balance the pH of your bath water, helping your skin stay at its natural slightly acidic pH, which is typically around 5.5.

    This is crucial to prevent skin dryness or irritation that can occur when some soaps and bath products disrupt the pH.

    Natural Ingredients for Sensitive Skin

    If you have sensitive skin, selecting bath bombs with natural ingredients is key.

    • Look for products that contain essential oils and avoid harsh chemicals.
    • Carrier oil ingredients like coconut oil provide moisture. Other nourishing oils include jojoba oil, sweet almond oil, or avocado oil.
    • Essential oils such as lavender or chamomile offer a soothing, anti-inflammatory effect that can help calm irritated skin.

    Benefits for Oily and Dry Skin Types

    For those with oily skin, activated charcoal in bath bombs can absorb excess oil and remove impurities.

    Contrarily, if you have dry skin, ingredients like melted coconut oil in these black bath bombs can enhance skin hydration.

    The right balance of ingredients means that whether your skin is oily or dry, a well-formulated bath bomb can promote healthier skin.

    The Art of the Perfect Bath Experience

    Creating the perfect bath experience is about finding the right balance of texture and moisture for your bath bomb, as well as infusing the environment with fragrances that evoke a sense of calm and relaxation.

    Achieving the Ideal Texture and Moisture

    The texture of your bath bomb is crucial to the experience—it should fizz and dissolve at the right speed, neither too fast nor too slow.

    A silky-smooth texture that envelopes your skin is what you’re aiming for. To achieve this, the ratio of baking soda to citric acid is typically 2:1.

    For a moisture-rich bath bomb that leaves your skin feeling hydrated, consider adding oils like coconut oil or shea butter. These ingredients not only add moisture but also contribute to the bath bomb’s compactness.

    • Ideal Texture:
      • Mix 2 parts baking soda with 1 part citric acid.
      • Ensure no lumps for a fine powder consistency.
    • Recommended Emollient Ingredients:
      • Add melted coconut oil, shea butter, or one of the other many carrier oils from the section below.
      • Mix until the consistency is similar to damp sand.

    15 Carrier Oils to Use in Bath Bombs

    The handy chart below breaks down the kinds of oils and emollients you can use in bath bombs. We recommend trying out various carrier oils and settling on a few you’ve determined your skin likes best.

    Normal Skin

    Carrier OilProperties
    Sweet Almond OilLightweight, moisturizing, easily absorbed
    Jojoba OilBalancing, mimics skin’s natural oils
    Sunflower OilLightweight, rich in vitamin E, non-comedogenic
    Hemp Seed OilAnti-inflammatory, rich in omega acids
    Argan OilNourishing, rich in antioxidants, easily absorbed

    Sensitive Skin

    Carrier OilProperties
    Avocado OilDeeply hydrating, rich in vitamins
    Apricot Kernel OilLightweight, moisturizing, gentle
    Rosehip Seed OilPromotes healing, rich in essential fatty acids
    Shea ButterAnti-inflammatory, moisturizing, solid at room temp
    Cocoa ButterRich, moisturizing, solid at room temp

    Oily Skin

    Carrier OilProperties
    Grapeseed OilLightweight, non-comedogenic, antioxidant-rich
    Jojoba OilBalancing, mimics skin’s natural oils
    Hemp Seed OilAnti-inflammatory, non-comedogenic, rich in omega acids
    Safflower OilLightweight, non-comedogenic, high in linoleic acid

    Dry Skin

    Carrier OilProperties
    Coconut OilMoisturizing, solid at room temperature
    Olive OilRich in vitamins, heavier oil, moisturizing
    Avocado OilDeeply hydrating, rich in vitamins
    Argan OilNourishing, rich in antioxidants, easily absorbed
    Shea ButterAnti-inflammatory, moisturizing, solid at room temp
    Cocoa ButterRich, moisturizing, solid at room temp
    Castor OilThick, hydrating, can add bubbles to bath bombs

    When selecting oils for bath bombs, it’s important to consider not only the skin type compatibility but also the potential for the bathtub to become slippery, the oil’s scent, and its ability to mix.

    Additional Tips for DIY Bath Bomb Enthusiasts

    Crafting your own bath bombs can be a rewarding experience, but even the most seasoned DIYers can encounter issues. The following tips will help refine your techniques and enhance the quality of your homemade bath bombs.

    Troubleshooting Common Problems

    • When your bath bombs aren’t quite turning out as expected, start by checking the moisture level. If they’re crumbly, a spritz of rubbing alcohol can help bind the ingredients without setting off the reaction that water might cause.
    • On the flip side, if your bombs are expanding in the mold, it could be a sign of too much moisture. Press the mixture firmly into the mold to ensure it compacts well.

    Packaging and Presentation Ideas

    After you’ve made a few successful batches of bath bombs, we recommend adding dried flowers to your recipes for a more luxurious bathing experience. If you don’t mind cleaning up the petals after the bath, dried flowers are an incredible way to enhance your bathing experience.

    First impressions count; showcase your homemade bath bombs with creative packaging. Clear cellophane bags tied with a ribbon or hemp can give a simple yet elegant look.

    For a more rustic approach, use small cardboard boxes or egg cartons as eco-friendly alternatives. Remember, presentation elevates the perceived value of your craft.

    Activated Charcoal Bath Bomb FAQs

    How do you incorporate activated charcoal into homemade bath bombs?

    To include activated charcoal in your bath bomb mixture, combine it thoroughly with dry ingredients like baking soda and citric acid before adding any wet components. This ensures even distribution of the charcoal throughout the bath bomb.

    What are the benefits of using activated charcoal in bath bombs?

    Activated charcoal in bath bombs may help detoxify the skin by binding to dirt and oil on the skin’s surface. The ingredient is praised for its deep-cleansing properties and its ability to give a purifying bathing experience.

    Which recipe is best for creating an activated charcoal bath bomb?

    A recipe that balances skin-soothing agents and carrier oils with activated charcoal, such as coconut and shea butter, to prevent dryness could be considered best for creating a nurturing yet detoxifying bath bomb.

    Fizzing bath bombs that color the bath water are great, but we consider how they nourish the skin even more important. Place a high value on the underlying ingredients of any bath bomb product or recipe you consider.

    How do you achieve a deep black color in bath bombs without staining the tub?

    You should consider ingredients like activated charcoal or Liquid Black Iron Oxide for a deep black color. Test the bath bomb in a small amount of water first to ensure it won’t stain your tub.

    That said, everyone’s tub is different, including how it may or may not get stained with bath bomb colorants. If you’re adding colorants to your bath water, there is always a risk of staining. The darker and more vibrant the colorants may especially lead to staining.

    Lastly, if you definitely want to reduce staining and clean up as much as possible, we recommend using polysorbate 80. You can add that as an ingredient during the mixing step, where you mix in the wet ingredients. See other sections in the above post for more information on that.

    What is the recommended amount of activated charcoal to use for a detox bath bomb?

    While there is no one-size-fits-all answer. Generally, a recommended amount ranges from a half teaspoon to two teaspoons per batch of bath bombs, depending on the desired color and detoxification level.

    Are there any skin-detoxifying properties associated with using charcoal bath bombs?

    Yes, charcoal bath bombs have skin-detoxifying properties. Activated charcoal attracts toxins and chemicals, which may help cleanse and detoxify the skin.

  • Apple Cider Vinegar Scalp Scrub: Guide and 3 DIY Recipes

    Apple Cider Vinegar Scalp Scrub: Guide and 3 DIY Recipes

    Apple Cider Vinegar Scalp Scrub: Guide and 3 DIY Recipes

    Maintaining a healthy scalp is just as crucial as taking care of your skin, especially when dealing with product buildup, itchiness, or dandruff. DIY apple cider vinegar scalp scrubs are a solid solution you can easily create to relieve these issues at home.

    Table Of Contents
    1. 5 Benefits of Apple Cider Vinegar (ACV) for Your Scalp
    2. Choosing the Right Ingredients
    3. 3 DIY Apple Cider Vinegar Scalp Scrub Recipes
    4. Proper Application for Optimal Results
    5. Safety and Precautions
    6. Customizing for Different Hair Types
    7. Maintaining a Healthy Scalp Post-Exfoliation
    8. Comparison to Salon Treatments
    9. Perfecting Your Hair Care Routine with ACV Scrubs
    10. Apple Cider Vinegar Scalp Scrub FAQs

    We love this common household item for face care, but it also works well for the hair and scalp. Apple cider vinegar (ACV), known for its natural cleansing properties, works as an excellent base for a scalp scrub.

    • Its acidic nature helps balance the pH of your scalp and contains alpha-hydroxy acid that gently exfoliates away dead skin cells.
    • Creating your own scalp scrub with apple cider vinegar is simple and cost-effective.
    • It can help alleviate common scalp issues by removing excess oils and product residue without stripping natural moisture.

    Lastly, regular use of an apple cider vinegar scalp scrub can provide a deeper cleanse than shampoo alone, leaving you with a refreshed, invigorated feeling and setting the stage for healthier-looking hair.

    5 Benefits of Apple Cider Vinegar (ACV) for Your Scalp

    Rich in natural properties, ACV may contribute to a better environment for hair growth and scalp maintenance.

    1.) Balancing pH Levels

    Your scalp’s pH levels are essential for maintaining healthy hair and scalp condition.

    Apple cider vinegar is believed to help balance the pH levels of the scalp, creating a more optimal environment that may reduce the likelihood of developing conditions like seborrheic dermatitis.

    2.) Removing Residue and Product Buildup

    Over time, residues from hair products accumulate on your scalp, potentially clogging hair follicles.

    Using apple cider vinegar as part of your hair care routine may serve as a natural clarifying shampoo, helping to remove product buildup and residue without stripping hair of its natural oils.

    3.) Combatting Dandruff and Flaky Scalp

    ACV’s natural acidity and antifungal properties may offer relief for those suffering from dandruff and a flaky scalp.

    By applying an apple cider vinegar scalp scrub, you can gently exfoliate the scalp, potentially keeping dandruff at bay. The anti-dandruff effects are substantial when paired with ingredients like lemongrass essential oil.

    This special essential oil has demonstrated a high level of efficacy in relieving dandruff, as demonstrated in studies.

    4.) Promoting Hair Growth and Health

    The overall health of your scalp is vital for hair growth.

    Apple cider vinegar may stimulate circulation within the scalp, promoting healthy hair growth. Its use might also prevent bacteria and fungi that can lead to poor scalp conditions that hinder hair growth.

    5.) Soothing Itchy and Sensitive Scalp

    If you have an itchy scalp or sensitive scalp, the anti-inflammatory properties of apple cider vinegar might provide relief. Its application can soothe itchiness and irritation, making it a natural remedy for scalp discomfort.

    Incorporating apple cider vinegar into your hair care routine will keep your scalp clean and nourished, making it an apt environment for healthy hair growth.

    Choosing the Right Ingredients

    Crafting your DIY apple cider vinegar scalp scrub involves selecting high-quality components that nourish your scalp while effectively removing dead skin cells.

    The right balance of oils for moisture, exfoliants for a deep cleanse, and natural add-ins can enhance your scrub’s benefits significantly.

    Oil Selection for Moisture

    Incorporate a nourishing oil base to ensure your scalp maintains its natural oils after exfoliation.

    • Coconut oil is praised for its hydration properties and can prevent your scalp from drying out.
    • Jojoba oil is another superb option, as it closely resembles the scalp’s own sebum.
    • Avocado oil, rich in vitamins, provides additional moisture and strength to the hair follicles.
    • Argan oil, as a natural emollient, is proven to protect the hair and moisturize the scalp.

    Exfoliants for a Deep Clean

    A natural exfoliant is crucial for sloughing off dead skin cells and product buildup. As we mentioned earlier, ACV can naturally and gently exfoliate dead skin cells due to the alpha hydroxy acid it contains.

    That said, depending on your hair and scalp, you may find adding an additional exfoliant will make the process more efficient.

    Sugar is a gentle choice that effectively exfoliates without being too harsh on your scalp.

    Colloidal oatmeal: We’ve mentioned this amazing skincare ingredient in multiple other blog posts, but we had to mention it here, too, because it works wonders for an inflamed, flaky scalp. It’s anti-inflammatory, seals in moisture as a natural emollient, and it’s a gentle exfoliation ingredient especially suitable for sensitive skin.

    Salt: Salt is an excellent exfoliator for hair and scalp due to its natural abrasive texture, which helps to slough off dead skin cells and remove product buildup effectively. Additionally, salt’s purifying properties can help absorb excess oil and rebalance the scalp, contributing to the overall condition of the scalp.

    We prefer using sea salt whenever possible.

    If all you have are normal oats, simply grind them into a fine powder or in a blender. That can then be added to DIY recipes for the above benefits.

    Natural Add-Ins for Enhanced Benefits

    Boost your DIY scalp scrub with natural add-ins for their unique properties:

    • Honey can soothe the scalp and reduce potential inflammation due to its natural antibacterial qualities. Manuka honey is especially known for being skin-soothing. It’s a skincare ingredient we recommend purchasing if you haven’t already.
    • A few drops of tea tree oil can provide a refreshing sensation and have antifungal benefits.
    • Incorporate lemon juice for an extra boost of freshness and to help clarify the scalp.
    • As mentioned earlier, lemongrass essential oil is a powerful ingredient for dandruff relief, as demonstrated in studies.

    By selecting the right ingredients, you’re on your way to creating an effective and soothing DIY apple cider vinegar scalp scrub.

    3 DIY Apple Cider Vinegar Scalp Scrub Recipes

    With simple ingredients, you can prepare a natural scrub that helps remove buildup, clarifies, and balances pH levels on the scalp. By adding some of the natural add-ins discussed earlier, we can enhance the scrub with many additional benefits tailored to your hair and scalp type.

    1.) DIY Basic Apple Cider Vinegar Hair Scrub Recipe

    Ingredients:

    • 1/4 cup brown sugar
    • 1/4 cup apple cider vinegar
    • 2 tablespoons coconut oil (or a more preferred oil)
    • 1 teaspoon honey (Manuka honey preferred)
    • 5 drops essential oil (optional for fragrance)

    Instructions:

    1. In a bowl, mix the brown sugar and apple cider vinegar until well combined.
    2. Add the coconut oil to the mixture and stir in. If using solid coconut oil, the mixture may need to be slightly warmed before you can mix it in. You can also use fractionated coconut oil. Either works fine.
    3. Mix in the honey until fully incorporated.
    4. If desired, add a few drops of your chosen essential oil for added fragrance.
    5. To use, apply the mixture to your damp scalp in slow, gentle circular motions to exfoliate.
    6. Rinse thoroughly with warm water and follow with shampoo and conditioner.

    2.) DIY Invigorating Mint Apple Cider Vinegar Hair Scrub Recipe

    Ingredients:

    • 1/4 cup brown sugar
    • 1/4 cup apple cider vinegar
    • 2 tablespoons coconut oil (or a more preferred option)
    • 1 teaspoon honey (Manuka honey preferred)
    • 5-10 drops peppermint essential oil
    • Optional: 2-3 drops rosemary essential oil for spicy, fragrant tones

    Instructions:

    1. Combine the brown sugar and apple cider vinegar in a mixing bowl.
    2. Add the coconut oil to the sugar and vinegar, blending until a consistent paste is formed.
    3. Stir in the honey, ensuring it’s evenly distributed throughout the mixture.
    4. Add the peppermint essential oil for an invigorating scent and additional scalp stimulation.
    5. Apply to a wet scalp before shampooing, massaging gently in a circular motion.
    6. Rinse out the scrub with water, then shampoo and condition as usual.

    3.) DIY Anti-Dandruff Apple Cider Vinegar Hair Scrub Recipe

    Ingredients:

    • 1/4 cup Himalayan pink salt
    • 1/4 cup apple cider vinegar
    • 2 tablespoons coconut oil (or another option)
    • 1 teaspoon Manuka honey (or regular honey if Manuka is not available)
    • 10 drops lemongrass essential oil

    Instructions:

    1. In a mixing bowl, combine the Himalayan pink salt, apple cider vinegar, and coconut oil.
    2. Add the Manuka honey to the mixture and stir until all ingredients are well combined.
    3. Finally, add the lemongrass essential oil to the scrub and mix thoroughly.
    4. Apply to a wet scalp using slow and gentle motions to exfoliate.
    5. Thoroughly rinse the mixture, then shampoo and use a conditional as usual.

    As mentioned in the above instructions, it’s best to scrub first, then shampoo, and then conditioner as the last step.

    Proper Application for Optimal Results

    To achieve the best results with your apple cider vinegar scalp scrub, applying it correctly and following up with proper aftercare is crucial. An accurate application not only clears away dead skin but also ensures it fits into your hair care routine smoothly.

    Sectioning and Massaging Techniques

    Divide your hair into sections:

    Before applying the scrub, begin by sectioning your hair to expose different areas of your scalp. This ensures even distribution of the scrub.

    Gently massage the scrub onto your scalp:

    Pour a small amount into your palm and use your fingertips to gently massage it onto your scalp in circular motions. This scalp massage helps to loosen dead skin and stimulate blood flow, but be sure not to use your nails as it can cause irritation.

    Remember, don’t use too much pressure for this step!

    Rinse and Aftercare

    After thoroughly massaging your scalp, it’s time to rinse out the scrub.

    Use lukewarm water to carefully wash away all traces of the scrub, ensuring that none remains on your scalp or hair. Follow with a mild shampoo and conditioner, if necessary, to remove any lingering residue and to condition your hair.

    For the shampoo step:

    Safety and Precautions

    When introducing an apple cider vinegar scalp scrub to your hair care routine, it’s important to be aware of the potential for skin sensitivity and the importance of using the scrub properly to avoid irritation.

    Understanding Skin Sensitivity and Reactions

    Your scalp is covered with skin cells that can be sensitive, just like the skin on the rest of your body.

    Before using an apple cider vinegar scalp scrub, it’s crucial to patch-test it on a small area of your scalp, even if it’s a DIY mix. Apply a small amount to a discreet area of your scalp, wait a few minutes, and rinse. If there’s no inflammation for 24-48 hours, you can proceed with using as normal.

    If you experience redness, itching, or swelling, this could indicate a sensitivity or allergy, and you should avoid using the scrub.

    While apple cider vinegar doesn’t cause any skin reactions in most people, it’s best to be on the safe side if you haven’t used it before, especially if you have a lot of skin allergies.

    Avoiding Overuse and Abrasion

    Scalp scrubs should be used with caution to prevent overuse and abrasion. The same can be said for any skin exfoliating scrub.

    Never use a skin scrub excessively.

    • Limit your use to once a week or less if you have a sensitive scalp.
    • Be gentle when massaging the scrub into your scalp to avoid irritating your sensitive skin.

    Remember: The goal is to remove dead skin cells and product residue without causing damage to your scalp.

    Consulting with Dermatologists or Trichologists

    If you’re unsure about introducing an apple cider vinegar scalp scrub into your hair care regimen or if you have underlying scalp conditions, consulting with a dermatologist or trichologist is a good idea.

    These professionals can assess your scalp’s health and provide guidance tailored to your needs, ensuring you use the scrub safely and effectively.

    Customizing for Different Hair Types

    When creating a DIY apple cider vinegar scalp scrub, it’s important to modify the recipe to complement your unique hair and scalp needs.

    This is exactly why we love DIYs: We pick the ingredients and concentrations entirely tailored to our exact preferences.

    Adjusting for the specific characteristics of your hair ensures the most effective and gentle cleanse.

    Adjustments for Oily or Dry Scalp

    • Oily scalp: Incorporating ingredients like sea salt can help absorb excess oils without over-drying. The sea salt works to combat oiliness, while the apple cider vinegar acts as an astringent, leaving your scalp feeling refreshed.
    • Dry scalp: Consider using a lesser quantity of apple cider vinegar and adding a hydrating component such as honey or aloe vera, which can provide moisture while still cleansing.

    Consideration for Color-Treated Hair

    If you have color-treated hair, you’ll want to be careful with the apple cider vinegar concentration.

    We recommend at least a 1:5 ratio of ACV to water, but a 1:10 ratio would be even better. That would equate to 1 tablespoon of ACV to 10 tablespoons of water.

    • Dilute the vinegar more than you would for untreated hair to prevent the acidity from stripping away color or causing undue dryness.
    • Due to its acidity, AVC closes the hair cuticles, helping to seal in color after color treatments.
    • We recommend you wait a few days after a color treatment before using apple cider vinegar in your hair routine.

    When it comes to exfoliants, if you use them at all on your color-treated hair, use milder exfoliants like jojoba beads or sugar, which can scrub away buildup without affecting your hair color.

    Tailoring to Hair Thickness and Texture

    Hair thickness and texture can also determine the composition of your scalp scrub.

    Fine or thin hair benefits from a lighter scrub that won’t weigh down strands, whereas those with thicker hair may require a more substantial mixture to fully reach the scalp.

    For coarse or curly textures, consider ingredients that will also define and nurture curls, such as argan oil, which enhances the strength and elasticity of the hair.

    Maintaining a Healthy Scalp Post-Exfoliation

    After exfoliating your scalp with an apple cider vinegar scrub, it’s crucial to nourish your scalp. The goal is to balance removing build-up while maintaining essential moisture. We’ve already covered some of this, but it’s worth diving in a bit deeper.

    Here’s how to care for your scalp following exfoliation:

    • Hydrate: Just like your skin, your scalp needs hydration. Use a lightweight, hydrating conditioner, especially focusing on the mid-length to the ends.
    • Gentle Products: Choose hair care products formulated for sensitive skin or post-exfoliation care. Look for ingredients that nurture the scalp without causing irritation.
    • Avoid Heat: Minimize the use of heat styling tools immediately after exfoliating, as your scalp may be more sensitive.

    Weekly Routine for Scalp Health:

    DayRoutine
    Post-ScrubApply conditioner.
    Day 2Use gentle styling products.
    Day 3Monitor scalp moisture.
    Day 4Avoid heat styling.
    Day 5Rehydrate with a hair mask.
    Day 6Rest, no heavy products.
    Day 7Assess scalp condition.

    Diet and Hydration: Don’t forget the role of a healthy diet and ample water intake in maintaining a healthy scalp. You must drink plenty of water and consume a balanced diet rich in nutrients.

    Remember, your scalp may take some time to adjust to a new exfoliation ritual. Pay attention to how your scalp feels and adjust your routine accordingly to keep your scalp and hair looking and feeling healthy.

    Comparison to Salon Treatments

    When considering a DIY apple cider vinegar scalp scrub versus salon treatments, you are looking at two entirely different experiences.

    Cost and Convenience:

    • Salon: Higher costs for professional services and products. Ninety-nine percent of the time, you’ll be exposed to a plethora of chemicals and be charged accordingly. However, they will be able to make very knowledgeable and specific recommendations for your hair type if they’re skilled in their craft.
    • DIY: Lower expenses; apple cider vinegar and additional ingredients are generally affordable and widely available. You control the ingredients you use and don’t have to use any chemicals. We prefer DIY whenever possible as a lifestyle choice for the overall goal of reducing regular chemical exposure.

    Experience:

    • Salon: Personalized care, often with a relaxing environment.
    • DIY: You adapt the scrub to your preferences, applying it in your own home.

    Professional Expertise:

    • Salon: Stylists possess in-depth knowledge of scalp health. Or, at least, this should be the case. The reality is that there are some bad stylists out there. If going to a salon, do your research to ensure you’re seeing a skilled and knowledgeable stylist.
    • DIY: You rely on your own understanding and research.

    Customization:

    • Salon: Treatments can be tailored to your specific needs.
    • DIY: With a DIY approach, you control the ingredient mix and concentration. You can take an even more tailored approach to your needs, though it may involve a period of trial and error.

    Time:

    • Salon: Appointments can be time-consuming.
    • DIY: Scrubs can be prepared and applied quickly at home.

    Remember, salon experiences provide the expertise of a stylist to address complex scalp issues and recommend specific treatments. For us, we don’t have a need for salon visits or stylists since we can easily do everything at home.

    All of that being stated, admittedly, a trip to a hair salon can be very enjoyable once in a while. And, if you have hair that’s more difficult to manage, professional stylists can be incredibly helpful. So, consider your own preferences, the pros and cons of either option, and see what works best for you.

    Perfecting Your Hair Care Routine with ACV Scrubs

    As we wrap up our journey through the world of apple cider vinegar scalp scrubs, it’s clear that these DIY recipes offer a customizable, cost-effective, and natural approach to hair care.

    From the basic brown sugar scrub to the invigorating mint scrub, each blend caters to different needs, ensuring that no matter your hair type, there’s a scrub that can enhance your routine. Embrace the simplicity and effectiveness of these homemade solutions, and enjoy the journey to a healthier, happier scalp.

    Apple Cider Vinegar Scalp Scrub FAQs

    What are the benefits of using apple cider vinegar in a scalp scrub?

    Apple cider vinegar’s acidic nature helps to balance the pH levels of your scalp, fostering a healthy environment for hair growth. It’s also known for its antimicrobial properties, which can combat dandruff-causing yeast overgrowth.

    How can I create a homemade scalp scrub for enhancing hair growth?

    To enhance hair growth, mix a tablespoon of apple cider vinegar with a natural exfoliant like brown sugar or ground oats for overall nourishment. Then, mix in rosemary essential oil, which has been demonstrated in studies to increase hair growth.

    Peppermint EO and tea tree are also promising EO options.

    Massage the mixture gently into your scalp to remove buildup and stimulate circulation.

    In what ways can a sea salt and apple cider vinegar scrub help with scalp health?

    Combining sea salt with apple cider vinegar creates a scrub that can exfoliate excess skin and oil buildup, providing a deep cleanse and improving overall scalp health, which is essential for healthy hair.

    What are the steps to make a DIY coffee scalp scrub, and how does it compare to apple cider vinegar scrubs?

    Mix ground coffee with a spoonful of apple cider vinegar and a carrier oil like coconut oil to create a DIY coffee scalp scrub. Coffee can enhance exfoliation, while ACV helps balance the scalp’s pH; together, they promote a clean, healthy scalp.

    How does an apple cider vinegar scalp detox contribute to reducing dandruff?

    Apple cider vinegar scalp detox involves using ACV to break down dandruff flakes and residue, thanks to its antifungal attributes. This can diminish the symptoms of dandruff over time with regular use.

    As we mentioned a few times in the post, definitely read up more on lemongrass essential oil if you’re struggling with dandruff. We included it in the DIY dandruff scrub ACV recipe for that reason (see the above post).

    Can I use apple cider vinegar in a scalp scrub for curly hair without drying it out?

    Absolutely.

    Apple cider vinegar can be mixed with moisturizing agents like honey or avocado to create a scalp scrub that won’t dry out curly hair. This can remove buildup while maintaining the necessary moisture curly hair needs.

    As mentioned earlier, limit DIY exfoliating hair scrub use to once every week or two.

  • Agave Nectar for Skin: Key Benefits and 3 DIY Recipes

    Agave Nectar for Skin: Key Benefits and 3 DIY Recipes

    Agave Nectar for Skin: Key Benefits and 3 DIY Recipes

    Agave nectar is gaining popularity as a versatile and natural skincare ingredient. Extracted from the blue agave plant, this sweet liquid is more commonly known for its role as a sugar substitute, but its benefits extend far beyond the kitchen.

    When applied topically to your skin, agave nectar can be soothing and hydrating, making it an attractive option for those looking to enrich their skincare routine with natural products. Rich in sugars like fructose, this plant-derived nectar helps to retain moisture and offers a gentle softness to your skin.

    With its naturally occurring compounds, agave nectar may help in enhancing your skin health without the harshness of synthetic ingredients. Its potential antibacterial properties contribute to a clearer complexion by fighting the bacteria that can lead to skin issues.

    Moreover, the antioxidants present in agave nectar are thought to combat free radicals, contributing to the maintenance of your skin’s elasticity and youthfulness. As more individuals seek out plant-based alternatives for skin care, agave nectar stands out as a compelling, natural choice that aligns with a holistic approach to beauty.

    A Brief Background of Agave Nextor

    Derived from the agave plant, agave nectar is a sweetener that has found its way from traditional uses to modern skincare products.

    History of Agave Usage

    Agave, specifically the blue agave plant, has been intimately connected with the cultures of Mesoamerica for thousands of years.

    The Aztecs valued it for its therapeutic properties, utilizing the sap for its healing benefits. This plant wasn’t just a source of sweetener; it held spiritual significance in that culture and played a role in traditional medicine.

    Comparing Blue Agave to Other Varieties

    While the blue agave is most famously linked to the production of tequila and for skincare purposes, its sap (agave nectar) sets it apart. The blue agave’s high fructose content distinguishes it from other varieties.

    It is richer than most and more concentrated not just in sweetness but also in the beneficial compounds your skin craves.

    When choosing an agave product, it’s crucial to discern between the blue agave plant and its counterparts to ensure you reap the intended benefits.

    Properties of Agave Nectar

    Agave nectar has gained popularity not just in the kitchen but also in the skincare realm. This section will delve into the properties of agave nectar that make it a noteworthy addition to your skincare routine, focusing on its nutritional makeup, sugar profile, and antioxidant capacity.

    Nutritional Profile

    Agave nectar is primarily composed of sugars, with fructose being the predominant.

    Additional nutrients include a number of vitamins, including B2, B6, B9, C, and K.

    Notably, vitamin C is an antioxidant that helps protect the skin from environmental damage, while vitamin K is known for its role in the body’s healing process and may help with skin elasticity and tone.

    Skin Benefits of Agave Nectar

    With its natural ability to attract and retain moisture, coupled with soothing components, agave nectar can be a pivotal ingredient in maintaining healthy and vibrant skin.

    Hydration and Moisturization

    Your skin craves hydration to stay supple and smooth. Agave nectar is a natural humectant, which means it hydrates your skin by drawing moisture from the environment.

    The high sugar content, similar to that of honey, ensures your skin retains its natural moisture, giving you refreshed, supple skin.

    • Key Component: Natural sugars
    • Benefit: Retains moisture, leaving skin supple and hydrated

    Anti-Inflammatory Properties

    If you’re dealing with redness or skin irritation, agave nectar’s anti-inflammatory qualities can help. It contains saponins, known for their soothing effects on various skin issues, including irritated skin.

    • Key Component: Saponins
    • Benefit: Reduces inflammation and soothes irritated skin

    Anti-Aging Effects

    Aging skin benefits from the rejuvenating effects of agave nectar. Packed with the vitamins mentioned earlier, agave promotes a youthful glow and minimizes the appearance of fine lines, working against common signs of aging.

    • Key Ingredient: Vitamins C and K
    • Benefit: Promotes a youthful appearance, reducing signs of aging

    Aiding in Acne and Blemishes

    The antimicrobial and antioxidant properties of agave nectar make it a strong ally in the fight against acne and blemishes. By reducing harmful bacteria on the skin’s surface, agave nectar assists in clearing and preventing acne without harsh chemicals.

    • Key Action: Antimicrobial and antioxidant activity
    • Benefit: Helps clear acne and maintain blemish-free skin

    Skin Soothing Effects

    Agave nectar can calm your skin just as effectively as it can soothe a sweet tooth. It offers comfort to stressed and irritated skin, providing a soft, soothing touch that enhances the skin’s overall texture and health.

    • Key Feature: Natural soothing agents
    • Benefit: Calms and softens irritated skin, promoting overall skin health

    By incorporating agave nectar into your skincare routine, you give your skin a chance to enjoy these natural, beneficial properties.

    Agave Nectar in Skincare Products

    Agave’s skincare applications range from homemade and DIY products to a number of professionally manufactured products designed for everyday skincare routines.

    Face Masks with Agave Nectar

    Incorporating agave nectar into your face masks can significantly enhance their hydrating and anti-inflammatory benefits.

    For instance, combining agave with aloe vera forms a potent blend that can help soothe and moisturize the skin. The natural components present in agave are especially beneficial for hydration and promoting a smooth complexion.

    Other DIY Skincare Recipes

    You can create a gentle exfoliant by adding ingredients like oatmeal and enrich the hydrating effects of your favorite DIY face exfoliator scrubs with a teaspoon of agave nectar.

    Skincare for Sensitive Skin

    If you have sensitive skin, agave nectar is a gentle alternative to harsher skincare additives.

    Its gentle and nourishing properties help to reduce irritation and support skin recovery, particularly when combined with gentle ingredients like manuka honey, aloe, and oatmeal.

    Commercial Products Containing Agave

    A variety of commercial products containing agave are available for those who prefer pre-made skincare solutions.

    Many of these formulations feature agave nectar as a key hydrating agent, complemented by other beneficial substances such as essential oils and botanical extracts that cater to a wide range of skin requirements, including those with a preference for organic skincare.

    Safety and Side Effects

    When considering the use of agave nectar for skin, it’s important to be aware of potential safety issues and side effects that might affect you.

    Dermatological Considerations

    Fresh agave nectar contains compounds that may cause skin irritation upon direct contact.

    Therefore, we do not recommend using fresh agave sap or nectar on your skin. Instead, you can purchase agave nectar online that’s gone through enough processing to reduce the likelihood of skin reactions. We prefer organic varieties as we do with most natural ingredients.

    Sensitive Skin and Patch Testing

    You should be particularly cautious if you have sensitive skin, just as with any new skincare ingredient. A patch test is recommended before the first use, especially if you have a history of plant allergies.

    Place a small amount of agave nectar on your inner forearm, cover it with a bandage, and wait for 24 hours. If you experience redness, swelling, or itching, you might have an allergy and should avoid using agave on your skin.

    3 Natural DIY Agave Skincare Recipes

    Agave nectar can be integrated into various DIY skincare recipes due to its soothing properties. For a simple home remedy, you can mix agave nectar with ingredients like turmeric or oatmeal to create a face mask that hydrates and brightens the skin. Let’s take a look at three DIY recipes below.

    1.) Agave Nectar Soothing Hydration Mask

    Indulge in a wave of moisture with this soothing hydration mask, perfect for dry or sensitive skin. Agave nectar pairs with calming colloidal oatmeal to provide deep hydration and reduce redness.

    Ingredients:

    • 1 tablespoon agave nectar
    • 2 tablespoons colloidal oatmeal
    • 1 teaspoon almond oil
    • A few drops of lavender essential oil (optional for added relaxation)

    Instructions:

    1. In a small bowl, mix the agave nectar and colloidal oatmeal until you get a smooth paste.
    2. Add the almond oil and mix well. If desired, add a few drops of lavender essential oil for its calming properties.
    3. Apply the mask to your face, avoiding the eye area. Leave it on for 15-20 minutes.
    4. Rinse off with warm water and pat your skin dry.

    2.) Blue Agave Brightening Exfoliator

    Reveal radiant skin with this gentle yet effective brightening exfoliator. Blue agave teams up with natural exfoliants to slough away dead skin cells, leaving your skin bright and refreshed.

    Ingredients:

    • 1 tablespoon blue agave nectar
    • 2 tablespoons ground brown rice or rice flour
    • 1/2 teaspoon lemon juice
    • 1 teaspoon jojoba oil

    Instructions:

    1. Combine blue agave nectar, ground brown rice, and lemon juice in a bowl.
    2. Stir in the jojoba oil to create a paste. If the mixture is too thick, add a little more agave nectar.
    3. Gently massage onto your face in circular motions for 1-2 minutes.
    4. Rinse with lukewarm water and follow up with a moisturizer.

    3.) Agave Kissed Shea Butter Lip Balm

    Pamper your pout with this nourishing lip balm, where agave nectar meets shea butter for an ultra-moisturizing experience. Perfect for chapped lips in need of some love and care.

    Ingredients:

    • 1 tablespoon shea butter
    • 1 teaspoon agave nectar
    • 1 teaspoon beeswax pellets
    • 2 drops of peppermint essential oil (optional for a cooling effect)

    Instructions:

    1. In a double boiler, gently melt the shea butter and beeswax pellets together, stirring until they are fully combined.
    2. Remove from heat and let the mixture cool for a minute before stirring in the agave nectar. If you’re using peppermint essential oil, add it now for a refreshing tingle.
    3. Once everything is well mixed, pour the liquid balm into small lip balm containers or tubes.
    4. Allow the balm to set and solidify, which may take a couple of hours at room temperature or quicker if placed in the refrigerator.
    5. Once set, apply to your lips for a smooth, hydrating experience.

    Each of these DIY skincare recipes with agave is designed to harness the natural benefits of the ingredients for radiant, healthy skin.

    Remember to do a patch test with any new skincare product, even natural ones, to ensure you don’t have a reaction before applying it to your face or lips. Enjoy crafting these natural skincare treats!

    Enhancing Agave Nectar for Skin Application

    Agave nectar can be significantly enriched through the integration of additional natural components tailored to meet your skin’s specific requirements.

    Mixing with Other Natural Additives

    If you’re seeking to amplify the efficacy of agave nectar for skincare, you can incorporate a variety of natural additives, as we did in some of the above recipes.

    • For instance, adding cinnamon can create a warming effect that enhances circulation.
    • Turmeric is renowned for its anti-inflammatory qualities, potentially diminishing the visibility of blemishes.
    • On the other hand, coffee grounds serve as an exfoliant, aiding in the removal of dead skin cells.
    • Baking soda can be included for its gentle cleansing properties, especially for use in the hair.

    Creating Custom Mixtures for Different Skin Types

    When making custom skincare mixtures, it’s crucial you select ingredients that synergize with your unique skin type.

    • For oily skin, you might find a mixture of agave nectar with a few drops of tea tree oil beneficial due to its antibacterial traits.
    • If you have dry skin, consider incorporating avocado, which is rich in fatty acids, to enhance moisturization. You can enrich the blend further with something heavier like shea butter.
    • To soothe sensitive skin, a combination of agave nectar with lavender oil can yield a calming effect. You can easily create face masks easily just by adding some ground oats or colloidal oatmeal.

    Wrap-Up: Agave and Skincare

    In the realm of natural skincare, agave nectar is a lesser-known ingredient but offers benefits for a radiant complexion.

    As we’ve explored through our DIY recipes, agave is yet another ingredient that enables you to introduce more variety in your DIY skincare creations while also elevating your skincare routine with its benefits.

    Whether it’s through a soothing mask, a brightening scrub, or a moisturizing lip balm, agave nectar’s gentle yet effective properties make it a must-try for anyone seeking to embrace the power of natural ingredients in their skincare regimen.

    As you integrate these agave-infused creations into your self-care rituals, you’re not just pampering your skin—you’re also tapping into an ancient beauty secret that has stood the test of time.