What is an Enzyme Facial? 3 DIY Enzyme Peel Recipes
If you enjoy simple, natural skincare that delivers real results, enzyme facials are a gentle and effective option. They rely on fruit-based enzymes to exfoliate the skin in a mild, non-abrasive way, helping remove buildup that can make your complexion look dull or uneven.
- Have You Ever Wondered About Enzyme Facials?
- Understanding Enzyme Facials
- How Enzyme Facials Work
- Benefits of Enzyme Facials
- Choosing the Right Enzyme for Your Skin Type
- Preparing for an Enzyme Facial
- Enzyme Facial vs. Chemical Peel: What's the Difference?
- #1: DIY Papaya and Pineapple Enzyme Peel Recipe
- #2: DIY Pumpkin and Honey Enzyme Peel Recipe
- #3: DIY Banana and Yogurt Enzyme Peel Recipe
- Tips for a Successful DIY Enzyme Facial at Home
- Safety Precautions and Allergies to Consider
- FAQs: Enzyme Facials and Peels
- 1. What exactly is an enzyme facial?
- 2. How do enzyme facials work?
- 3. Are enzyme facials safe for sensitive skin?
- 4. How often should I get an enzyme facial?
- 5. What should I expect after an enzyme facial?
- 6. Can I do an enzyme facial at home?
- 7. What ingredients are commonly used in DIY enzyme peel recipes?
- 8. How long should I leave an enzyme mask on my skin?
- 9. Is it possible to have an allergic reaction to an enzyme facial?
- 10. Can I use regular skincare products after an enzyme facial?
Enzyme facials work well for anyone wanting a smoother texture, a fresh glow, or a softer feel without the irritation that often comes with stronger peels or scrubs.
Have You Ever Wondered About Enzyme Facials?
Enzyme facials have earned a lot of attention in the skincare world for offering a more gentle approach to exfoliation. They help support healthy skin turnover, brighten dull areas, and refresh the complexion with minimal irritation. If your goal is radiant, comfortable skin without complicated steps, enzyme facials are a wonderful option worth exploring.
Understanding Enzyme Facials
An enzyme facial is a type of skin treatment using topical applications of natural enzymes that accelerate the process of skin exfoliation, alleviate skin discolorations, and improve skin texture.
These enzymes, primarily from fruits such as papaya, pineapple, and pumpkin, aid in breaking down the ‘glue’ that holds dead skin cells together. When applied to the skin, these enzymes encourage the removal of dead skin, allowing newer, healthier skin cells to surface.
How Enzyme Facials Work
Now that we know what an enzyme facial is, you might be wondering how it actually works. The magic is all in the enzymes. When applied, enzymes, which are proteolytic (protein-breaking) agents, catalyze a reaction that breaks down keratin (protein) in the skin. By doing so, they help to exfoliate the top layer of the skin, removing dead skin cells and impurities.
This unique mechanism allows for a gentler effect compared to other forms of chemical exfoliation, making enzyme facials an ideal choice for those with sensitive skin.
Common Enzymes in Enzyme Facials and Peels:
- Papain: Found in papaya, this enzyme breaks down unnecessary proteins on the skin’s surface.
- Bromelain: This pineapple-derived enzyme acts as a natural exfoliant, removing dead skin cells.
- Pumpkin Enzymes: They speed up cell turnover, brightening and rejuvenating the skin.
The Science Behind Enzyme Facials
As already alluded to, the science behind enzyme facials lies in their biochemical properties. Enzymes are biological molecules (proteins) that speed up chemical reactions—in this case, the natural shedding process of the skin, also known as desquamation.
Dead skin cells on the surface layer of our skin contain a protein called keratin. When the enzymes in these facials come into contact with this protein, they cause it to break down, resulting in exfoliation.
After the enzyme facial, newer, healthier skin is revealed after removing the layer of dull, dead skin cells. The beauty is it’s all done naturally and gently.
In essence, enzyme facials leverage the biochemical properties of natural enzymes to encourage a naturally glowing skin by removing dead skin cells.
Pineapple enzyme is known for its brightening and clarifying effects on the skin. – Science Direct
DIY enzyme peels can be a cost-effective alternative to professional enzyme facials. – Byrdie
Benefits of Enzyme Facials
After a long day, treating yourself to a gentle, naturally exfoliating facial can feel incredibly refreshing. One of the best parts is that enzyme facials can be done easily at home using simple, affordable ingredients. Here are some of the key benefits:
- Natural exfoliation
Enzyme facials help break down keratin in dead skin cells so they can be removed without scrubbing. The process is gentle, effective, and ideal for anyone who dislikes abrasive exfoliators. - Brighter complexion
By lifting away dull surface buildup, enzyme treatments reveal a fresher, more radiant layer of skin. This helps restore a healthy glow and smooth appearance. - Supports healthy aging
Enzymes encourage natural skin turnover, which can soften the look of fine lines and promote a smoother overall texture. - Better product absorption
With the top layer of buildup removed, moisturizers and serums can sink into the skin more effectively, helping your daily routine work even better. - Suitable for sensitive skin
Because enzymes exfoliate without acids or harsh grains, they are usually a gentler option for those who experience irritation from traditional peels.
Note: Always patch test new treatments on a small area of skin first. Research each ingredient to ensure it is appropriate for your skin type.
Choosing the Right Enzyme for Your Skin Type
Choosing the right enzyme for your skin type is crucial for the success of enzyme facials. But how to navigate through the abundance of enzyme types out there?
First, let’s unpack the most common enzymes found in facial products:
- Bromelain: Derived from pineapples, Bromelain is known to be mild and soothing, making it an excellent choice for sensitive skin. Its anti-inflammatory and antibacterial properties help to reduce redness and fight acne in acne-prone skin.
- Papain: Coming from papayas, Papain has powerful exfoliating properties. It can break down and remove dead skin cells, rejuvenating the skin and giving it a vibrant glow. It’s best suited for combination with oily skin types.
- Pumpkin enzyme: Pumpkin enzymes work great on all skin types and effectively deal with dullness, uneven skin tone, and signs of aging.
It’s important to remember that skin types can shift due to a variety of factors: seasons, hormonal changes, medication, stress, aging, as well as your current skincare regime. Always listen to your skin needs and adjust your skincare to them.
Wondering where to start?
- If you have sensitive skin, begin with milder enzymes such as bromelain. They are soothing and less likely to cause irritation.
- For combination or oily skin types, Papain can be a great choice. It’s powerful enough to help manage excess oil and clean out clogged pores.
- If you’re struggling with dullness or fine lines, pumpkin enzyme could be your go-to. It has the potency to redefine your skin’s texture and bring out its natural glow.
As mentioned at least a few times already, remember to conduct a patch test before applying any new enzyme on your face completely. Discontinue using if you experience any discomfort or allergic reactions. This is your face we’re talking about. Exercise caution.
Ultimately, the best option comes down to personal preference and how your skin responds to different enzymes. Constant testing and adjusting are key to finding what works best for your skin. Recipes will be included in a few sections below.
Preparing for an Enzyme Facial
Before starting your DIY enzyme facial, taking a few simple steps to prepare your skin will help you get the best results. A little preparation makes the treatment more effective and far more relaxing.
Step 1: Start With a Clean Base
Begin by washing your face thoroughly with a gentle cleanser. This removes makeup, oil, and dirt so the enzymes can work directly on your skin without any barriers.
Step 2: Steam Your Face
Steaming helps open your pores and allows the enzymes to penetrate more effectively.
You can:
- Use a facial steamer
- Lean over a bowl of hot water with a towel draped over your head
Aim for 5 to 10 minutes of gentle steam.
Step 3: Perform a Patch Test
Every skin type reacts differently, especially to natural ingredients. Always test first.
- Apply a small amount of the mixture to a quarter-size area on the inner arm
- Leave it on for the same length of time you plan to leave the peel on your face
- Rinse and watch for irritation
- Wait 24 hours if possible, since reactions can be delayed
If you notice no redness, stinging, or itching, it is likely safe to proceed.
Step 4: Gather Your Ingredients
Have everything you need within reach so the process feels smooth and enjoyable.
- Your chosen enzyme facial ingredients
- A clean bowl for mixing
- A brush or clean fingertips for application
- A comfortable place to recline while the mask rests on your skin
Preparing ahead ensures you can relax, unwind, and give your skin the attention it deserves. An enzyme facial is not only a skincare step but also a moment of calm that supports both skin health and overall well-being.
Enzyme Facial vs. Chemical Peel: What’s the Difference?
But what is the precise difference? You may wonder. Let’s set that straight.
Enzyme Facials
An enzyme facial is a gentle and natural form of exfoliation. It uses active ingredients derived from fruits and plants such as papaya, pineapple, or pumpkin, rich in enzymes. These enzymes accelerate the process of skin cell replacement by accelerating the chemical reactions necessary to bring forth newer, plumper cells and rid the skin of the older, dead cells.
Chemical Peels
On the other hand, a chemical peel harnesses acids for exfoliation as a result of a chemical reaction. Strong substances such as glycolic acid, salicylic acid, lactic acid, or trichloroacetic acid cause a ‘controlled injury’ to the skin. This process stimulates the body’s natural healing process, ultimately leading to smoother and more youthful-looking skin. Sound harsh?
| Enzyme Facials | Chemical Peels | |
|---|---|---|
| Exfoliation Type | Enzymatic | Chemical |
| Ingredients | Plant and fruit enzymes | Acids |
| Skin Type | Suitable for sensitive skin | Generally for stronger, oilier skin types |
While both treatments aim to improve skin texture and tone, the approach differs. An enzymatic peel offers a more gentle, natural exfoliation option while a chemical peel will offer a more intense, deep skin peeling effect.
Whenever possible, we prefer gentle skin treatments vs. harsh treatments that increase the likelihood of damaging the skin. So, enzyme peels are the way to go and are a gentler option than a chemical peel.
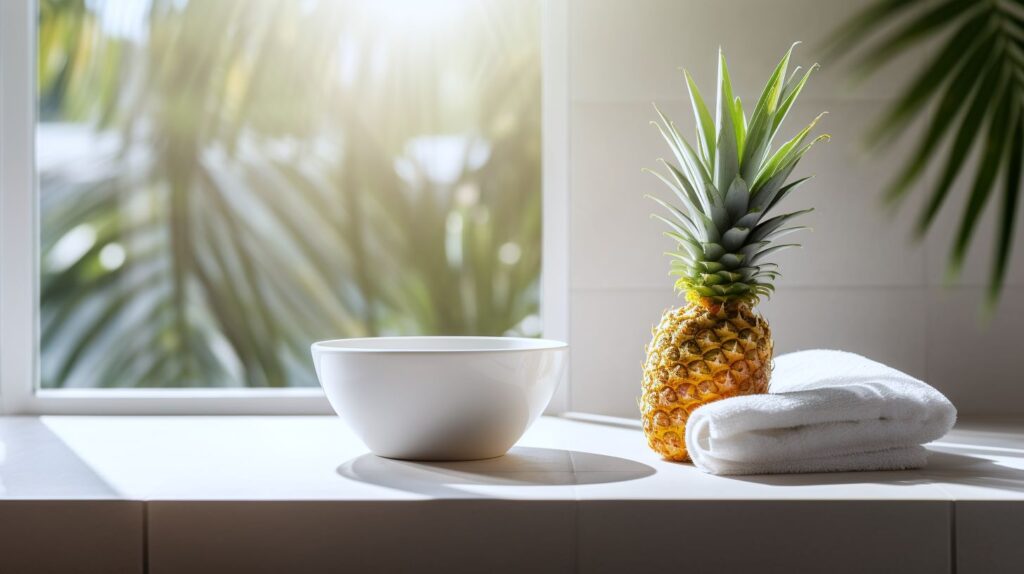
#1: DIY Papaya and Pineapple Enzyme Peel Recipe
This is a simple and easy homemade mask, perfect for those who want to freshen their skin. Here’s how you can make it:
- Get a ripe papaya and pineapple. These fruits are packed with natural enzymes that help exfoliate and cleanse the skin.
- Mash them. Take half of each fruit, remove the seeds and skin, then mash (or blend) them into a homogeneous mixture.
- Apply the mask. Apply the mixture directly onto a clean face. Leave it on your skin for around 10-15 minutes.
- Rinse off. Gently wash off with warm water.
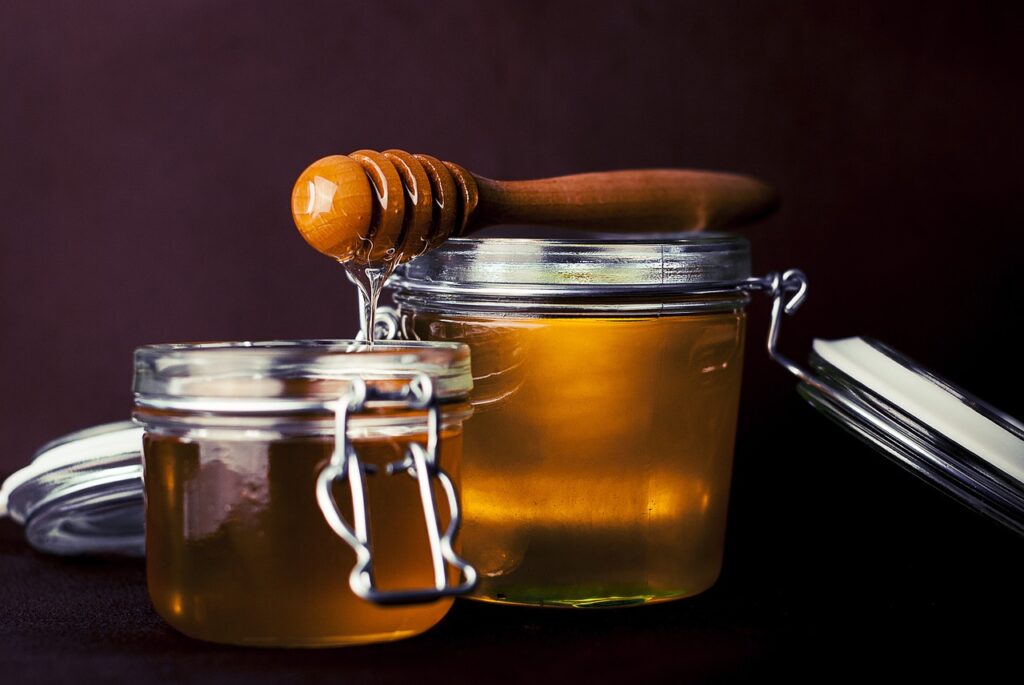
#2: DIY Pumpkin and Honey Enzyme Peel Recipe
With this recipe, you can give your skin a nice treat during the fall season. Here’s the recipe:
- Prepare your ingredients. You’ll need half a cup of pureed pumpkin, two tablespoons of honey, and half a teaspoon of milk. If you have manuka honey, that’s preferred. If not, any honey will do.
- Combine your ingredients. Mix the pumpkin puree, honey, and milk together in a bowl until you get a smooth, creamy consistency.
- Apply the mask. Apply the mask to your clean, dry skin, leaving it on for 10-15 minutes.
- Rinse off. Rinse off with warm water gently.
#3: DIY Banana and Yogurt Enzyme Peel Recipe
If you have sensitive skin, this peel is for you. Even with finicky skin, an at-home enzyme peel is still possible since you can control the ingredients, as well as how long you allow the ingredients to remain on the face. Here’s what you need to do:
- Prepare your ingredients. Grab an overripe banana and a quarter cup of plain yogurt.
- Create the mixture. Mash the banana and mix it with the yogurt until you achieve a smooth consistency.
- Apply the mask. Apply the mask onto clean, dry skin and let it sit for 10-15 minutes.
- Rinse off. Gently wash off with warm water.
Tips for a Successful DIY Enzyme Facial at Home
- Use fresh ingredients: The key to a potent and effective DIY enzyme peel is using fresh ingredients. Fresh fruits contain live enzymes that are far more active and beneficial to your skin than store-bought, processed alternatives.
- Prep your skin: Cleanse your face thoroughly before applying the peel. Any make-up, oils, or dirt can block the enzymes from fully penetrating your skin and doing their job. Check out our facial prep tips in an earlier section (see table of contents).
- Stick to the recommended frequency: It might be tempting to try these peels daily, especially when you start seeing results. However, too much of anything is harmful. Stick to a maximum of one enzyme facial every few weeks to allow your skin time to heal and regenerate. Even as little as once per month or every few months is fine. You’ll quickly learn when you should plan your next facial just by touching and observing your skin.
- Stay hydrated: Enzyme peels can sometimes cause a slight tightness on your skin – that’s normal. Rehydrate your skin immediately after rinsing off the mask by applying a high-quality, hydrating moisturizer.
- Patience is key: Skincare isn’t a race. Visible results might not occur immediately. Consistency and patience are key when it comes to DIY skincare. You’re in this for the long game, and gentle is best.
Safety Precautions and Allergies to Consider
When it comes to skincare treatments like enzyme facials, it’s essential to prioritize safety and be aware of potential allergens. This procedure involves applying various natural enzymes to your face, so it’s crucial to know how your skin will react.
Firstly, always conduct a patch test before attempting any DIY enzyme peel treatments at home. How do you do that? Simply apply a small amount of the mixture to a less visible part of your skin, such as behind your ear or on your wrist, and wait for at least 24 hours to see if any adverse reaction occurs.
We can’t stress patch testing enough. We’re serious. Test your skin’s reaction to new ingredients first!
- Allergic Reactions: Natural enzymes are usually gentle, but they can still cause rare allergic reactions in some people. Signs of an allergic reaction include redness, hives, itching, and difficulty breathing. If you experience any of these symptoms after a patch test or after the enzyme facial, discontinue use and seek medical attention immediately.
- Sensitivity: Even if you’re not allergic, you can experience some skin sensitivity or slight irritation after an enzyme facial, especially if you’ve never had one before. If your skin feels unduly tight, dry, or otherwise uncomfortable, rinse the peel off immediately with cool water. Any skin concerns warrant caution, so if you have doubts about previous apparent skin allergies, etc., get in touch with your healthcare professional beforehand.
- Exposure to UV Rays: Post-treatment, your skin may be more sensitive to UV rays. Thus, it’s a good idea to limit your exposure to the sun for a few days and apply a good SPF if you go outside.
Remember, while enzyme facials can provide several skincare benefits, they’re not for everyone. If you have any skin conditions—or if you’re currently under a dermatologist’s care or using prescribed skin products—consult with your healthcare professional before trying a DIY enzyme peel treatment at home.
Ultimately, it’s about understanding your skin, knowing your allergic reactions, and taking appropriate safety measures. So, always do your research, prepare properly, and listen to your skin!
FAQs: Enzyme Facials and Peels
If you are new to enzyme facials, you may have plenty of questions. Below are some of the most common ones, along with clear and practical answers.
1. What exactly is an enzyme facial?
An enzyme facial is a skincare treatment that uses natural fruit enzymes, often from ingredients like pineapple or papaya, to gently exfoliate the skin. These enzymes help dissolve dead skin cells on the surface, leaving the skin smoother, brighter, and more refreshed.
2. How do enzyme facials work?
Enzymes support natural skin renewal by breaking down the keratin in dead skin cells.
They work by:
- Loosening and dissolving the outer layer of dull, built-up skin
- Supporting a smoother, softer texture
- Revealing fresh, healthy-looking skin underneath
Because they work only on the surface, enzyme peels exfoliate without the intensity of strong acids or rough scrubs.
3. Are enzyme facials safe for sensitive skin?
Most people with sensitive skin tolerate enzyme facials very well. They are milder than many chemical or physical exfoliants and often feel gentle during use.
For best results:
- Always perform a patch test first
- Avoid using other exfoliators on the same day
- Choose simple, natural ingredients to reduce the chance of irritation
Enzyme peels offer an easy way to refresh the skin without relying on harsh or heavily concentrated products.
4. How often should I get an enzyme facial?
Professional estheticians often recommend treatments every few weeks or once per month, depending on your skin type. For DIY facials at home, spacing treatments farther apart is usually best.
A simple guideline:
- Every 4 to 8 weeks for most people
- Every 2 to 3 months if your skin is sensitive or if you prefer a minimal routine
Gentle, occasional treatments can help support healthy skin without over-exfoliating.
5. What should I expect after an enzyme facial?
Post-enzyme facial, you may experience minor redness, or it may appear your blood vessels are more visible, often called the “plasmatic effect” or “vascular matting”.
This typically will fade fairly quickly and is the result of having a bit more visibility into the blood flow under your previously unseen layer of skin. Ultimately, your skin should feel smoother and have a clear, glowing, more radiant appearance.
6. Can I do an enzyme facial at home?
Yes, you can. DIY enzyme facials are simple to make and use natural ingredients you may already have on hand. Always start with a patch test when trying a new ingredient to ensure your skin does not react negatively.
7. What ingredients are commonly used in DIY enzyme peel recipes?
Many fruits contain natural enzymes that gently exfoliate the skin. Common choices include:
- Papaya
- Pineapple
- Pumpkin
- Apple
You will often see soothing add-ins like honey or yogurt to help balance the mixture and keep the skin hydrated.
8. How long should I leave an enzyme mask on my skin?
Most enzyme masks should stay on the skin for 10 to 20 minutes. Leaving them on longer may cause irritation. If this is your first time, begin with a shorter time so you can see how your skin responds before working up to a full treatment.
9. Is it possible to have an allergic reaction to an enzyme facial?
Yes, it is possible, even though reactions are uncommon. Natural ingredients can still trigger sensitivities, which is why patch testing is essential. Always test any new mixture on a small area of skin before applying it to your face.
10. Can I use regular skincare products after an enzyme facial?
Yes, you can apply your normal skincare afterward, but keep it gentle. Choose products that are mild, free of harsh fragrances, and non-irritating. Natural and organic options are ideal, especially since the skin can be more sensitive immediately after exfoliation.
We believe the best natural skincare products are the ones made with whole ingredients you can actually read. Even better, homemade skincare products you’ve crafted ensure you know exactly what you’re putting on your body.