How to Make Natural Hot Process Soap: Recipe + Tips
Soaps are something we use constantly, often without giving much thought to what is actually in them. They wash away dirt, sweat, and pollutants that collect on our skin throughout the day, helping keep our skin clean and healthy.
- Synthetic Soap: Daily Exposure and Hidden Concerns
- Introduction to Making Natural Hot Process Soap
- Common Ingredients in Natural Homemade Soap
- Understanding Hot Process Soapmaking: At a Glance
- Safety First: Working With Lye
- Preparation
- Essential Materials and Ingredients
- Core Ingredients
- A Note on Superfatting
- The Process: Fat + Lye = Soap!
- Soapmaking Instructions: Follow These Steps Carefully
- Cooking the Soap
- Curing Your Soap
- Clean Up
- Storing Your Finished Soap
- Soapmaking: Natural Ingredients, Complete Customization
- Hot Process Soap FAQs
But how safe are the soaps we reach for every day?
Many commercial soaps contain synthetic fragrances, harsh detergents, and additives that can dry out or irritate the skin. If you want a gentler, more natural option, making your own hot process soap is a wonderful alternative. It gives you full control over the ingredients, creates a moisturizing bar your skin will love, and is surprisingly simple once you learn the basics.
Synthetic Soap: Daily Exposure and Hidden Concerns
Most commercial soaps, including well-known brands, rely on synthetic detergents and additives that your skin absorbs every single day. These ingredients may clean well, but they can also be drying, irritating, or unnecessarily harsh.
Why coat your skin with synthetic chemicals when you can make your own natural soap at home? If you do not have time for DIY projects, there are also many excellent natural soap options available online and sometimes at local shops, depending on where you live.
Reducing chemical exposure is one of the simplest and most effective steps you can take toward healthier skin. Choosing natural soap is an easy switch that offers better ingredients, better moisture, and better peace of mind. Making your own hot process soap is also incredibly enjoyable and gives you complete control over what touches your skin.
Many commercial soaps contain parabens, phthalates, artificial dyes, and synthetic fragrances that can irritate skin or disrupt its natural balance. If your goal is healthier, more radiant skin, using harsh chemical-laden bars might work against your efforts.
Introduction to Making Natural Hot Process Soap
Fortunately, the process of making natural and homemade soaps is becoming more popular.
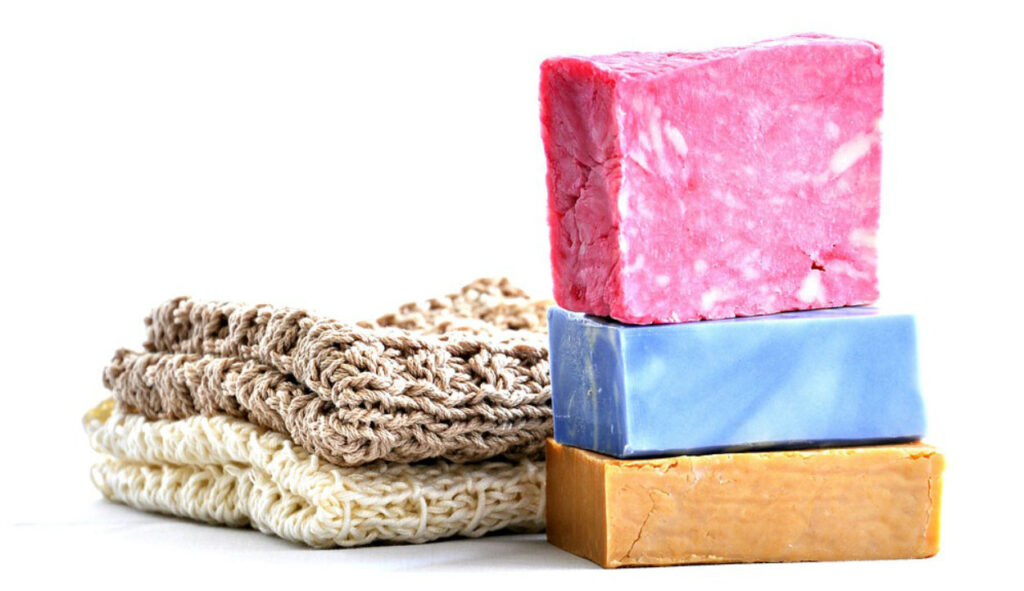
Due to increased popularity, people are getting more creative, and more varied recipes are being formulated all the time. Natural soaps can contain any number of carrier oils, essential oils, honey, oatmeal, aloe, and other organic ingredients.
True to its name, hot process soapmaking is a method carried out under higher temperatures. This distinguishes it from the traditional cold-pressed artisanal process.
The heat speeds up the saponification process, converting oils into soap more rapidly and allowing for immediate use. As appealing as it sounds, the process does require some degree of precision and caution, resulting in beautifully healthy soaps brimming with your own personal ingredient preferences (scents, flower petals, you name it!), natural ingredients, and eco-friendliness.
Why Make Your Own Soap?
Before we embark on the journey of soap creation, let’s answer a simple question. Why would it be worth the time to create soap at home? Why not just buy a bar from the nearest store? Well, there are a few compelling reasons:
- Gentleness on Skin: Commercial soaps often contain harsh chemicals and synthetic ingredients that can strip your skin of its natural oils. When you make your own, you know exactly what’s going on in it. This control allows for the creation of a soap tailored to your skin’s specific needs.
- Environmentally Friendly: Homemade soaps don’t just benefit you; they’re better for the environment as well. With no synthetic ingredients, the product is biodegradable and free from harmful pollutants. Additionally, natural ingredients can be manufactured more sustainably than synthetic ingredients, which often results in the disposal of toxic byproducts.
- Creative Outlet: Soapmaking is not just practical – it’s a chance for you to express your creativity. Experiment with various essential oils, patterns, colors, and textures to create your unique bar.
“Making soap at home is a satisfying and incredibly inexpensive. Homemade soaps are tailored to your family’s preferences and make for meaningful creative gifts.”
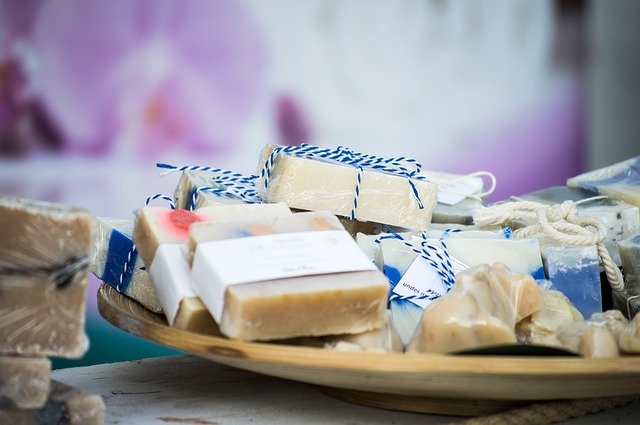
As you’re probably already aware, some great companies sell all-natural soaps found in stores that offer natural and organic beauty products. Of course, the options online for natural soap products are endless as well.
Lastly, we have a great Oatmeal Milk and Honey Soap article that includes 3 easy recipes. They all use the melt-and-pour soapmaking method, where you’ll be starting with a premade soap base rather than making your own from scratch, as in the hot and cold process soapmaking methods.
But why settle for only store-bought soaps when you can enjoy the experience of using your own creativity to formulate a new scent, color scheme, or lather preference? That’s right, all of that’s up to you when you make your own soap and more.
Common Ingredients in Natural Homemade Soap
Below, see a shortlist of a few commonly used ingredients classified across five categories.
Base Oils and Fats
| Ingredient | Benefit/Purpose |
|---|---|
| Olive Oil | Moisturizes and nourishes the skin. |
| Coconut Oil | Provides rich lather and cleansing. |
| Palm Oil | Creates a hard bar of soap. |
| Sunflower Oil | Adds a creamy and stable lather. |
| Shea Butter | Offers extra moisturizing properties. |
Lye (Sodium Hydroxide)
| Ingredient | Benefit/Purpose |
|---|---|
| Sodium Hydroxide (Lye) | Essential for the saponification process. |
Essential Oils
| Ingredient | Benefit/Purpose |
|---|---|
| Lavender Essential Oil | Calming and soothing aroma. |
| Peppermint Essential Oil | Refreshing and invigorating scent. |
| Tea Tree Essential Oil | Antibacterial and antifungal. |
| Lemon Essential Oil | Uplifting and cleansing fragrance. |
| Eucalyptus Essential Oil | Respiratory and soothing aroma. |
Additives
| Ingredient | Benefit/Purpose |
|---|---|
| Aloe Vera Gel | Soothing and healing properties. |
| Oatmeal | Exfoliation and skin soothing. |
| Honey | Natural humectant and moisturizes. |
| Clay (e.g., Kaolin) | Helps with oil absorption and color. |
| Activated Charcoal | Draws out impurities and detoxifies. |
Natural Colorants
| Ingredient | Benefit/Purpose |
|---|---|
| Spirulina Powder | Adds a green color, antioxidant. |
| Turmeric Powder | Provides a warm yellow color. |
| Paprika Powder | Imparts a reddish-orange hue. |
| Alkanet Root Powder | Creates a natural purple color. |
| Cocoa Powder | Adds a brown color and a chocolaty scent. |
The number of potential ingredients you can implement into your own soaps is almost endless. That also means endless scent profiles, moisturizing qualities, and skin benefits as well. So, these are just some of the most common ingredients you may come across in soapmaking, but again, you can make some wonderful benefit-packed soaps when you control what you put into them.
Yet, as inspiring as experimenting can be, safety comes first. Please never underestimate the importance of safety when handling lye (more on that later).
Whether you desire certain unique scents, textures, colors, sizes, or shapes, it’s all completely dependent upon your own ideas and tastes. Who knows, you might become the next small-town soap artisan!
Understanding Hot Process Soapmaking: At a Glance
Hot process soapmaking, often called HP soap, uses heat to speed up saponification. Unlike cold process soap, which cures slowly at room temperature, hot process soap finishes much faster and can be used soon after it cools. The method is traditional, reliable, and perfect for anyone who prefers a quicker turnaround.
Here are the main things to know:
- Hot process soapmaking has been used for centuries because it produces a ready-to-use bar in far less time. It does, however, require closer attention than cold process methods. Temperature checks, timing, and stirring stages all matter.
- The process begins by mixing oils with a lye solution. This mixture is heated over low heat while stirred regularly. As it warms, it thickens and develops a gel-like consistency, which indicates that saponification is underway.
- When the mixture reaches trace, meaning the oils and lye have fully emulsified and thickened, it is transferred to a slow cooker or crockpot. The soap continues to cook on low heat, with occasional stirring.
- As the soap cooks, it moves through several distinct phases, such as a glossy gel stage, a mashed potato-like stage, and a crumbly phase. When it becomes smooth, cohesive, and uniform, it is fully cooked and ready to be placed into molds.
- Because the mixture is heated, it can scorch or overcook if left unattended. Monitoring the soap and stirring it at the right moments helps prevent sticking, drying, or burning.
Hot process soapmaking produces a beautiful, rustic bar that can be enjoyed quickly, but it does require a more hands-on approach. With a bit of patience and practice, anyone can learn and enjoy this classic method.
Safety First: Working With Lye
Soapmaking is a rewarding craft, but it does involve working with lye, which means safety comes first. Both hot process and cold process methods rely on a chemical reaction created by lye, and that reaction is what turns oils into real soap. Once saponification is complete, all lye is fully used up, leaving none in your finished bars.
Basic Lye Safety
Always treat lye with the same respect you would give any strong household chemical.
- Wear gloves and safety glasses when handling lye or raw soap batter.
- Work in a space with good airflow.
- Use heat-safe, non-reactive tools such as stainless steel, silicone, glass, or enamel.
- Never use aluminum, because lye reacts with it.
- Take your time and measure ingredients carefully.
With these precautions, lye is safe to work with and very predictable.
A Brief Note on Lye (Sodium Hydroxide)
If you remember the warnings you received in chemistry class, this is the same idea. Lye is a strong alkaline ingredient that must be handled properly, but it is not dangerous when used correctly. You do not need a chemistry background to make soap, only patience and common sense.
Lye, also called sodium hydroxide or caustic soda, is required for all hard bar soaps.
For reference:
- Sodium hydroxide is used for solid bars.
- Potassium hydroxide is used for liquid or soft soaps and is not used in this recipe.
Always buy 100 percent sodium hydroxide in dry crystal form. Do not use liquid drain cleaner or any product that contains additives.
Why You Should Not Fear Lye
Many people worry about using lye because of stories of misuse or accidents. The truth is simple: when handled properly, lye is no more dangerous than driving a car or using a kitchen stove. Respect it, protect yourself, and follow your recipe.
During saponification, lye binds with fats and becomes soap. No lye remains once the reaction is complete, which means your finished bars are completely safe for skin.
With careful handling, you can enjoy the process and the satisfaction of creating your own natural soap at home.
Lye Safety Precautions
Working with lye becomes simple and predictable when you follow the right safety habits. The list below covers the essential steps every soapmaker should take to keep their workspace safe and their project stress-free.
- Wear proper PPE (Personal Protective Equipment) such as gloves, safety glasses, and long sleeves. A lab coat or apron is helpful to protect clothing.
- Keep a small container of vinegar nearby. Vinegar helps neutralize lye if it splashes on surfaces.
- Use heat-safe, non-reactive containers that will not crack or melt. Stainless steel, tempered glass, silicone, and enamel are ideal.
- Avoid leaning directly over your mixture. Lye solution can release mild fumes when first mixed.
- Work close to a water source so you can rinse immediately if lye touches your skin.
- Protect your counters with newspaper or kraft paper to catch drips or spills.
- Wash your hands and arms thoroughly after you finish. Even one stray grain of dry lye can cause irritation.
- Never leave your workspace unattended while lye or raw soap batter is present.
- Keep pets and children completely out of the area.
- Store all lye and strong ingredients in clearly labeled, secure containers that children or pets cannot access.
- Do not use aluminum tools or containers. Lye reacts with aluminum and produces harmful fumes.
- Always add lye to water, never water to lye. This prevents splattering from sudden heat release.
- Add the lye gradually and stir gently so it dissolves evenly. Avoid letting undissolved lye settle at the bottom of the container.
By making these precautions part of your routine, you can enjoy a safe, smooth, and confidence-building soapmaking experience every time.
Preparation
Making your own natural soap is much simpler than it looks. With the right tools and a solid recipe, you can create beautiful, nourishing bars right at home. If this is your first batch, do not stress. Texture, fragrance strength, or batter consistency might not be perfect the first time. That is normal. The process becomes easier every time you do it, and experimenting is half the fun.
Before you begin, gather all of your tools and ingredients. Good preparation makes soapmaking safer, smoother, and far more enjoyable.
Essential Materials and Ingredients
Equipment
- Digital kitchen scale
Accurate measurements are absolutely necessary for safe soapmaking. - Two commercial-grade heat-resistant pitchers
Stainless steel or enamel only. Never use aluminum. - Digital food thermometer
Required for checking the temperature of your oils and lye solution. - Two long-handled stainless steel spoons
- Electric hand mixer or immersion blender
Needed to bring the soap mixture to trace. - A small disposable plastic cup
Useful for measuring lye or mixing colorants. - Silicone soap mold
Makes unmolding easier and helps the bars hold their shape. - Measuring spoons
- Rubber spatula (silicone preferred)
- Personal protective equipment
Gloves, safety glasses, long sleeves, and protective clothing. - Crockpot or slow cooker
Essential for cooking hot process soap. - Double boiler (optional)
Helpful for melting butters.
With these tools ready, you are fully equipped to make your first batch of hot process soap.
Core Ingredients
Below is a classic hot process recipe, calculated to produce a firm, cleansing bar with approximately 1 percent superfat. Always measure ingredients by weight, not volume, for safe and accurate results.
Ingredients (by weight)
- 4 ounces (113 g) castor oil
- 8 ounces (227 g) olive oil, pomace
- 8 ounces (227 g) palm oil
- 8 ounces (227 g) coconut oil, 76-degree melt point
- 10 ounces (284 g) distilled water
- 4.1 ounces (116 g) sodium hydroxide (NaOH)
Important Notes
- Only use distilled water. Tap or filtered water can interfere with saponification.
- The corrected lye amount (4.1 ounces) is essential. This quantity accounts for a roughly 1 percent superfat, ensuring the finished soap is firm, safe, and not overly oily.
- Never substitute potassium hydroxide (KOH). This recipe uses sodium hydroxide only.
A Note on Superfatting
Superfatting refers to leaving a small percentage of oils unreacted in the finished soap. These leftover oils make the soap gentler and more moisturizing. A 1 percent superfat creates a balanced bar that is firm, cleansing, and long-lasting.
Once you learn the process, you can adjust superfat levels, substitute oils, and create custom fragrances and natural color blends. This recipe gives you a dependable foundation to work from as you experiment with your own creations.
- Feel free to add additional oil for a higher superfat value.
- You can use this calculator from Bramble Berry to hone in on your exact process.
- I recommend starting with the above recipe first, then modifying once you’ve gotten the overall hot process steps down.
The Process: Fat + Lye = Soap!
Soapmaking looks different depending on whether you use the cold process or the hot process method. Both rely on the same basic reaction. When oils and lye combine, they undergo saponification, which transforms them into real soap.
Below is a clear, accurate comparison of the two most common methods.
Cold Process Soap
Cold process soap is made by blending oils with a water and lye solution and allowing the mixture to saponify at room temperature.
How it works:
- Oils are measured and melted, then combined with a cooled lye and water solution.
- The mixture is blended until it reaches trace, which is the stage where oils and lye are fully emulsified and the batter thickens slightly.
- The soap batter is poured into a mold and left to harden.
- After unmolding, the bars must cure for 4 to 6 weeks. This curing time allows excess water to evaporate and gives the soap a harder, longer-lasting finish.
Cold process allows for intricate swirls, additives, and detailed design work, but the long cure time requires patience.
Hot Process Soap
Hot process soap uses the same ingredients but is cooked to complete saponification more quickly.
How it works:
- Oils and the lye solution are mixed to trace.
- Instead of pouring into a mold immediately, the batter is cooked in a crockpot or double boiler.
- Heat pushes the soap through all stages of saponification, thickening from gel to a mashed potato texture.
- Once fully cooked, the soap can be molded and is technically ready for use right away.
Although hot process bars still benefit from a short drying period, they do not require the long cure time that cold process bars need. Many soapmakers choose hot process because it produces usable soap much faster.
Choosing Your Method
Both methods make excellent soap. Cold process offers artistry and design flexibility, while hot process offers speed and durability. Most people choose based on personal preference and workflow.
Soapmaking Instructions: Follow These Steps Carefully
Below are the corrected and fully accurate steps for the hot process recipe you are using. These steps align with the updated lye amount and oil measurements.
Step 1. Mix the Lye and Water
- Place a non-aluminum cup on your scale and measure 4.1 ounces (116 g) sodium hydroxide. Set aside.
- Place a heat-safe pitcher on the scale and measure 10 ounces (284 g) distilled water.
- Slowly sprinkle the lye into the water while stirring. Never add water to lye.
- Stir gently until fully dissolved. The mixture will heat up quickly.
- Set aside to cool.
Step 2. Prepare and Heat the Oils
- Place a heat-resistant pitcher on the scale.
- Measure the following oils by weight:
- 8 ounces (227 g) coconut oil
- 8 ounces (227 g) palm oil
- 4 ounces (113 g) castor oil
- 8 ounces (227 g) olive oil, pomace
- Melt and combine the oils using:
- A double boiler
- A microwave
- Or a stovetop on low heat
- Heat until the oils reach approximately 120 degrees Fahrenheit.
- Stir thoroughly to ensure all oils are fully blended.
Step 3. Allow Both Mixtures to Cool
Using a digital thermometer, monitor temperatures.
- Oils and lye mixture should cool to 95 to 105 degrees Fahrenheit.
- It is helpful, though not required, for them to be within a similar temperature range before mixing.
If the oils or lye cool too much, false trace or a thick, crumbly texture can occur.
Step 4. Combine the Lye Solution With the Oils
- Pour the cooled lye and water solution slowly into the oils.
- Do this inside a warm crockpot set to low.
- Use caution and steady stirring.
Step 5. Bring the Mixture to Trace
- Insert your immersion blender fully into the mixture to avoid splashing.
- Use short pulses, alternating with manual stirring.
- Continue blending until the batter thickens to the consistency of pancake batter.
This generally takes 3 to 5 minutes. - You have reached trace when a drizzle of batter sits briefly on top before sinking back in.
For cold process, this would be the point where you add fragrance and pour into molds.
For hot process, continue with the cooking stage next.
To see what tracing looks like in action, check out the video below (the 4-minute mark).
Customizing Your Hot Process Soap
Once your soap batter reaches trace, it is ready for scents, colors, and texture. You can keep your bars simple or get creative with add-ins.
- Popular essential oils include chamomile, lavender, cinnamon, vanilla, peppermint, frankincense, and myrrh. Add essential oils at the end of cooking so their scent lasts longer.
- Natural colorants such as turmeric, annatto, alkanet root, spirulina, and cocoa powder add beautiful tones without synthetic dyes.
- For a textured bar, stir in oatmeal, wheat germ, poppy seeds, or dried herbs.
- For multicolored bars, divide the hot process batter after cooking, tint each portion, then layer or swirl them lightly before molding.
Creativity is limitless at this stage, so experiment to find your favorite combinations.
Cooking the Soap
Once your batter reaches trace, the hot process cooking stage begins. This step completes saponification by applying gentle, consistent heat. Again, to see how this works, see the above video from Elly’s Everyday Soapmaking. The crockpot will be our cooking vessel for this process.
How to Cook Hot Process Soap
- Set your crockpot to low. High heat can cause overheating or volcanoing, especially for beginners.
- Transfer the traced soap batter into the crockpot and cover with the lid.
- Allow the soap to cook undisturbed for 10 to 15 minutes.
- After the initial rest, stir the mixture and replace the lid. Continue checking and stirring every 10 to 15 minutes.
The batter will move through several visual stages:
- Thick pudding.
- Gel stage that looks shiny and translucent around the edges.
- Mashed potato stage where the mixture becomes thick and fluffy.
- Fully cooked, glossy paste with an even texture throughout.
The entire cook time is usually 30 to 60 minutes, depending on the batch size.
How to Know When the Soap Is Fully Cooked
The batter should look uniformly glossy and gelled. At this point, saponification is complete.
The traditional zap test is no longer recommended for safety reasons. Instead, rely on:
- Visual cues. The mixture should have a fully gelled, even texture.
- A small pH strip test, if desired. Fully saponified soap generally falls between 8 and 10 on the pH scale.
Once the soap is fully cooked, turn off the heat.
Adding Fragrance and Optional Ingredients
After cooking:
- Allow the soap to cool for two to three minutes so essential oils do not flash off.
- Stir in your chosen essential oils, colorants, clays, or botanicals.
- Mix thoroughly to distribute add-ins evenly.
Making the Batter More Pourable
Hot process soap is naturally thick and can be difficult to spoon into molds. You can thin the consistency with one of these additives:
- Sugar, honey, agave, or maple syrup. Use 1 teaspoon per pound of oils. Add to the lye water or stir in after the cook.
- Sodium lactate. Use 1 teaspoon per pound of oils. Add to the lye water once it has cooled.
Both options create a smoother, more fluid batter that is easier to mold.
Curing Your Soap
Once the cooked soap is placed into molds, the hardest part is behind you.
How to cure hot process soap:
- Spoon or pour the finished batter into your molds and smooth the top.
- Cover with parchment or plastic wrap to protect from dust.
- Let the soap harden for at least 24 hours.
- Unmold and cut into bars if using a loaf mold.
Hot process bars can be used immediately after unmolding, but giving them an additional 1 to 2 weeks of rest improves hardness, longevity, and overall quality. The bars will lose excess water during this rest period, making them last longer in the shower.
If you used individual silicone molds, no cutting is required.
Clean Up
Once your soap is safely in the mold, clean your workspace before any residue can dry.
- Rinse spills of raw lye or lye water with plenty of plain water.
- After rinsing, you may neutralize remaining residue with vinegar if needed.
- Do not use your soapmaking equipment for food preparation.
Any leftover soap batter on tools will saponify fully within a day or two. After that point, it can be washed away safely.
Storing Your Finished Soap
Proper storage will help extend the life of your homemade bars.
- Store finished bars where they can breathe. A paper towel, kraft paper, or a cardboard box works well.
- Avoid storing handmade soap in sealed plastic unless it is fully cured. Natural soap contains glycerin and will draw moisture from the air.
- Keep soaps away from direct sunlight and heat.
Once cured, your bars will be mild, long-lasting, and completely your own creation.
Soapmaking: Natural Ingredients, Complete Customization
Making your own hot process soap is one of the easiest ways to clean up your routine and know exactly what is going on your skin. Instead of mystery ingredients and synthetic detergents, you choose every oil, scent, color, and additive.
Natural soapmaking gives you:
- Full control over ingredients
- Freedom to choose gentle, skin-loving oils
- Room to experiment with colors, textures, and scents
- A creative, hands-on project that benefits your home and family
Whether you prefer a simple, unscented bar or one infused with herbs and essential oils, each batch is completely customizable. Once a formula is properly saponified, no lye remains in the finished bar. Only true soap and the skin-nourishing “superfat” oils you selected are left behind.
As you gain confidence, you can:
- Make custom bars for different skin types
- Create seasonal or holiday soaps for gifting
- Develop signature blends to sell locally or online
Homemade soap is practical, enjoyable, and endlessly customizable. Every batch teaches you something new.
Hot Process Soap FAQs
1. How can I make hot process soap more pourable?
Hot process batter thickens quickly, but you can help it flow more easily by using one or more of these methods:
- Add sugar, honey, agave, or maple syrup (about 1 teaspoon per pound of oils)
- Add sodium lactate (about 1 teaspoon per pound of oils, added to the cooled lye water)
- Add a small splash of extra distilled water or aloe juice after the cook
- Work quickly while the soap is still hot and soft
These adjustments help create a smoother, more fluid batter, making swirling and clean molding much easier.
2. How do I get a smoother texture in hot process soap?
Smooth hot process soap comes from an even cook and good handling. Focus on:
- Cooking until the soap is fully gelled throughout
- Stirring regularly to break up lumps
- Adding a bit of extra liquid if the batter is extremely stiff
- Pressing the batter firmly into the mold to eliminate air pockets
- Using sodium lactate or sugar for better fluidity
A fully gelled, well-stirred batch produces much smoother cut bars.
3. Can I use different essential oils for scent in hot process soap?
Yes. Essential oils work beautifully when added at the right time.
Follow these guidelines:
- Add essential oils after the cook, once the soap has cooled slightly
- Stir thoroughly so the fragrance distributes evenly
- Choose heat-tolerant oils like lavender, rosemary, peppermint, lemongrass, or cedarwood
- Follow safe usage rates for each essential oil
Adding oils after the cook protects them from evaporating and gives you a stronger scent in the finished bar.
4. What safety precautions should I follow while making hot process soap?
Lye and raw soap must be handled with care. Always:
- Wear gloves, eye protection, and long sleeves
- Work in a well-ventilated area
- Add lye to water, never the reverse
- Keep children and pets out of the workspace
- Avoid aluminum equipment
- Keep vinegar nearby for neutralizing lye on surfaces
- Rinse skin with cool running water if any raw soap touches it
Once the soap is fully saponified and cured, it is completely safe to use.
5. How long should hot process soap cure?
Although hot process soap is technically usable once cooled and unmolded, a short cure time improves the bar.
- Minimum: 24 hours to unmold and cut
- Better: 3 to 7 days to evaporate excess water
- Ideal: 1 to 2 weeks for a harder, longer-lasting bar
Longer curing also helps your bar last longer in the shower.
6. Why is my hot process soap crumbly?
Crumbly bars usually point to one of the following issues:
- Too much lye in the recipe
- Very low water content
- Overheating or “volcanoing” during the cook
- Incomplete stirring, leaving dry pockets
To prevent this in future batches:
- Double-check your recipe in a soap calculator
- Weigh ingredients precisely
- Use moderate crockpot heat
- Add a bit more liquid or sodium lactate for a softer batter
If the batch is safe but unattractive, you can rebatch it.
7. Can I add exfoliants like oatmeal to hot process soap?
Yes. Hot process soap handles exfoliants very well.
Good options include:
- Finely ground oatmeal
- Ground coffee
- Poppy seeds
- Ground herbs such as calendula or mint
- Fine salt or sugar (used lightly)
Add exfoliants:
- After the cook, once the soap is fully gelled
- Right before transferring the soap to the mold
This prevents the exfoliants from becoming mushy or over-processed.
8. Why do I need to measure ingredients precisely?
Soapmaking relies on accurate chemistry. Precise measurements:
- Prevent excess lye, which makes soap harsh
- Prevent too little lye, which leaves soap soft and oily
- Ensure proper hardening and lathering
- Help you repeat successful batches consistently
Always use a digital scale. Measuring cups and spoons are not accurate for soapmaking.
9. What natural colorants can I use for hot process soap?
Hot process soap works with a wide range of natural colorants.
Popular options include:
- Clays such as kaolin, rose, or French green
- Cocoa powder or unsweetened chocolate
- Turmeric, paprika, or annatto
- Activated charcoal
- Alkanet root
- Spirulina or chlorella
Add colorants after the cook or near the end of the gel stage. You can also swirl multiple colors together.
10. What is the white powder on top of my soap after curing?
That film is soda ash, a harmless byproduct of saponification.
Key points:
- It forms when unsaponified soap reacts with carbon dioxide in the air
- It is completely harmless
- It affects appearance only, not performance
To prevent soda ash:
- Spray fresh soap with isopropyl alcohol
- Cover the mold to reduce airflow
- Avoid pouring very cool batter into a cold room
If soda ash forms, you can steam or gently rinse it off, or simply leave it.
11. Can I add milk, purees, or herbal infusions to hot process soap?
Yes, and hot process is often more forgiving than cold process.
For best results:
- Add milk or purees after the cooking process to avoid scorching
- Expect natural darkening from heat
- Keep the total liquid balanced so the soap still firms up
- Strain herbal infusions and weigh the liquid carefully
Milk soaps, herbal soaps, and puree soaps all work well with the hot process method.
12. Can I rebatch hot process soap if it turns out unattractive?
Yes. Hot process soap can easily be reworked.
To rebatch:
- Grate the soap into small pieces
- Add a small amount of distilled water or milk
- Warm gently in a crockpot or double boiler
- Stir until smooth
- Add fragrance or color if desired
- Spoon into the mold and reintegrate
The texture will be slightly rustic, but the soap will still perform well.